VAV – Module NMV-D2M
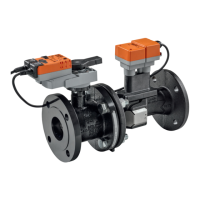
Screen data and NMV-D2M data do not agree:
a) Read data not executed
b) Screen data changed but Write data not executed
Screen data and NMV-D2M data agree.
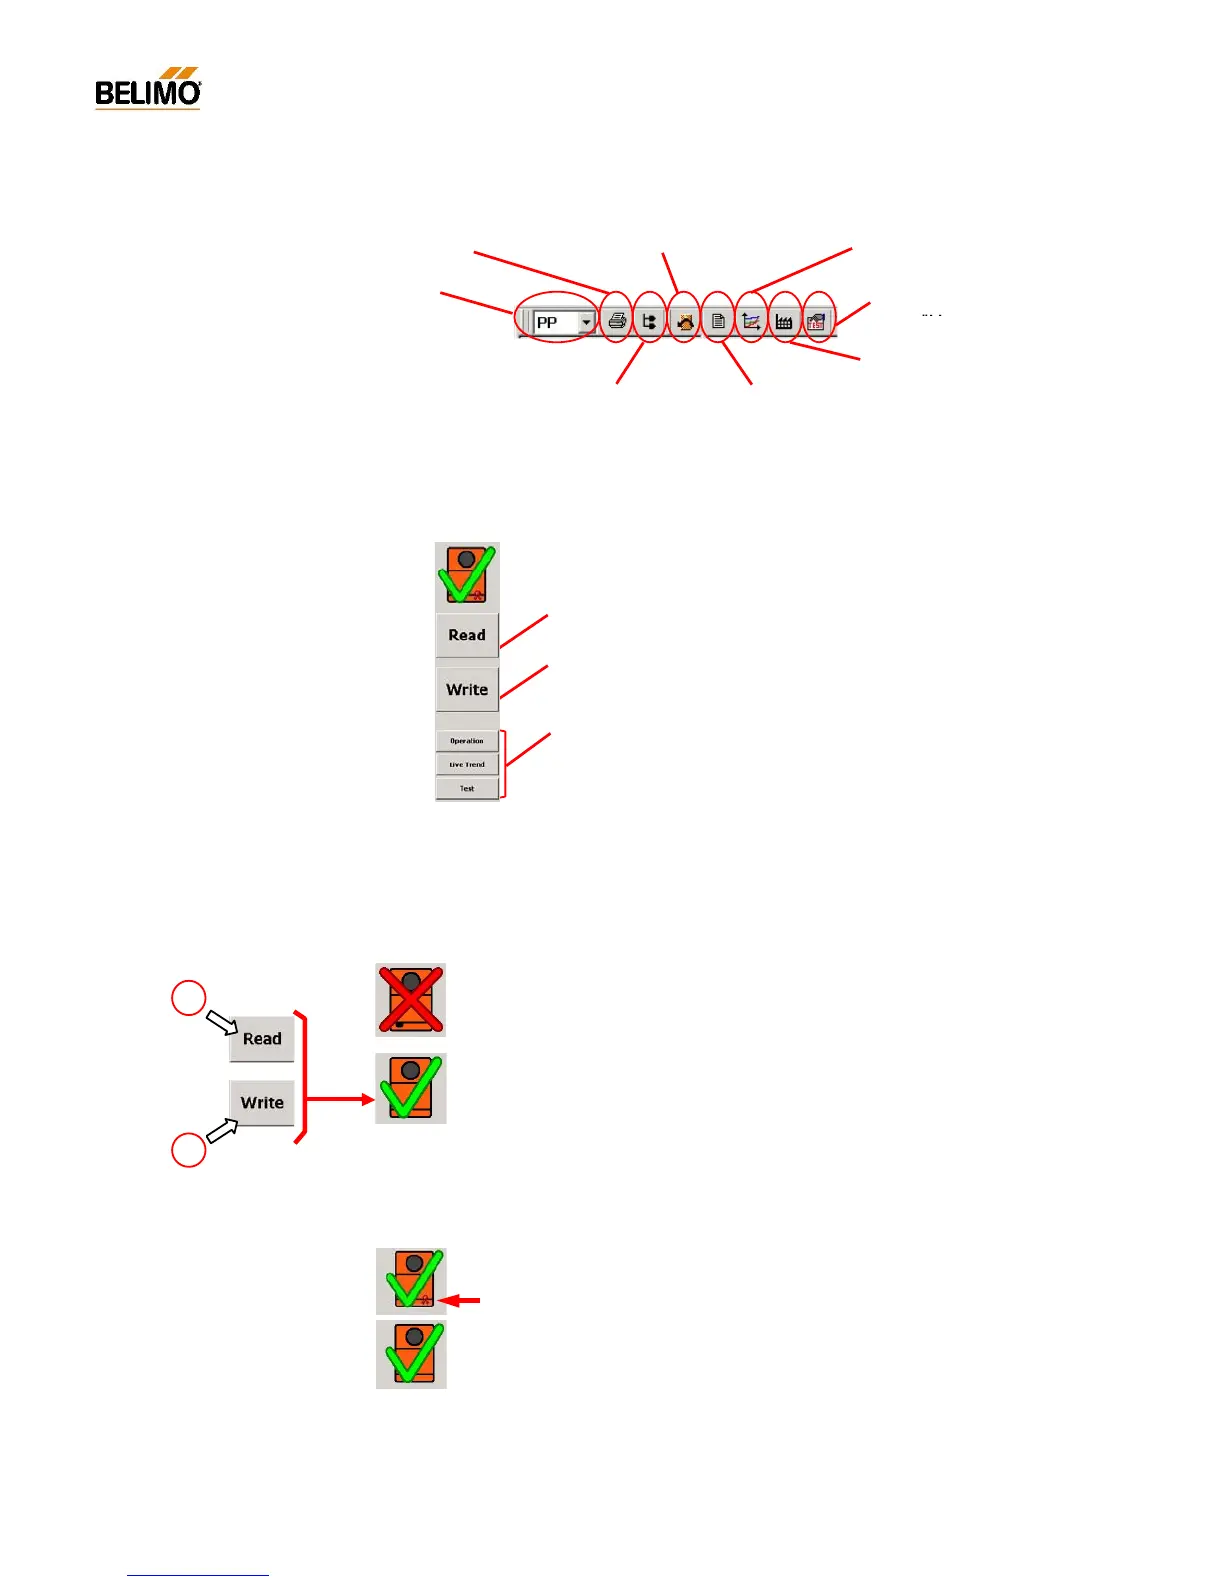
N-A3.2.4 Description of the toolbar
N-A2.3.5 Description of the buttons
The buttons are adapted to suit the various directories.
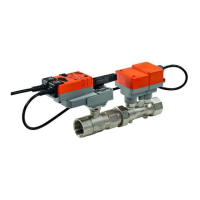
N-A3.2.6 ‘Actuator symbol’ (data comparison)
The large NMV-D2M symbol, above the buttons, shows the consistency
of data between the connected NMV-D2M and the screen display.
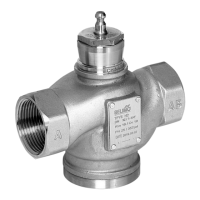
N-A3.2.7 Seal-bit function
The settings of operating flow rate programmed by the manufacturer
V’min, V’mid and V’max are flagged by the so-called ‘seal bit’. If any of
these values are adjusted on-site it will be indicated by the ‘broken seal
bit’ symbol. The manufacturer’s value (OEM defaults) can be reset at any
time with the <F5> function‚ OEM defaults’. However, the seal bit cannot
be reset by the user.
When used in the MP-Bus system:
‘Select required actuator’
[MP1 ... 8]
Print parameters <CTRL> <P> Reset to OEM setting <F5> Trend Recall <F6>
Address NMV-
Display Log Data <F3>
Project Data form <F4>
Read:
Reading parameters from the connected NMV-D2M controller.
Write:
Writing changed parameters to the connected NMV-D2M controller.
Buttons:
See ‘Experts‘ and ‘Service‘ descriptions.
a
b
Select Test
sequence <F7>