P-9000LT/F Low-Rise Pit Lift 25 P/N 5900022 — Rev. B — Nov. 2019
3. Attach an Hydraulic Elbow Fitting to each of the two Hydraulic Power Out connectors on the
Power Unit, usually labeled P1 and P2.
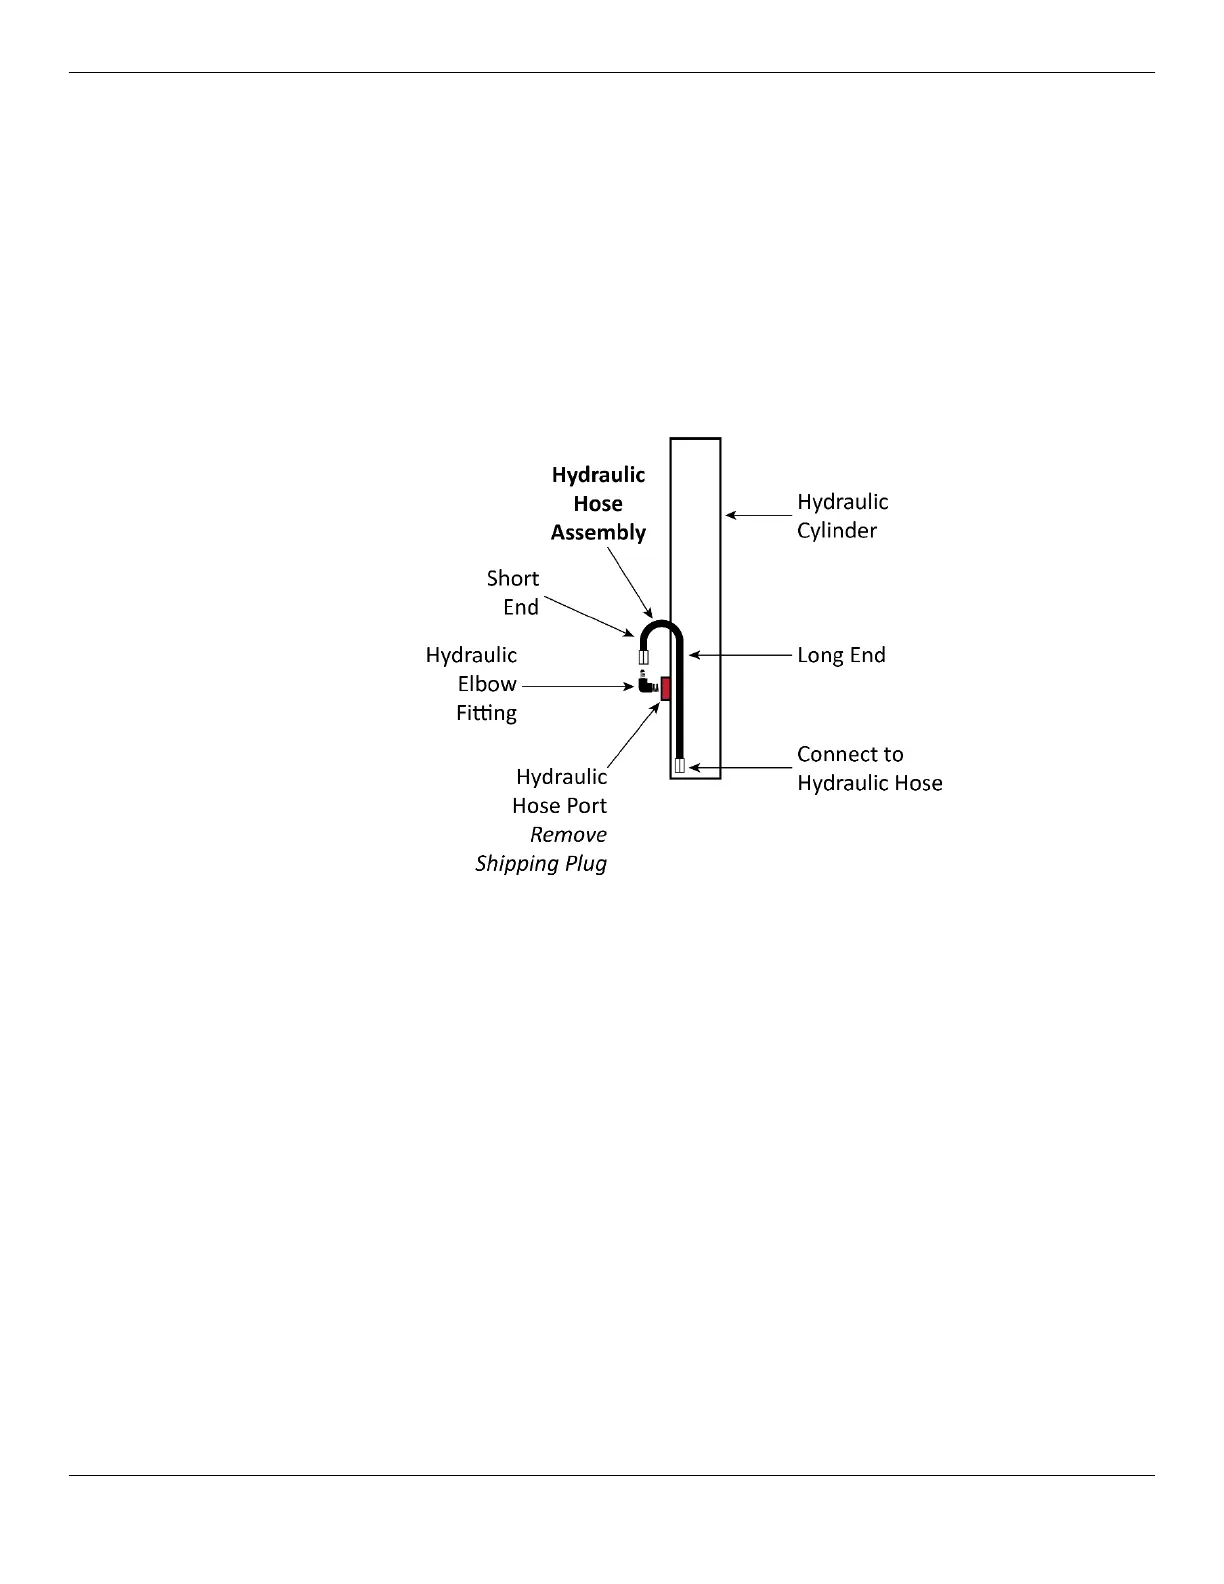
4. Remove the Shipping Plugs from the Hydraulic Hose Ports near the bottom of each Hydraulic
Cylinder.
5. Attach an Hydraulic Elbow Fitting to each of the Hydraulic Hose Ports.
6. Attach the Short End of either of the Hydraulic Hose Assemblies to one of the Hydraulic Elbow
Fittings you just attached, then attach the Short End of the other Hydraulic Hose Assembly to the
other Hydraulic Elbow Fitting.
⚠ CAUTION When installing the Hydraulic Hose Assemblies, make sure they are angled so they
end up against or very near to the Hydraulic Cylinders, not standing straight up.
Some components not shown, other components exaggerated for clarity. Fittings shown not
connected for clarity. Not necessarily to scale.
Finger tighten the connections.
7. Route one of the two Hydraulic Hoses from the Long End of one of the Hydraulic Hose
Assemblies, through the Retaining Rings in the corners of each Base, into an opening in the
bottom of the Console, then up to one of the Hydraulic Power Out connectors on the Power Unit.
8. When the Hydraulic Hose is correctly routed, connect it at both ends to the appropriate fittings.
Finger tighten the connections.
9. Perform Steps 7 and 8 for the second Hydraulic Hose.
10. Make sure both Hydraulic Hoses are correctly routed and do not have any kinks, then use
appropriate tools to
securely
tighten the finger-tightened connections.