18
STEP 11
( Routing the EQUALIZER CABLES )
Refer to illustrations on Page 10.
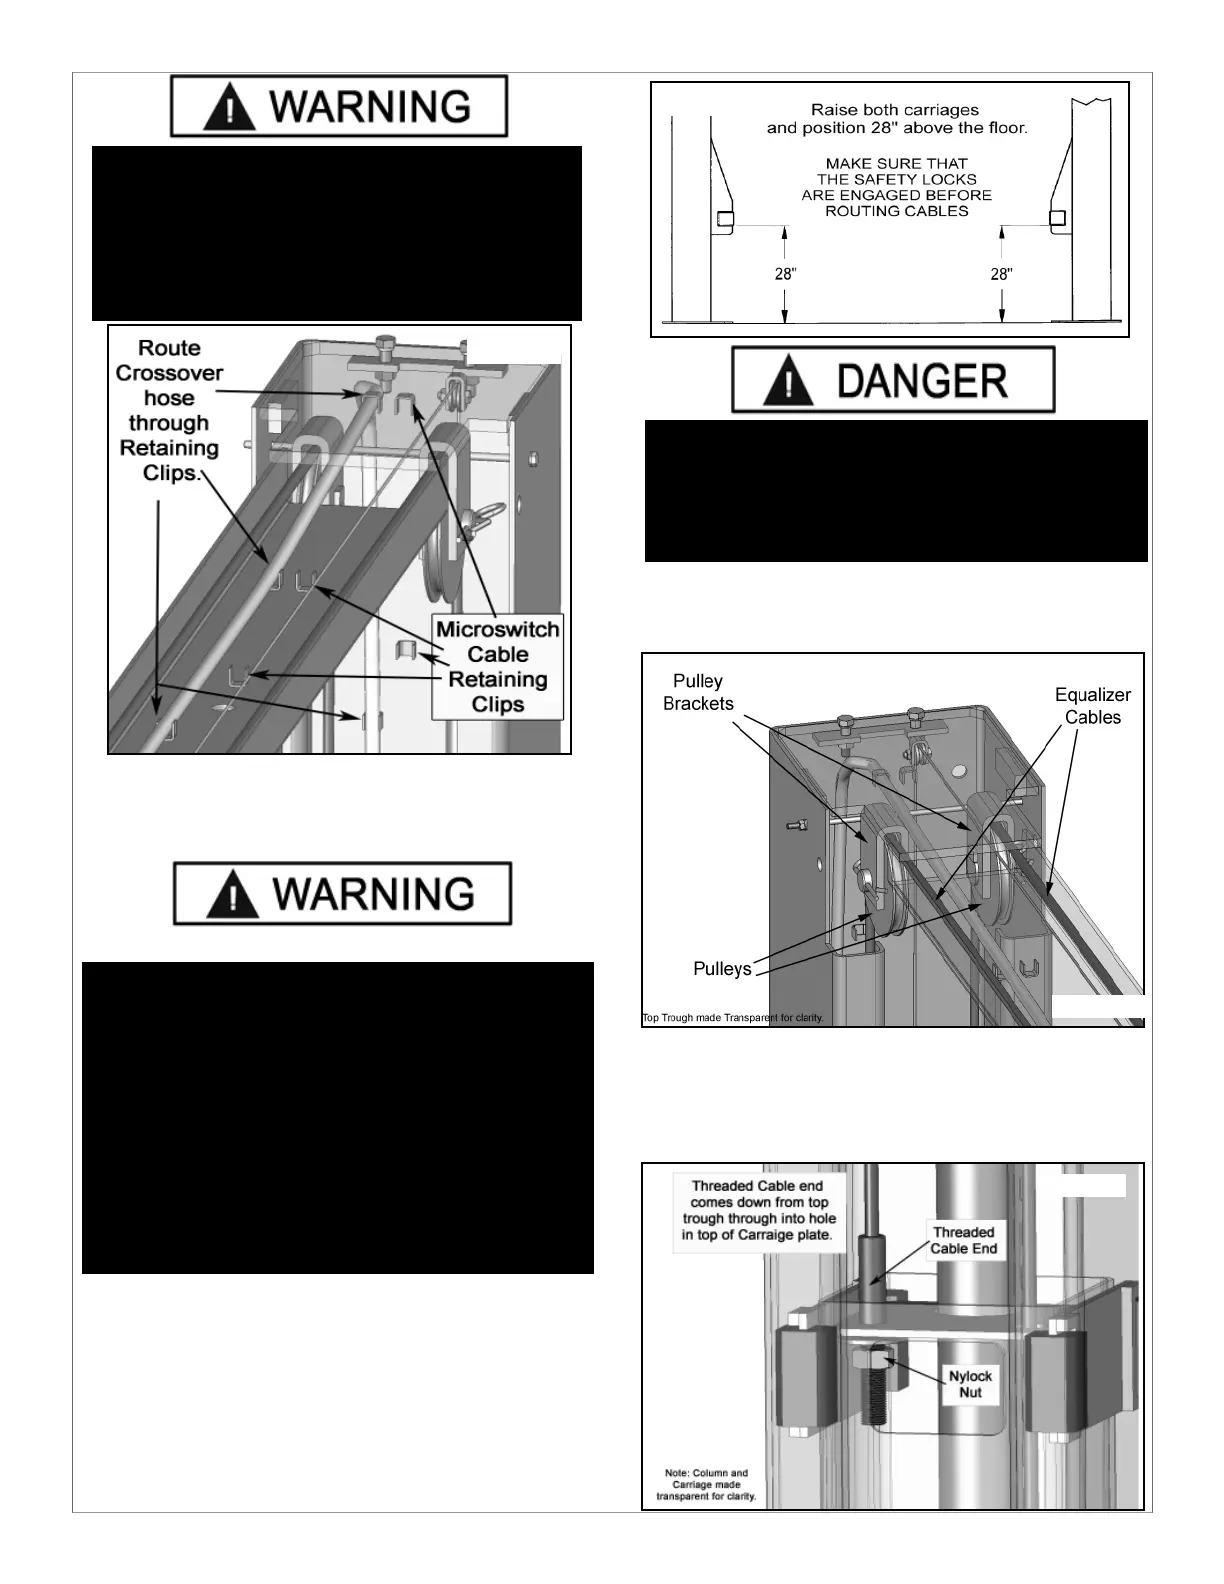
1. Raise and lock each Carriage approximately 28” above
the ground. (See Fig. 11.1)
2. With the Carriages locked at 28” off the floor, route
the Equalizer Cables up to the Top Trough.
3. Route the Cables through the Pulley Brackets and
reinstall the Pulleys. (See Fig. 11.2)
Note: The Pulleys should have been removed in Step 6.
4. Insert the Threaded end of the Cable through the
hole on top of the Carriage. Place M-18 washer and
M-18 Nylock Nut on threaded cable end. Tighten Cable
Nut until taught, checking that both Cables have equal
tension. (See Fig. 11.3)
WARNING!
When routing the Hydraulic Hose through the
Columns, make sure to route through the retain-
ing rings welded inside each Column. Make sure
that the Hose is clear of any moving parts. It may
be necessary to tie Hose clear by using nylon tie
straps or wire.
DANGER !
Make sure that the safety locks on each Column are
fully engaged before attempting to route Equalizer
Cables and/or Hoses. Carriages must be equal
height from the floor before proceeding.
Fig. 10.2
Fig. 11.1
Fig. 11.3
WARNING!
WHEN THE CABLE ADJUSTING NUTS BOTTOM OUT
ON THE THREADED END OF THE CABLE
CONNECTOR AND THERE IS STILL SLACK IN THE
CABLES, THE CABLES HAVE STRETCHED BEYOND
THE SAFE USEFUL LENGTH AND NEED TO BE
REPLACED WITH FACTORY APPROVED CABLE
ASSEMBLIES. DO NOT PLACE WASHERS, SPACERS
OR OTHER DEVICES TO “SHORTEN” THE
EFFECTIVE CABLE LENGTH AS DAMAGE TO THE
LIFT OR INJURY TO PERSONS MAY OCCUR.
Fig. 11.2