10
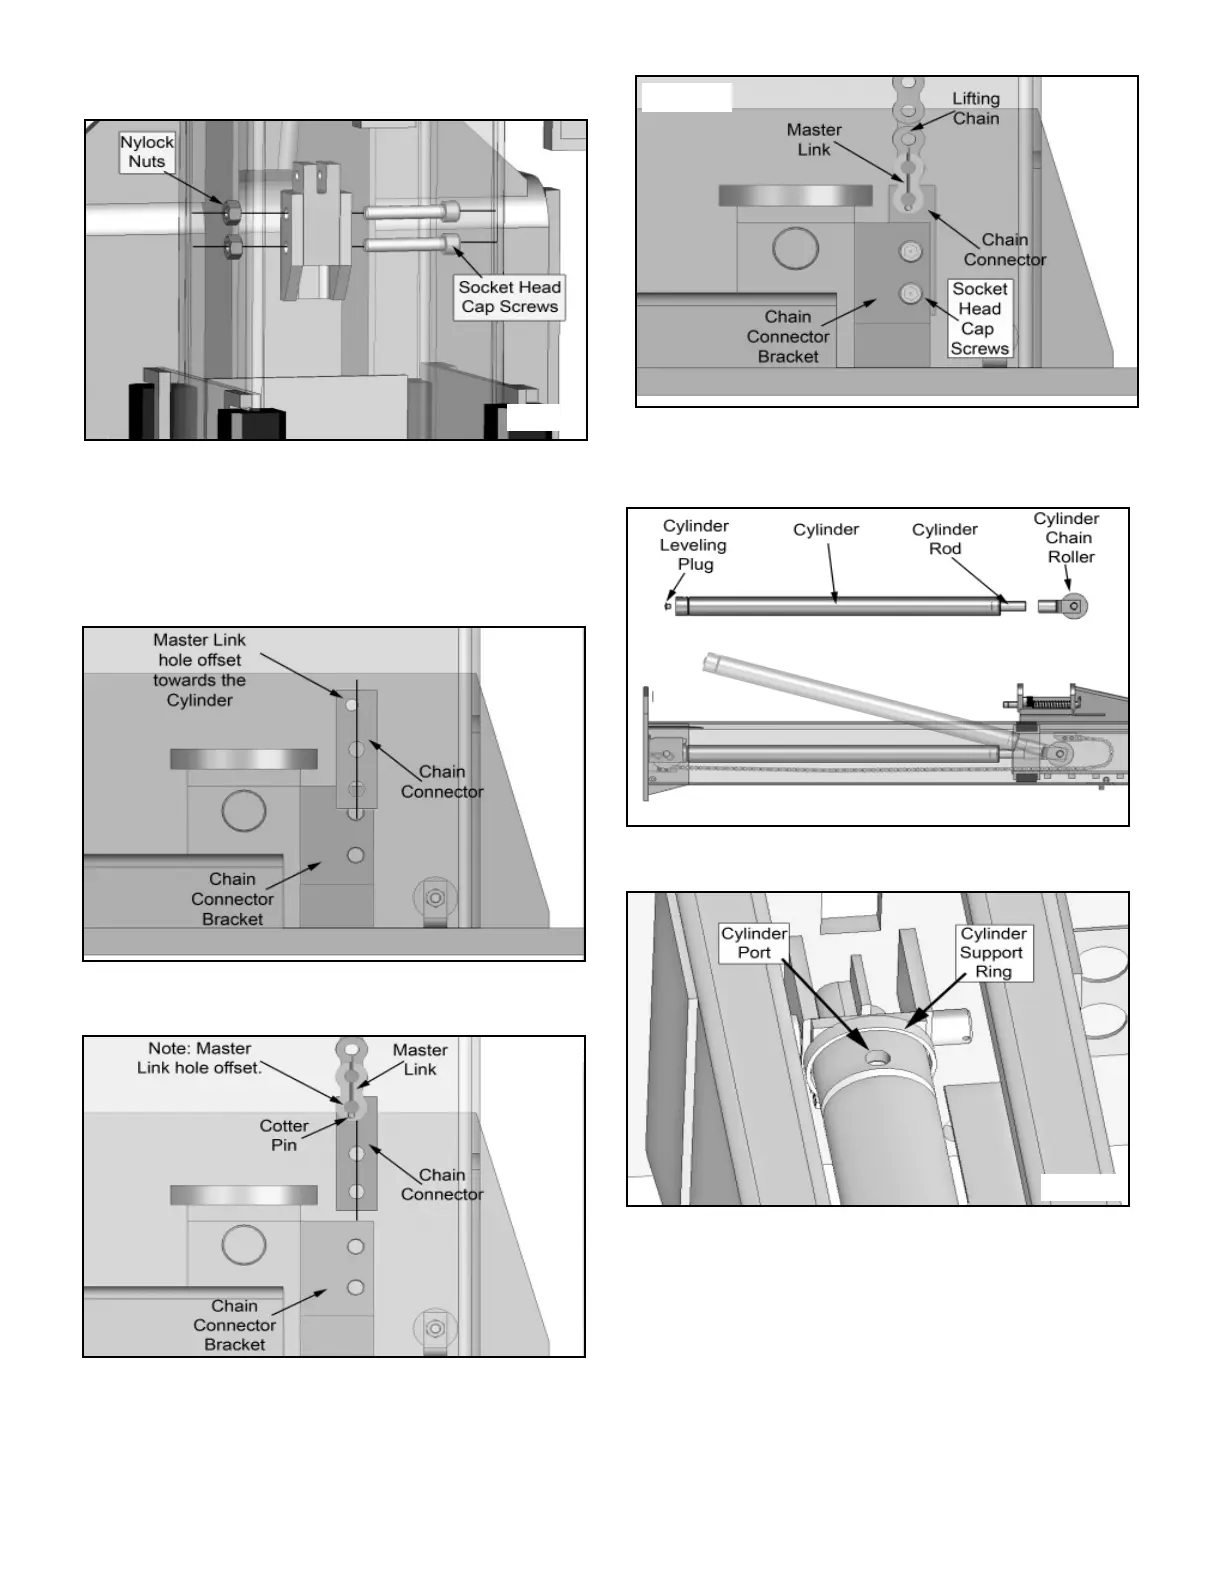
8. Install and tighten the Socket Head Cap Screws and
Nylock Nuts. (See Fig 3.7)
Connecting the Lifting Chain to the Post Base
9. Determine the proper orientation of the Chain
Connector. The Chain Connector must be installed with the
Hole for the Chain Master Link offset as shown.
(See Fig 3.8)
10. Connect the Chain to the Chain Connector using the
Chain Master Link. Bend the Cotter Pin. (See Fig 3.9)
11. Install the Chain Connector to the Chain
Connector Bracket on the Column Base Plate. Insure that
the Chain Connector is installed with the Hole for the Chain
Master Link offset as shown above. Install and tighten the
Socket Head Cap Screws and Nyloc Nuts. (See Fig 3.10)
13. Install the Cylinder Chain Roller on to the Cylinder
Rod. Lay the Cylinder and Roller Assy. into the Column on
top of the Chain. Insure that the Cylinder Leveling plug is in
place in the base of the Cylinder. (See Fig 3.11)
14. Insert the base end of the Cylinder into the Cylinder
Support Ring. (See Fig 3.12)
Fig 3.7
Fig 3.8
Fig 3.10
Fig 3.11
Fig 3.12
Fig 3.9