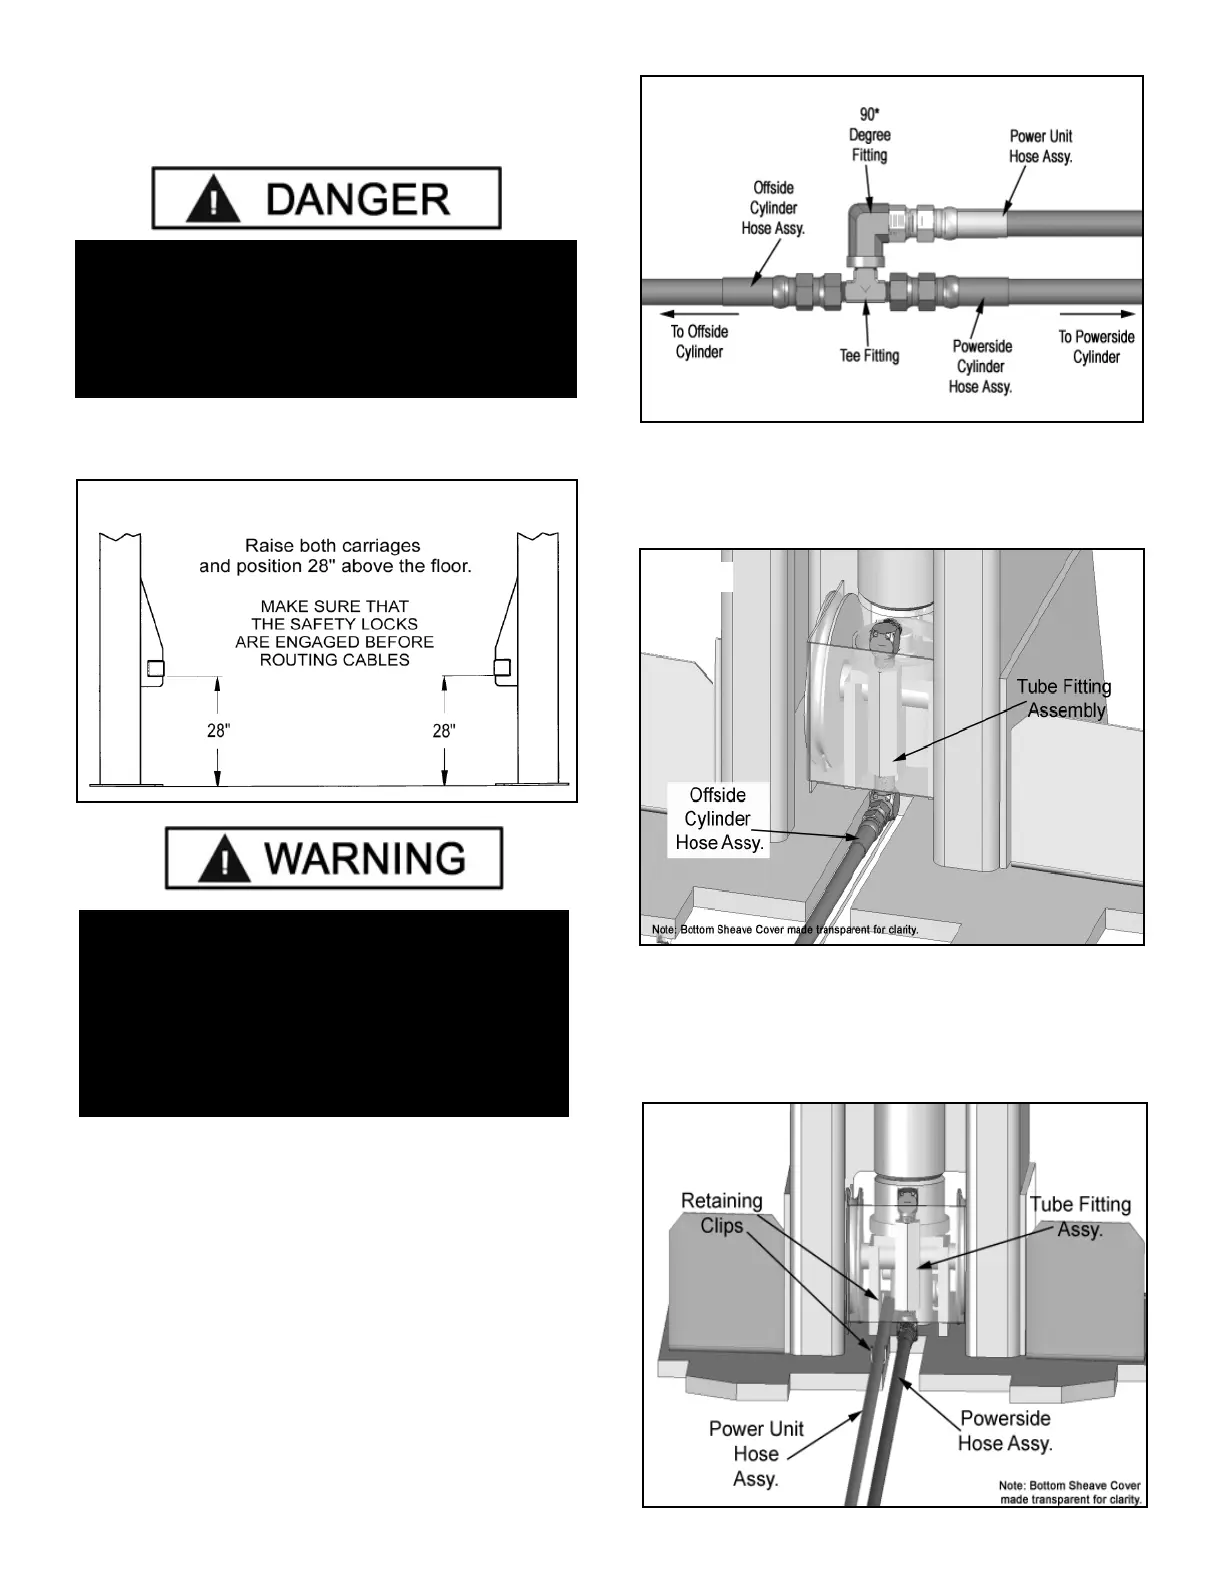
18
STEP 10
(Installing Hydraulic Lines)
1. Raise and lock each Carriage approximately 28”
above the ground. (See Fig. 10.1)
2. With the Carriages locked at 28” off the floor, route the
Hydraulic Hoses.
3. Connect the Tee Fitting to the 90* Fitting. Connect
the Power Unit Hose to the 90* Fitting.
4. Connect the Powerside Cylinder Hose to the Tee
Fitting. Ensure that the Power Unit Hose and Powerside
Hose Assy. are pointing in the same direction.
5. Connect the Offside Cylinder Hose to the other side
of the Tee Fitting. (See Fig 10.2)
6. Bottom Sheave Cover should be removed for
access. Connect the Offside Cylinder Hose to the Tube
Fitting Assy. of the Offside Cylinder. (See Fig. 10.3)
7. Connect the Powerside Hose Assy. to the Tube
Fitting of the Powerside Cylinder. Run the Power Unit
Hose Assy. though the Retaining Clips on the Base
Plate. (See Fig. 10.4)
WARNING!
WHEN ROUTING THE HYDRAULIC HOSE
THROUGH THE COLUMNS, MAKE SURE TO
ROUTE THROUGH THE RETAINING RINGS
WELDED INSIDE EACH COLUMN. MAKE SURE
THAT THE HOSE IS CLEAR OF ANY MOVING
PARTS. IT MAY BE NECESSARY TO TIE HOSE
CLEAR BY USING NYLON TIE STRAPS OR WIRE.
Fig 10.3
Fig. 10.4
DANGER !
MAKE SURE THAT THE SAFETY LOCKS ON
EACH COLUMN ARE FULLY ENGAGED BEFORE
ATTEMPTING TO ROUTE EQUALIZER CABLES
AND/OR HOSES. CARRIAGES MUST BE EQUAL
HEIGHT FROM THE FLOOR BEFORE PROCEEDING.
Fig 10.1
Fig 10.2