20
Rev 9 2022
Maintenance & Repair Front and Rear
Cover Assembly
Part Numbers
• E55509801 – Li Roller Bracket Assembly
• E55503501 – Top Cover Assembly
• E55503401 – Rear Cover Assembly
• E55506000 – Rear Pivot Pin
• E55509000 – Extension Spring
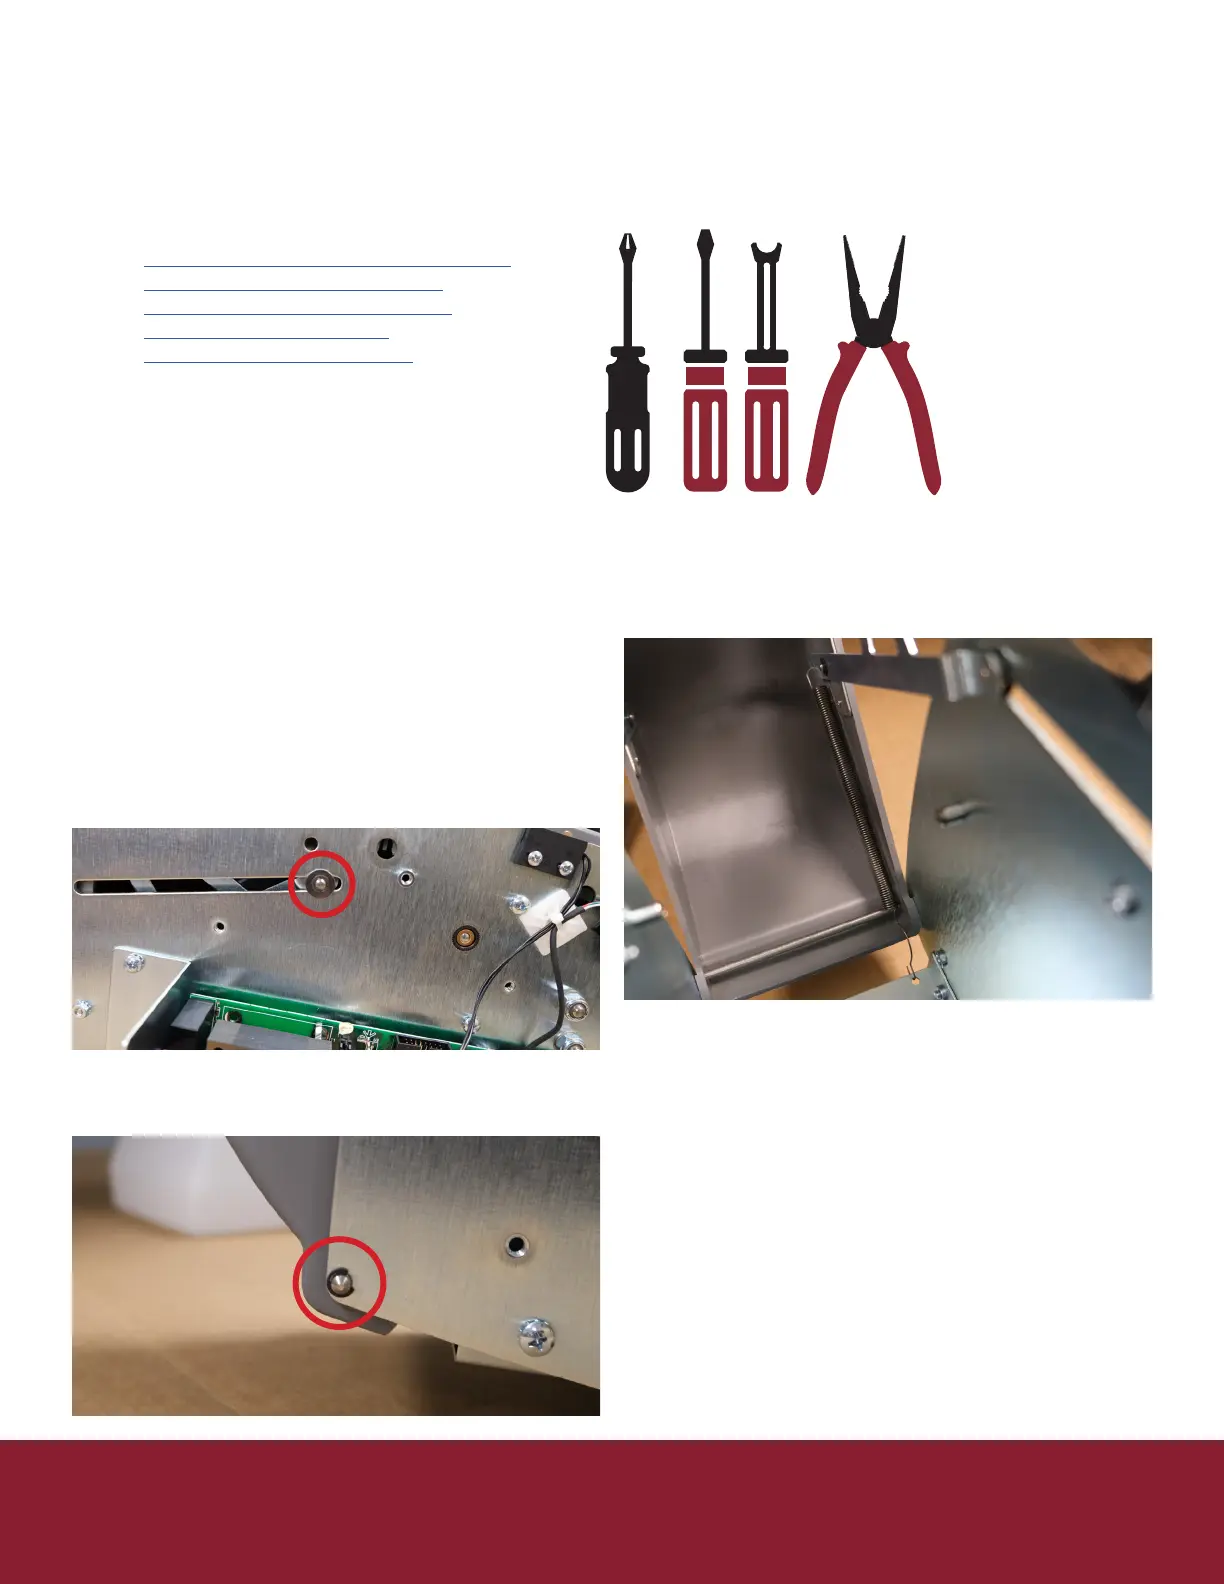
Tools needed
• Philips head screwdriver
• Flat head screwdriver
• E-clip applicator or needle nose pliers
Procedure
1. Unplug machine
2. Remove water bole, tank, and brushes
3. Remove right side cover (5 Philips screws)
4. Remove le side cover (5 Philips screws) be
careful as the ribbons connecng the keypad can
be ripped easily.
5. Unplug keypad ribbons from controller board
6. Using at head screwdriver remove the 2 E-clip
retaining rings holding the bracket assembly to
the right and le side frame.
7. Keep rings and washers in a safe place
8. Using at head screwdriver remove the 2 E-clip
retaining rings holding the rear pin in place from
the right and le side frame.
9. Remove the rear pin
10. Remove the spring from the rear cover,
the assembly should now come free of the
machine body
11. Align the new cover
12. Press the rear pin back into place
13. Using an E-clip applicator or needle nose plier
replace the clips on the pin
14. Replace the spring on the lower cover
15. Replace the washer on the bracket assembly
16. Using an E-clip applicator or needle nose plier
replace the clip on the bracket assembly
17. Repeat step 13 & 14 for opposite side
18. Replace the right cover (5 Philips screws)
19. On le cover plug keypad ribbons back into
controller board
a. Be sure not to miss any pins as this will eect
the length selected
20. Reinstall le cover be sure not to pinch or drive a
screw through the keypad ribbons.
21. Replace water tank, brushes, and water bole