Rev 9 2022
21
Maintenance & Repair Blade Oiler
Replacing the blade oiler is considered part of standard maintenance. Typically this is done at the same me as
replacing the feed wheel and/or the heater assembly.
Part Numbers
• SA10XXK – Felt and Bracket Kit
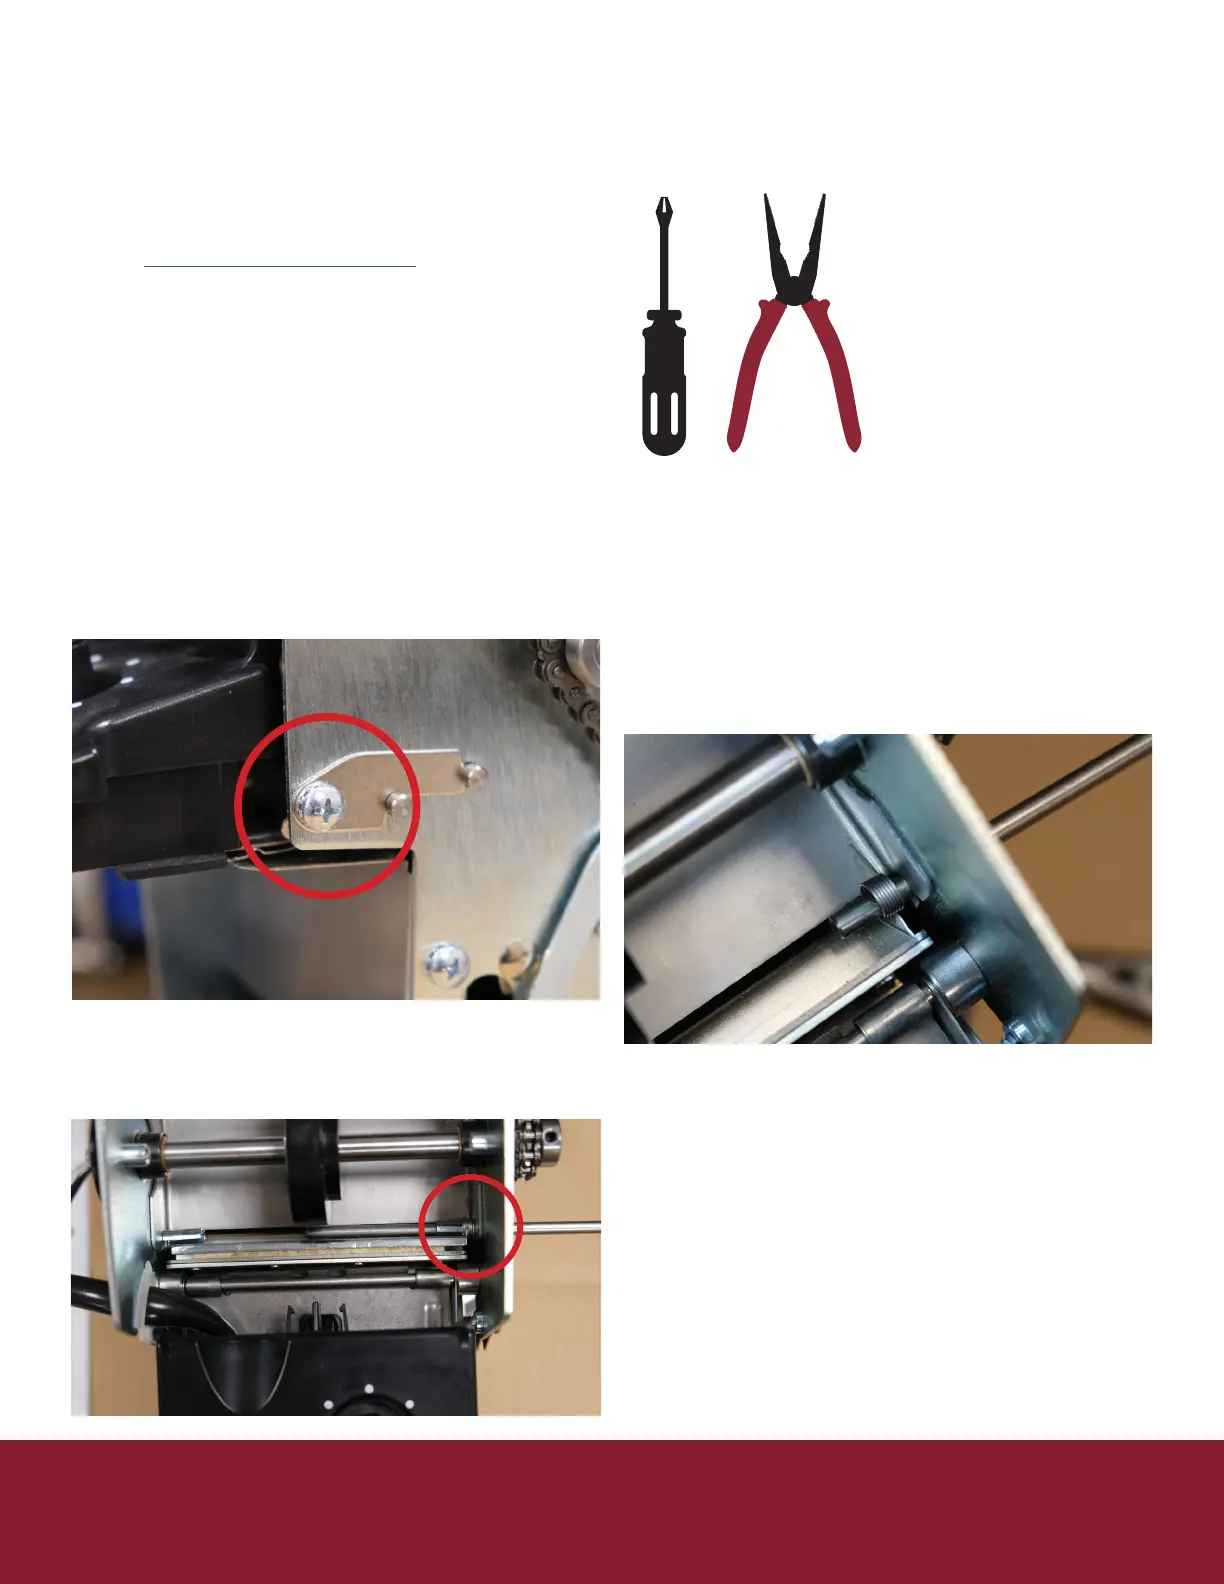
Tools Needed
• Philips head screwdriver
• Needle nose pliers
Procedure
1. Unplug Machine
2. Remove the water bole, and tank assembly
3. Remove right side cover (5 Philips screws)
4. Remove le side cover (5 Philips screws) be
careful as the ribbons connecng the keypad can
be ripped easily.
5. Unplug keypad ribbons from controller board
6. Loosen screw on the upper right side of frame
holding the retainer bracket
7. Li the retainer bracket
8. Remove the 2nd sha that holds the oiler
a. Use cauon as there is a spring under
tension
9. To install the new one, put the sha in from the
le side. As the sha is being inserted place the
new oiler in and be sure that the sha is going
through the oiler
10. Do not put sha all the way through. Place the
oiler spring at the right side holding it with a pair
of needle nose pliers.
11. The spring has to lay at on the lower tape plate.
Then you can get the sha to go through the
spring.
12. Now take the upper part of the spring that is
being held with the pliers and bring it to the
le of the oiler bracket where the bracket has a
bend on it. Let the spring go.
13. Replace the retainer bracket
14. Tighten the retainer screw locking the bracket
into place
15. Replace the right cover (5 Philips screws)
16. On le cover plug keypad ribbons back into
controller board
a. Be sure not to miss any pins as this will eect
the length selected
17. Reinstall le cover be sure not to pinch or drive a
screw through the keypad ribbons.
18. Replace water tank, brushes, and water bole