Configuration SIS System
62
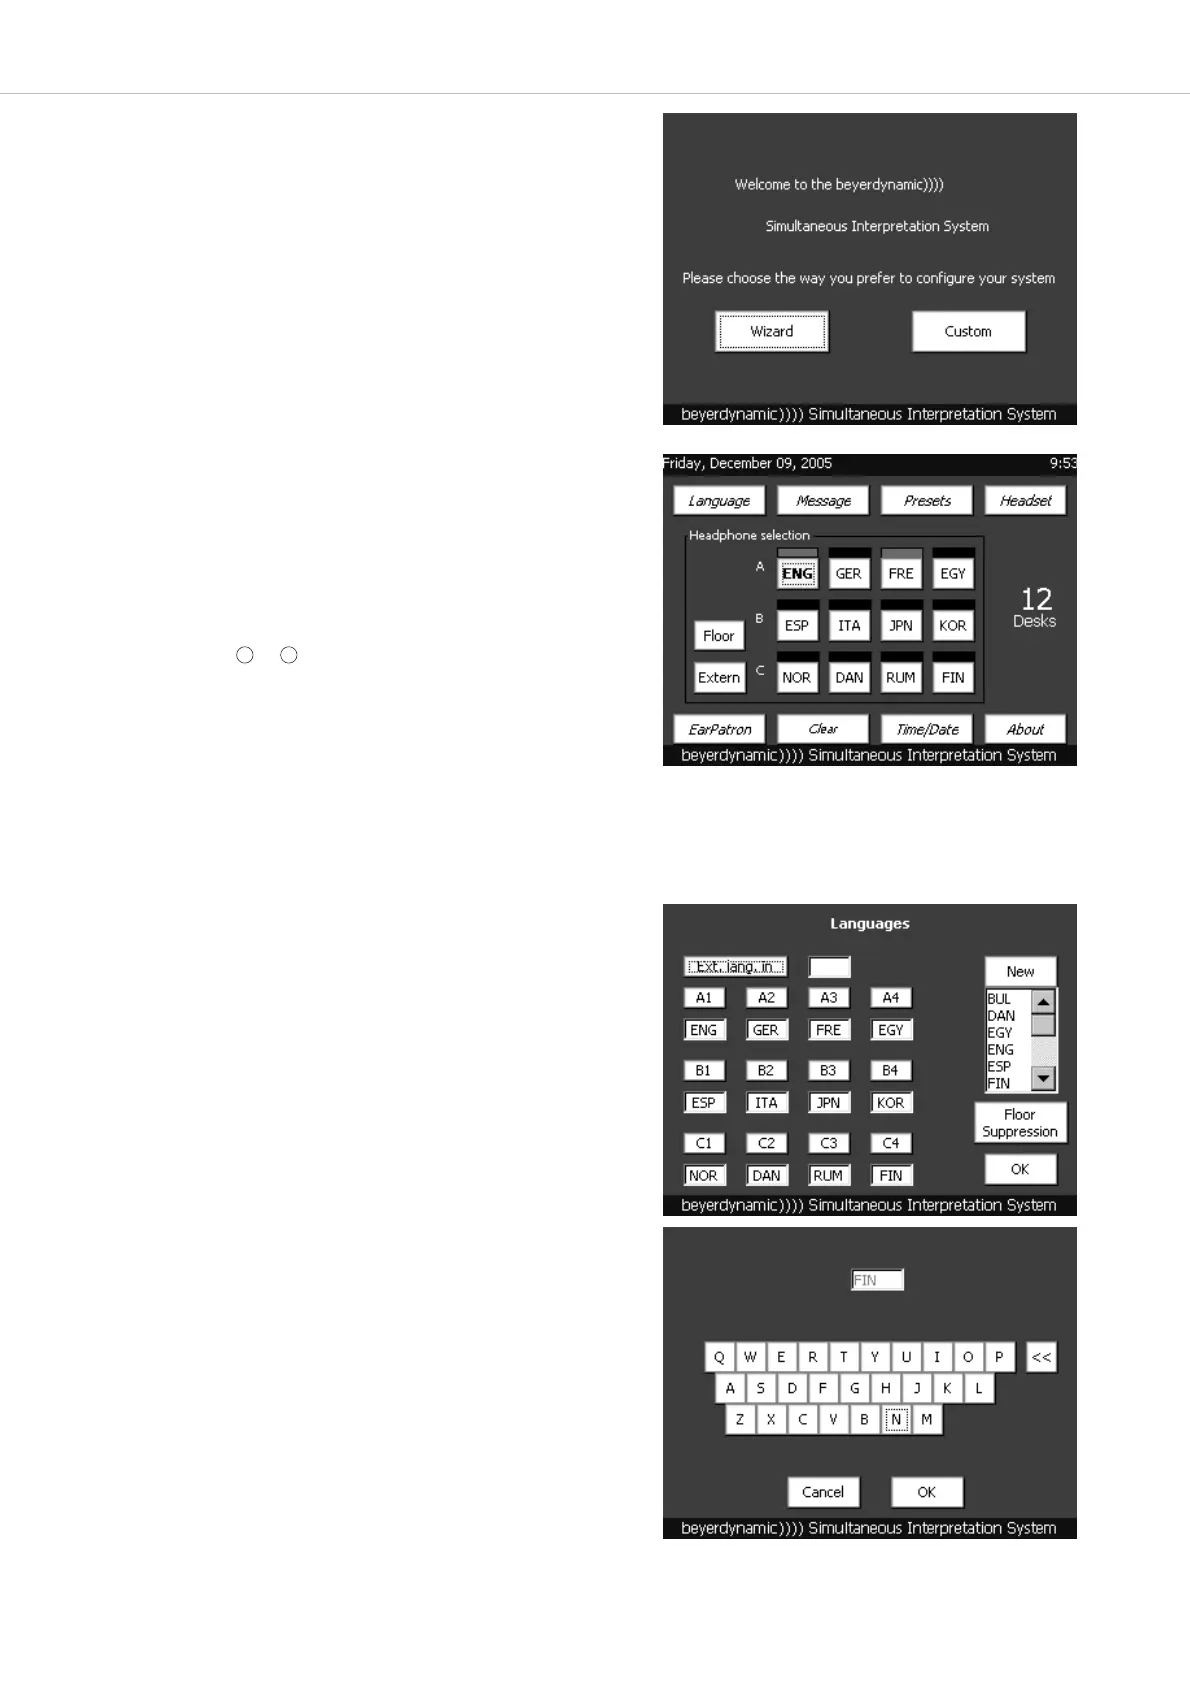
5.2 Configuration via “Custom”
• If you want to configure the SIS system via “Custom”, press the
“Custom” button.
5.2.1 Main Menu
• The main menu will be displayed, as soon as you have pressed the
“Custom” button or after a configuration via “Wizard”.
• In the main menu you cannot enter anything. It is to control the selected
languages and the number of the connected interpreter stations.
• With a headphone connected to the SIS control unit you can listen to
the original language (Floor), another external language (Extern) and the
individual foreign languages. You can select the language by pressing
the appropriate button. The language chosen is highlighted in yellow.
• The languages adjusted in the rows A, B and C correspond to the rows
of the outputs or on the rear of the SIS control unit.
• A red bar above the appropriate language indicates that the language is
currently spoken by an interpreter. A green bar above the appropriate
language indicates that this is the external relay language (in the picture
it is FRE).
• “No. of Desks” displays the number of the interpreter stations connected
to the SIS control unit and to the mains.
6 7
5.2.2 How to enter the Languages
• In order to be able to select the relay and target languages on the inter-
preter stations, the languages have to be adjusted on the SIS control
unit before.
• Press the “Language” button in the main menu.
• In this menu you can select all languages that are spoken during the
meeting.
• Press the appropriate button, e.g. A1.
• A list with different international abbreviations of languages will be
opened.
• Select a language from this list.
• Proceed with the other buttons until all languages are selected which
are spoken during the meeting.
• To transmit the selected languages to the interpreter stations press the
“OK” button.
• In order to select the external relay language, press the “Ext. lang. in”
button and select the language from the list. Please note that the
external relay language must also be selected in one of the fields from
A 1 to C 4.
• If there is no abbreviation for a language in the list, you can enter the
abbreviation via a keyboard. Press the “New” button and a window
with a keyboard will be opened.
• Enter the abbreviation with the appropriate buttons. Please note that
the abbreviation must consist of three letters.
• If you have entered wrong letters, you can delete them with the “<<”
button.
• Press the “OK” button to enter the new abbreviation into the list.
• In the “Language” menu you can then select the abbreviation from the
list.
• If you want to cancel the entry, press the “Cancel” button.
Keyboard to enter new abbreviations for languages