Chapter 5. System Configuration 37
Scroll down to Network wizard and press
'OK' in the next screen you will get the
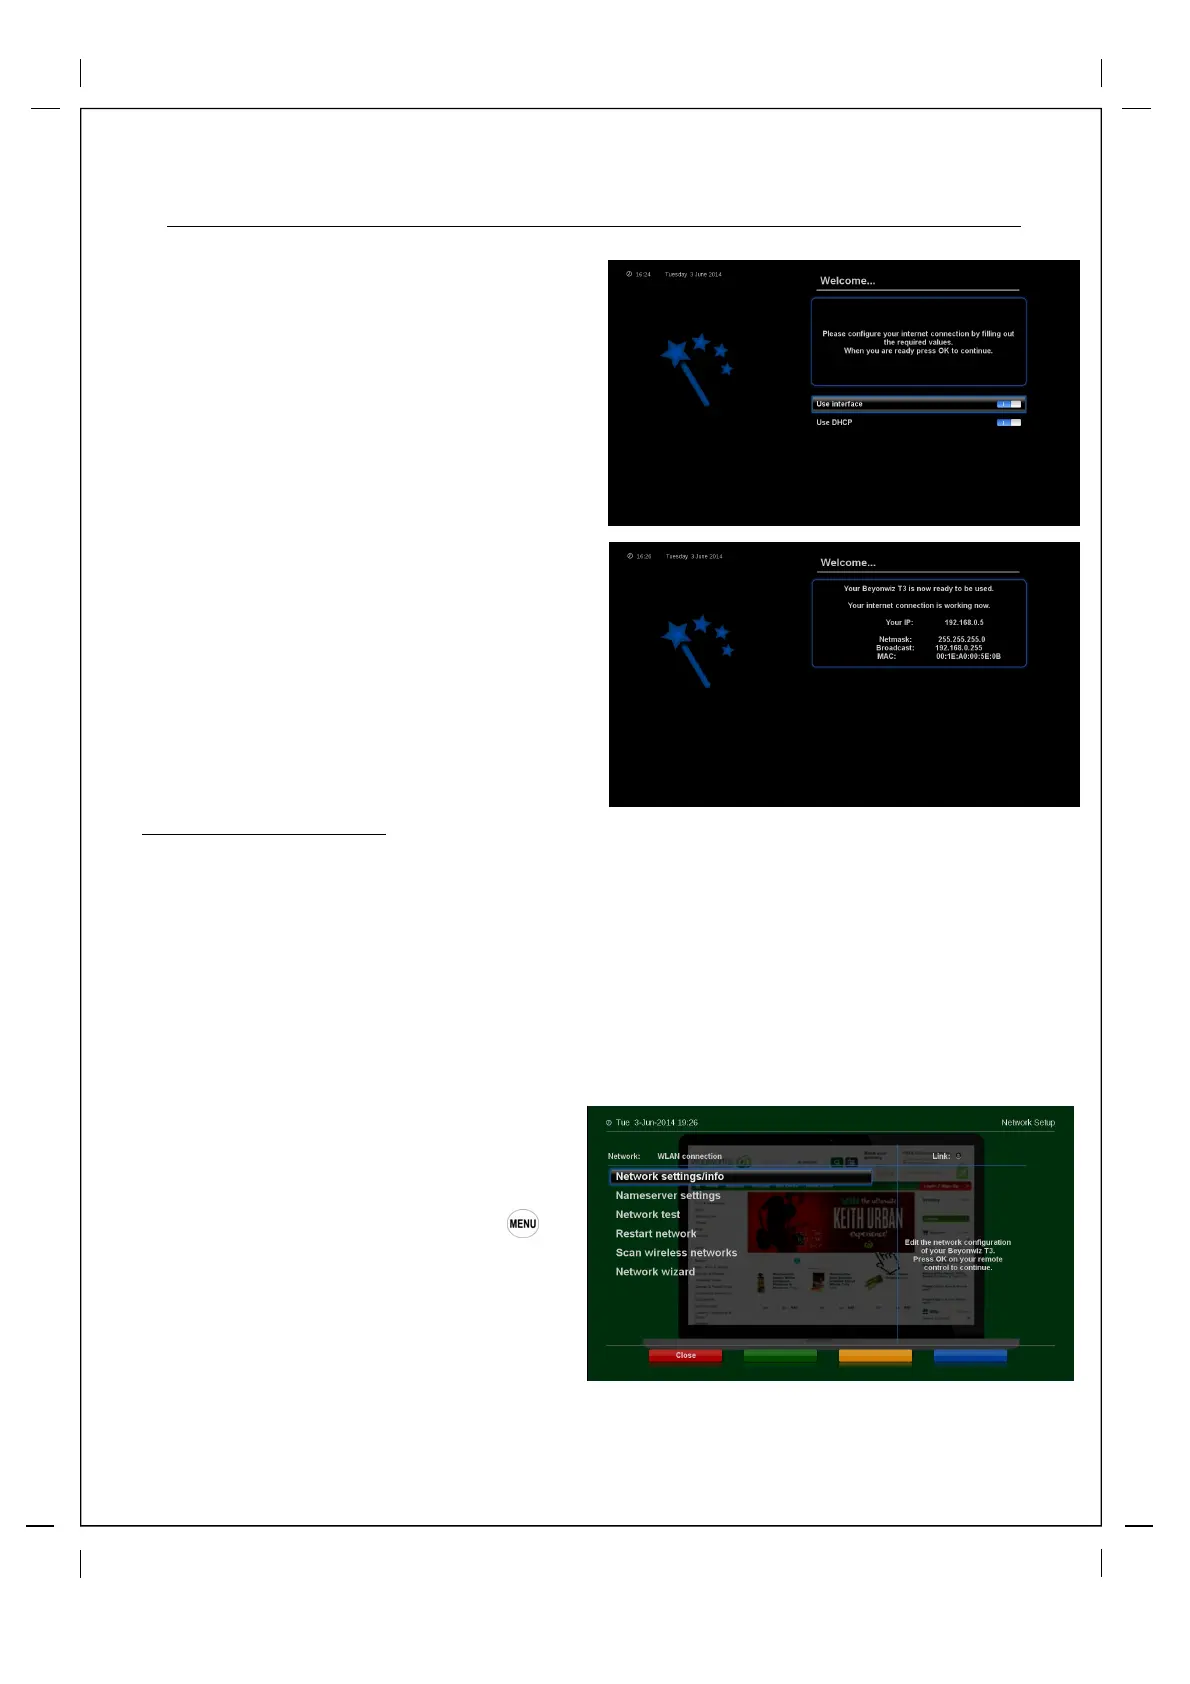
Welcome message for the Network wizard,
press 'OK' to start and you will get this
page>
Make sure both options are switched on as
pictured and then press 'OK'
If connection is successful you will get a
screen similar to this, please take not of
your IP address as you can use this to
access your V2 via your PC for controlling,
streaming and setting timers. If
unsuccessful please check your network
and cables or try manually entering your
network info in 'Network settings/info' and
'Nameserver settings' as pictured on
previous page.
Wireless LAN Connection
The Beyonwiz V2 will work with a variety of wireless dongles or wireless network adapters but we
recomend the ones that are sold at www.beyonwiz.com.au as they have been fully tested and
integrated.
To connect your V2 to your wireless network first place the wireless USB stick into one of the ports on
the V2 and then 'Reboot' (hold down the power button on your remote for 3 seconds and then select
'Reboot' from the power menu.
Once your V2 reboots press
The easiest way to connect to your wireless
home network is via the WLAN connection and
using the Network Wizard either in the initial
set up or by going into the Network menu
‘Setup’
‘Network’
Once in the Network
menu select Network Adapter Selection and
press 'OK' if you then get a choice between
LAN and WLAN choose WLAN and then pres
'OK' and you will get this screen >