Chapter 3. First Time Installation 17
Chapter 3.
First Time Installation
When you turn on Beyonwiz V2 for the first time after purchase, an installation wizard
will begin step by step.
NOTE: ‘OK’ key is used for confirmation and turns to the next step. Press ‘EXIT’ key to
return to the previous page.
Tip: If you do not see the Setup menu appear on the screen after boot then your TV may not support
the d
efault video mode. Use the TV-OUT button on the Beyonwiz remote to scroll through the
available modes until a
pictur
e appear
s. Please
refer to your TV manual for
advice on
suppor
ted
video
mod
es.
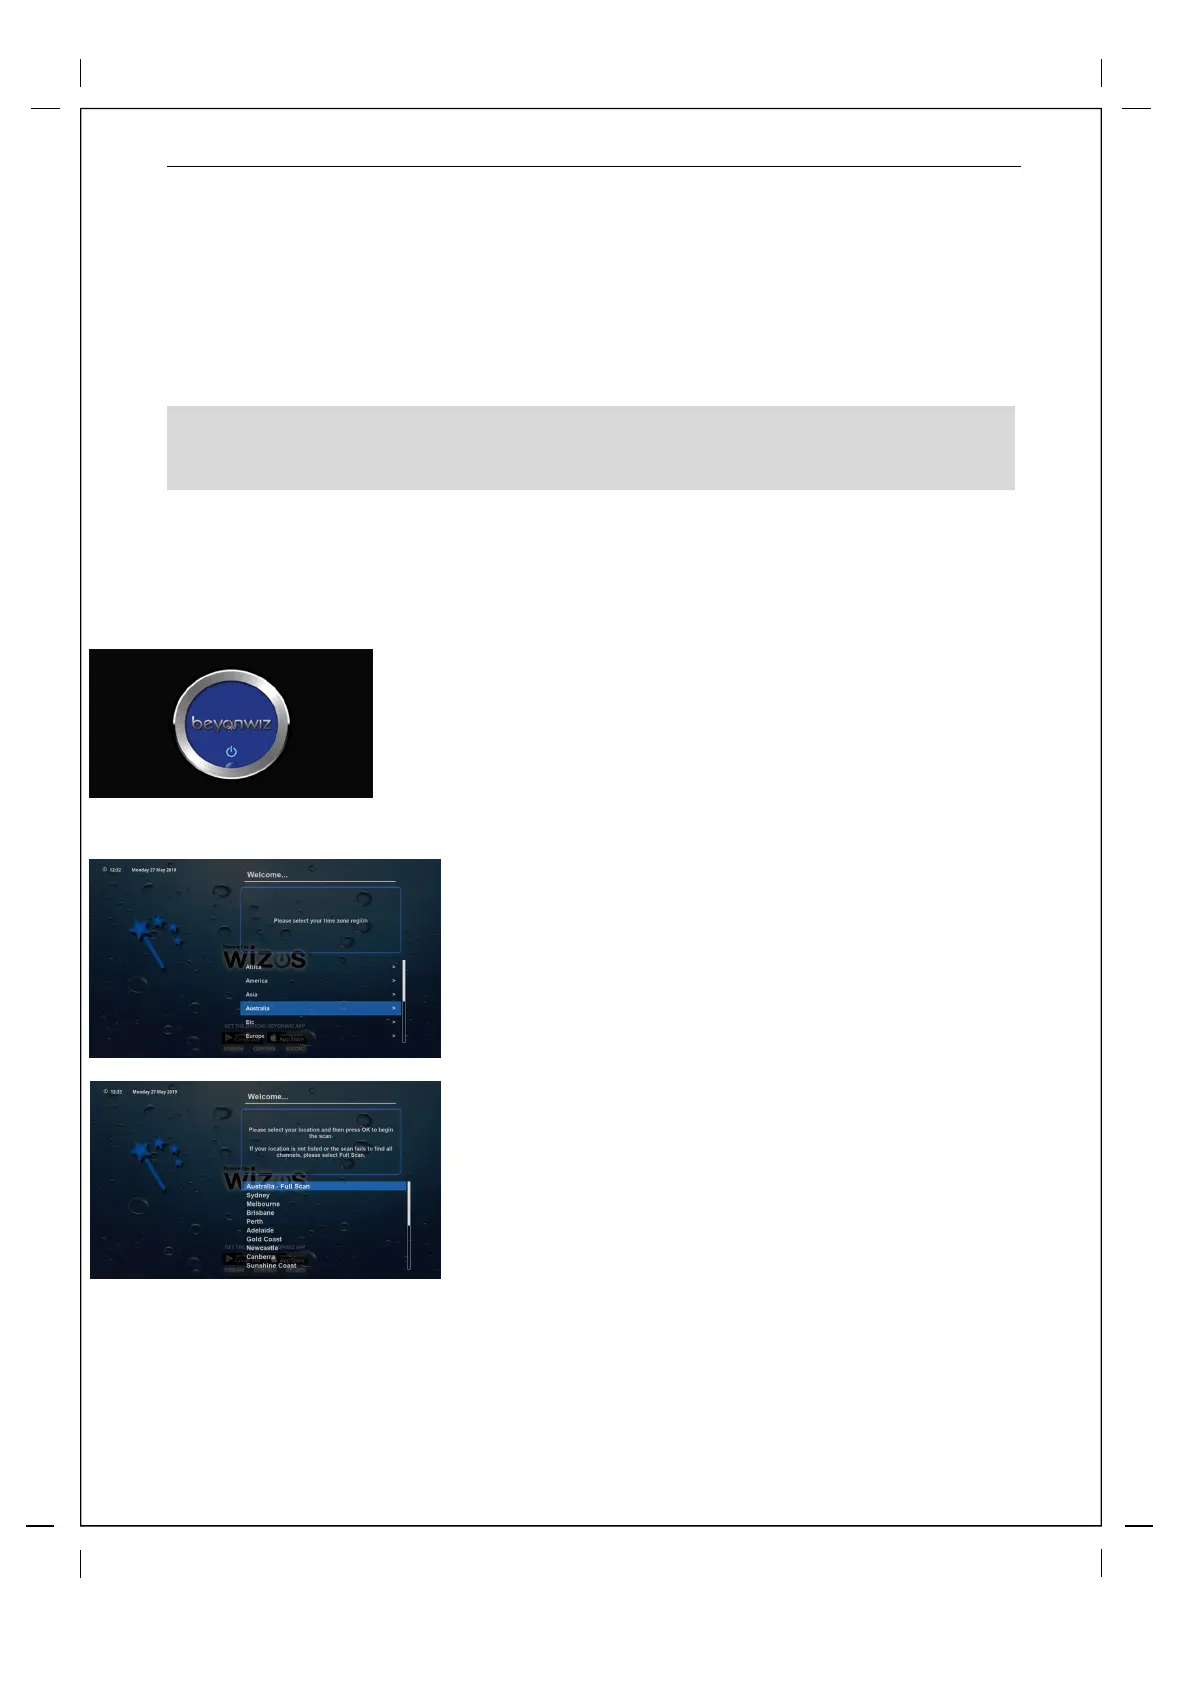
Starting your Beyonwiz
Make sure the Beyonwiz is connected to the mains and that the switch on
the rear of the PVR is set to ON, now press the On button on your
Remote Control or on the front touch panel.
If the message Booting doesn’t appear on the Beyonwiz’s front panel,
press the POWER button on the remote control.
After a short delay you should see the Beyonwiz logo on your TV screen.
The logo may flash off and back on and you will see a booting spinner,
this process could take up to 1min to boot from a cold start.
Setting your time zone
Use the UP and DOWN buttons to select the time zone that
applies to your area, and press OK to set it and move to the next
screen. Your Beyonwiz will automatically adjust to Daylight
Savings when it is needed.
Scanning for digital TV services
If your location is listed please scroll to it and press “OK” on your
V2 Remote, this will shorten the scan time as it only scans the
frequencies used in your area. If you location is not listed or if
you are unsure please select “Full Scan”, it will take a little longer
but it will ensure that you get the correct channels in your area. If
you perform a location scan and you find that you are missing
channels you can enter the Tuners menu at a later stage and
perform a full scan.