5
M6 8
M8 20
M10 40
M12 70
M14 110
M16 160
M20 320
M22 420
M24 550
M27 800
M30 1100
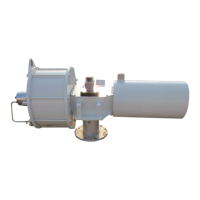
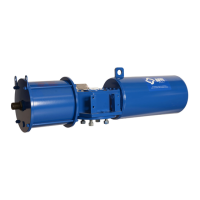
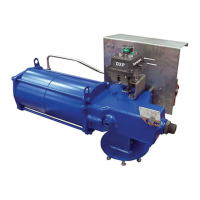
BIFFI FAIL SAFE ELECTRIC ACTUATORS, MODEL EFS2000V4
InstructIon and operatIng Manual
4 ASSEMBLING THE ACTUATOR ONTO THE
VALVE
The actuator is provided with an output flange
(or a spool piece and a stem extension) as
coupling to the valve. The assembly position of
the actuator, with reference to the valve, must
comply with the plant requirements (spring
cartridge axis parallel or perpendicular to the
pipeline axis).
4.1 Actuator supplied with insert already
machined
To assemble the actuator onto the valve
proceed as follows:
• Check that the coupling dimensions of the
valve flange and stem, or of the relevant
extension, meet the actuator coupling
dimensions.
• Arrange the valve in the position related to
the actuator spring operation.
• Lubricate the valve stem with oil or grease
in order to make the assembly easier: be
careful not to contaminate with lubricant the
flange surfaces with have to be connected to
transmit the actuator torque.
• Clean the valve flange and remove anything
that might prevent a perfect adherence to
the actuator flange and especially all traces
of grease, since the torque is transmitted by
friction.
Thread size Recommended tightening torque (Nm)
• Assemble the stem extension onto the valve
stem.
• Bring the actuator to the position caused by
the spring operation.
• Connect a sling to the support points of
the actuator and lift it: make sure the sling
is suitable for the actuator weight. When
possible, it is easier to assemble the actuator
to the valve if the valve stem is in the vertical
position. In this case the actuator must
be lifted while keeping the flange in the
horizontal position.
• Clean the actuator flange and remove
anything that might prevent a perfect
adherence to the valve flange and especially
all traces of grease.
• Lower the actuator onto the valve so that
the shaft output drive enters into the groove
of the stem extension. This connection
must take place without any force and only
by the weight of the actuator. When the
actuator output shaft and the valve stem
are connected, check the holes of the valve
flange. If they do not meet with the holes
of the spool piece flange or the stud bolts
screwed into them, the actuator shaft output
drive must be rotated; feed the actuator
cylinder with air at the proper pressure or
actuate the manual override, until connection
is possible.
• Assemble the insert into the EFS2000v4 as
shown in the following pictures (the engraving
realized on the insert has to correspond to
the engraving present on the EFS2000v4
bush, as highlighted in the pictures).
• Tighten the nuts of the connecting stud bolts
evenly with the torque prescribed in the
table. If no different materials are specified,
the stud bolts must be made of ASTM A 320
Grade L 7 steel, the nuts must be made of
ASTM A 194 Grade 2 or better.
• If possible, operate the actuator to check that
it moves the valve smoothly.
• If the actuators are supplied separately
from the valves, they must be placed onto
a wooden pallet so as not to damage the
coupling flange and the output shaft. In case
of long-term storage, the coupling parts
(flange, output shaft) must be coated with
protective oil or grease; if possible, blank off
the flange by a protection disk.
• In case of long-term storage, it is advisable
to store the actuators in a dry place or to
provide at least some means of weather
protection. If possible, it is also advisable
to periodically operate the actuators with
filtered, dehydrated and lubricated air; after
such operations, all the threaded connections
of the actuator and the valves of the control
panel (if present) should be carefully plugged.