KT-230-228
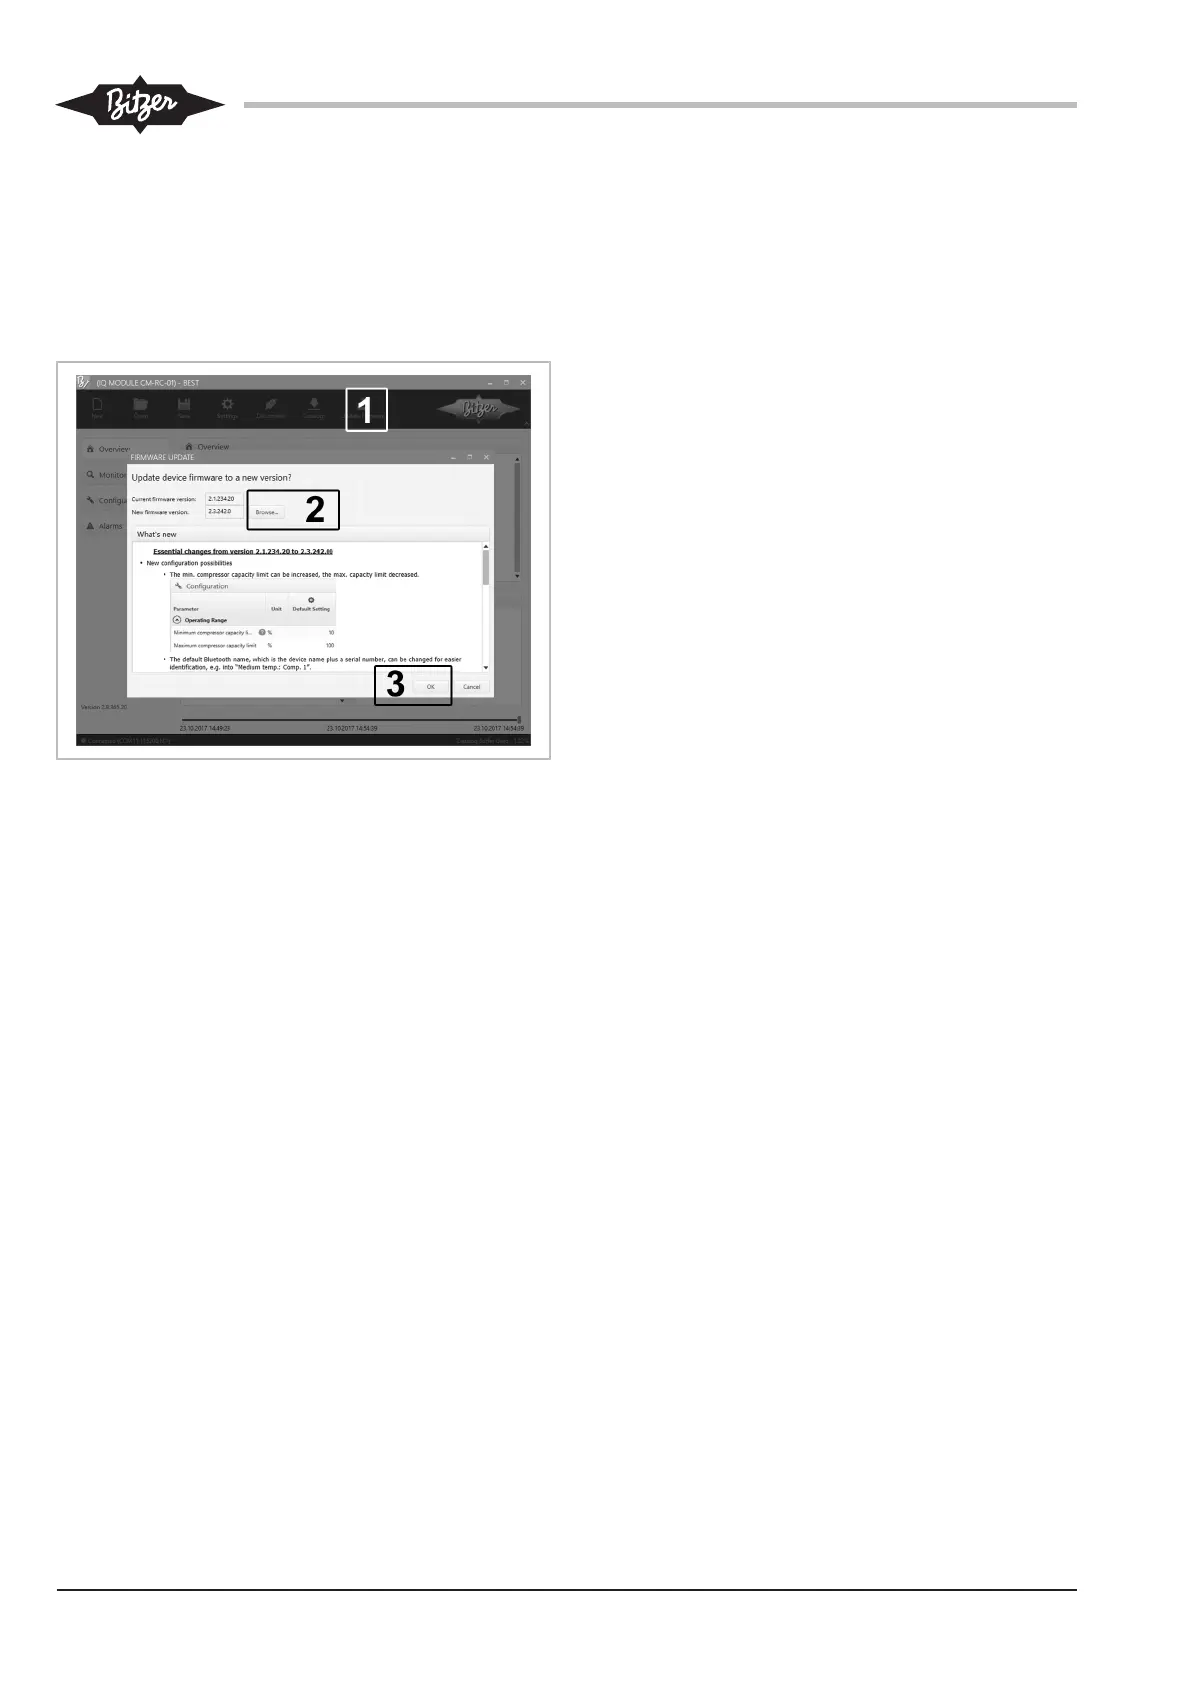
• Select UPDATE FIRMWARE (1) and BROWSE… (2) (see
figure 13, page 28).
• Search folder (...\BEST\Firmware\CM-RC-01) for
new firmware.
• Start firmware update and wait until the successful
update is confirmed. Confirm with OK (3).
Fig.13: Updating the firmware
• Selection of BLUETOOTH
A firmware update is not possible via the Bluetooth
interface.
All available devices are listed.
• Select compressor.
• Click on the CONNECT button.
• Enter the Bluetooth password. Factory setting from
firmware version 2.6.58.00:"8670", previous ver-
sions:"2".
The compressor module is now connected to the PC or
mobile device.
10.2 Configuring the CM-RC-01 with the BEST
SOFTWARE
The compressor module CM-RC-01 is preconfigured
for use with the respective compressor as delivered.
Check all settings in the CONFIGURATION menu and
change them if necessary. Check these entries in par-
ticular:
• MOTOR STARTER FUNCTION because of the time switch-
ing of the motor contactors, see chapter Switching
times of the motor contactors at compressor start,
page 13.
• REFRIGERANT
• DATE
• TIME
10.2.1 Setting the current time
Check the programmed date and time using the BEST
SOFTWARE:
• Check the CONFIGURATION menu, the MAIN SETUP win-
dow and the DATE and TIME lines.
• Correct the data if necessary.
10.2.2 Selecting the motor start function
The compressor module switches the motor contactors
on and off. With the BEST SOFTWARE, you can
choose between star-delta, part-winding or direct on-
line start and frequency inverter operation.
Adjust in the BEST SOFTWARE:
• Set the appropriate motor start function in menu
CONFIGURATION, window MOTOR STARTER FUNCTION.
In any case, the compressor motor starts 1s after the
start signal of the superior controller.
10.2.3 Activating peripheral devices
These functions must be activated with the
BEST SOFTWARE after installation and electrical con-
nection of the respective components:
• Application-limit monitoring
• High- and low-pressure transmitters (B6 and B7)
• Additional fan (M2)
• RI System (RI injection valve Y5)
• Open the BEST SOFTWARE.
• In the menu CONFIGURATION, in the column USER SET-
TING, click on each connected peripheral device and
enter YES in each case.
10.2.4 Activating application limits monitoring
➙ Prerequisite: High- and low-pressure transmitters
must be installed.
• Set the refrigerant in the BEST SOFTWARE: in the
menu MAIN SETUP, window REFRIGERANT, select the re-
frigerant used.
• In the menu MAIN SETUP, window PROTECTION FUNC-
TIONS, row ENABLE APPLICATION ENVELOPE PROTECTION in
the column USER SETTING, enter YES.



 To Next Page