SECTION 4
MAINTENANCE
33
H. Attaching Drive Chain
1. If drive sprocket assembly was removed reassemble it
into the conveyor drive shaft. Be sure flat on end of drive
shaft aligns with set screw in conveyor shaft collar. Once
in place tighten 3/32″ set screw.
2. Lift conveyor and install drive chain to conveyor drive
sprocket and motor sprocket.
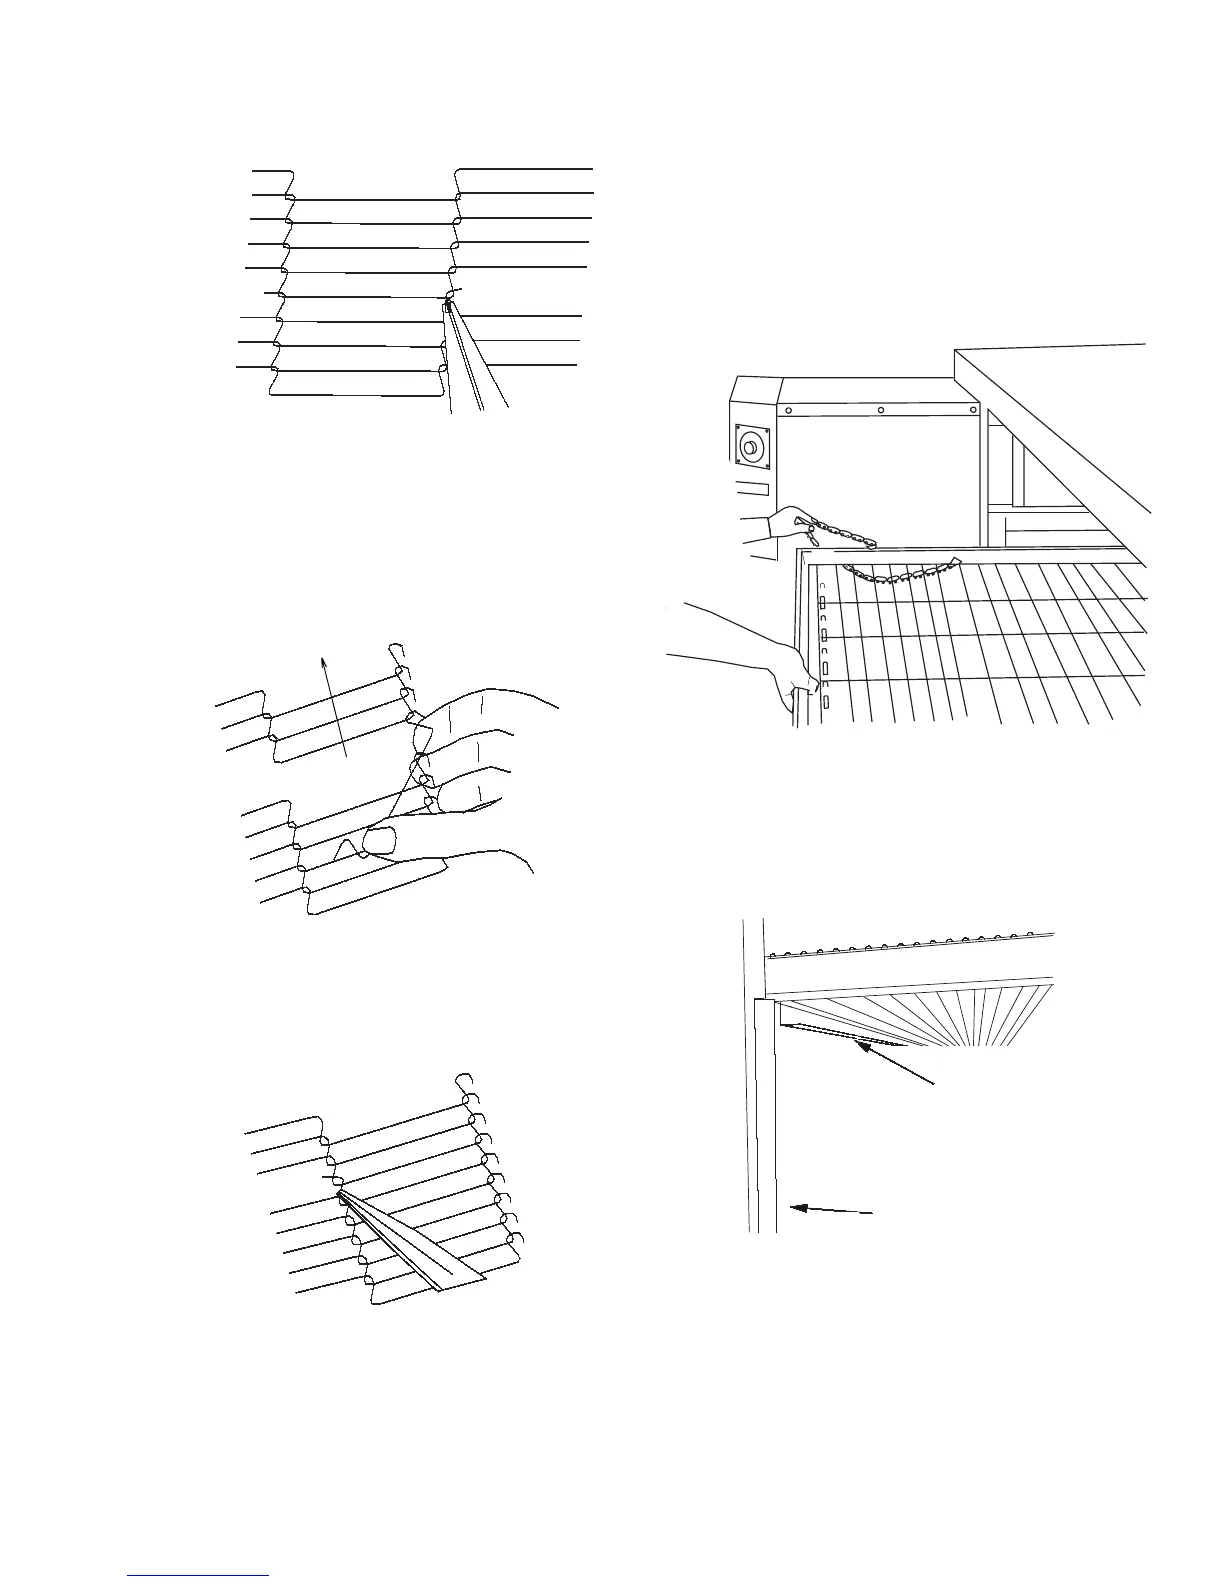
Figure 4-32.
3. The angle plate located on the underside of the con-
veyor must be against the lower end plug. This is true on
both sides of oven.
Figure 4-33.
6. Reconnect the inside master links (Figure 4-29.)
Figure 4-29.
NOTE: The outside master links have right and left sides
to them. The right edge master link has an open hook
facing you as shown in Figure 4-30. This will match up with
the outer edges of the conveyor belt. Remember this hook
travels backwards on the conveyor.
Figure 4-30.
7. Reconnect the outside master links.
8. Replace all parts removed from the oven.
Figure 4-31.
Direction of travel
Crumb Pan
Mounting
Bracket
Lower End Plug