6.1 - Maintenance
6 - Maintenance and service
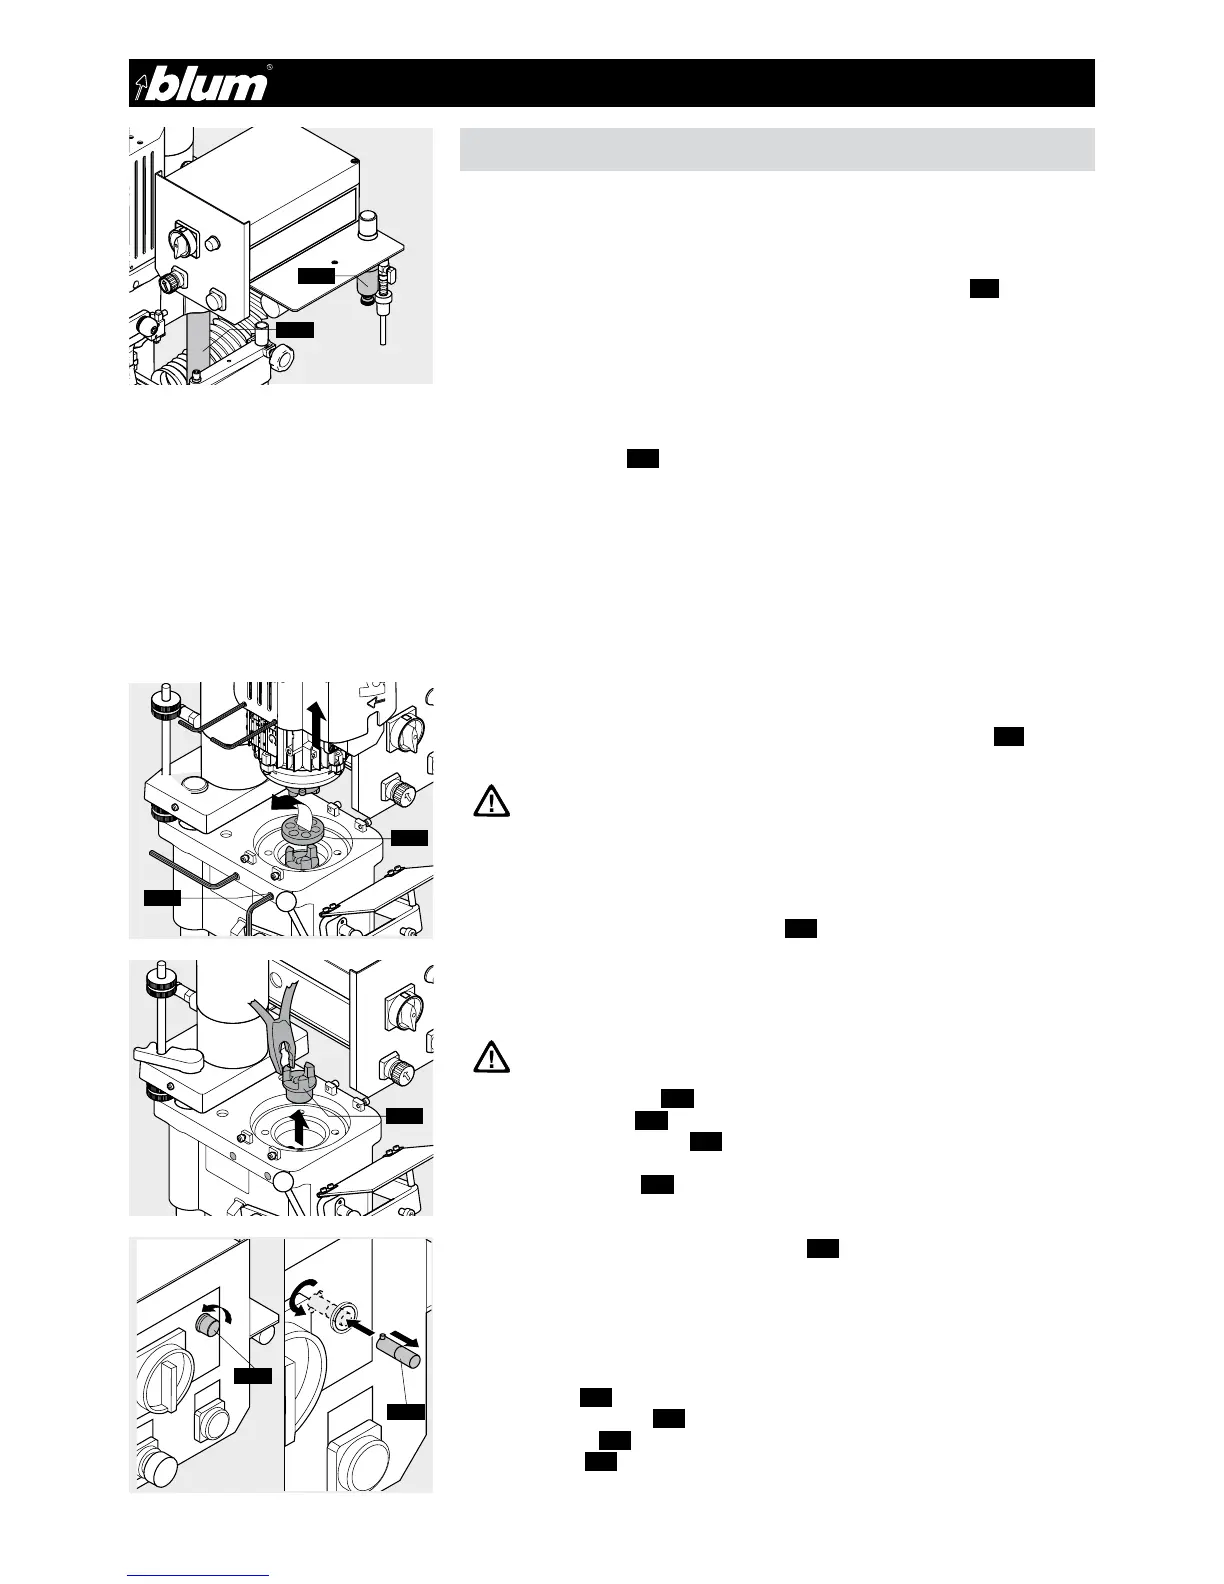
6.1.2) Damaged coupling
The coupling is damaged if:
• The drill is jammed in the work piece but the motor fan wheel continues (1.9) to turn.
• Set main switch to pos. 0
• Disconnect electrical and pneumatic connections to the assembly machine
• Remove drill
• Remove motor hood
• Loosen the motor’s four side fixing screws (6.4)
(approx. 4 full turns)
• Lift up motor and place on to the drive
• Remove dampening ring (6.5)
• Remove old coupling (6.6)
• Attach replacement coupling (6.6) on to the spindle. (ensure correct positioning of
coupling and spindle)
• Insert dampening ring (6.5)
• Preposition coupling base for motor attachment
• Attach motor (motor must sit securely on the flange)
• Re-secure the motor’s four side fixing screws (6.4)
• Re-attach motor hood
6.1.3) Replacing the operational status indicator
• Disconnect assembly machine from the power supply.
• Set main switch to pos. 0
• Remove front (6.7) from the operational status indicator. (unscrew)
• Remove defective lamp (6.8). (Press and turn to the left)
• Install new lamp (6.8). (Press and turn to the right)
• Reattach front (6.7) to the operating mode display indicator.
• The supports are maintenance free and should not be oiled
• The guide elements (6.2) must be cleaned regularly with a dry cloth to remove dust.
(Do not use cleaners or solvents)
6.1.1) Maintenance
• Drilling dust should be removed from the assembly machine on a regular basis
• Before using the machine, you should always check the air filter unit (6.1) for water
which may accumulate there. Empty the unit if necessary.
• Before every use of the machine, check the pneumatic lines and electrical lines for
damage.
ATTENTION:
Keep your hands and other objects away from machine work area (A)
ATTENTION:
Secure the motor against falling
6.4
6.5
6.6
 Loading...