Installation
EN
bora.com 29
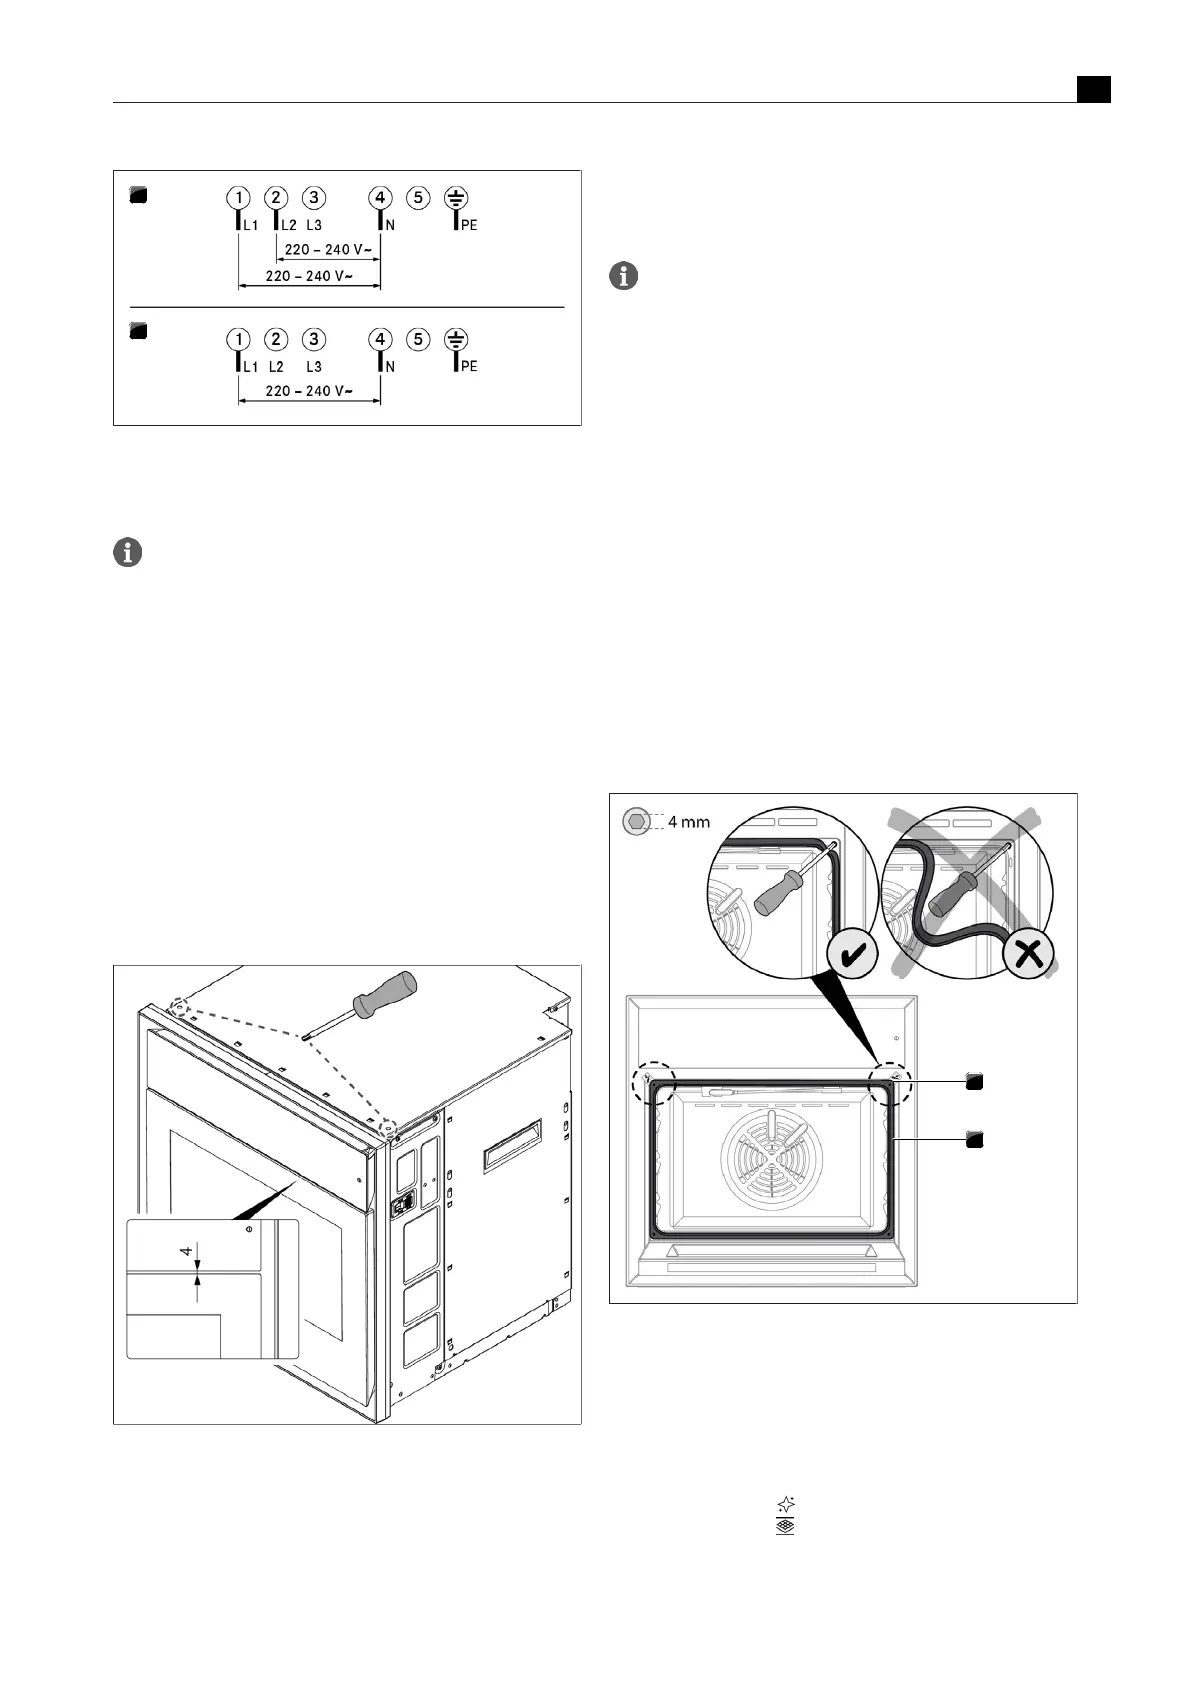
Fig.9.13
Connection diagrams
[1]
Connection diagram for 2-phase connection, 16 A
[2]
Connection diagram for single-phase connection, 16 A
Do not use the bridges provided.
9.6.6
How to connect the BORA multi-
drawer (optional)
If the BORAXBO is installed in conjunction with a BORA multi-
drawer, the two appliances can be connected.
u
Connect the communication cable on the BORA multi-drawer to
the RJ45 port on the appliance.
9.6.7
Positioning the operating unit
u
Ensure that there is an even distance of 4mm between the
operating unit and the door.
u
To do this, turn the adjusting screws on the front of the top of the
housing.
Fig.9.14
Adjusting the distance between the operating unit and door
9.6.8
Installing and securing the
appliance
The oven chamber seal must not be removed; instead, it
should be simply folded down at the top corners.
u
Push the appliance into the desired position in the installation
recess.
u
Ensure that the water hoses and power supply cable are not
trapped or damaged in doing so.
u
Maintain a minimum distance of 30mm between the back of the
appliance and the adjacent elements.
u
Align the appliance in the centre.
u
Open the door.
u
Fold the top left and right corners of the oven chamber seal down
far enough to access the fixing screws.
u
Ensure that you do not pull the oven chamber seal out too far.
Turning the fixing screw (4 mm Allen key) causes the levelling shim on
the corresponding side to move outwards and press against the
locking plate.
u
Fasten the fixing screws tight, alternating sides.
u
Carefully push the corners of the oven chamber seal back into
position.
u
Check that the oven chamber seal is positioned correctly all the
way round.
u
Check that the appliance is installed correctly.
Fig.9.15
Securing the appliance
[1]
Detachable corner with fixing screws underneath
[2]
Oven chamber seal
9.6.9
Fitting the odour filter
u
Take the new odour filter out of its packaging.
u
Touch “Maintenance” .
u
Touch “Filter change” .
u
Proceed as shown when you press the “Instructions” button.