14
Subject to change without prior notice Revised 05-12
6 720 220 048
CE Series
evaporative cooling to the loop water thus
maintaining a constant supply temperature to the
unit. When utilizing open cooling towers, chemical
water treatment is mandatory to ensure the water is
free from corrosive elements. A secondary heat
exchanger (plate frame) between the unit and the
open cooling tower may also be used. It is imperative
that all air be eliminated from the closed loop side of
the heat exchanger to insure against fouling.
In the heating mode, heat is absorbed from the water
loop. A boiler can be utilized to maintain the loop at
the desired temperature.
Water piping exposed to extreme low ambient
temperatures is subject to freezing.
Consult the specication sheets for piping sizes. Teon
tape sealer should be used when connecting to the unit
to insure against leaks and possible heat exchanger
fouling. Do not overtighten the connections. Flexible
hoses should be used between the unit and the rigid
system to avoid possible vibration. Ball valves should be
installed in the supply and return lines for unit isolation
and unit water ow balancing. Pressure/temperature
ports are recommended in both supply and return lines
for system ow balancing. Water ow can be accurately
set by measuring the water-to-refrigerant heat
exchangers water side pressure drop. See specication
sheets for water ow vs. pressure drop information.
No unit should be connected to the supply or return
piping until the water system has been completely
cleaned and ushed to remove any dirt, piping chips or
other foreign material. Supply and return hoses should
be connected together during this process to ensure the
entire system is properly ushed. After the cleaning and
ushing has taken place the unit may be connected to
the water loop and should have all valves wide open.
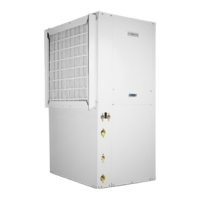
EARTH COUPLED SYSTEMS
(Figure #12)
Closed loop and pond applications require specialized
design knowledge. No attempt at these installations
should be made unless the dealer has received
specialized training. Utilizing Bosch’s Ground Loop
Pumping Package (GLP), makes the installation easy.
Anti-freeze solutions are utilized when low evaporating
conditions are expected to occur. Refer to the GLP
installation manuals for more specic instructions.
SYSTEM CHECKOUT
• After completing the installation, and before
energizing the unit, the following system checks
should be made:
• Verify that the supply voltage to the heat pump is
in accordance with the nameplate ratings.
• Make sure that all electrical connections are tight
and secure.
• Check the electrical fusing and wiring for the
correct size.
• Verify that the low voltage wiring between the
thermostat and the unit is correct.
• Verify that the water piping is complete and correct.
• Check that the water ow is correct, and adjust if
necessary.
• Check the blower for free rotation, and that it is
secured to the shaft.
• Verify that vibration isolation has been provided.
• Unit is serviceable. Be certain that all access
panels are secured in place.
UNIT START-UP
1. Set the thermostat to the highest setting.
2. Set the thermostat system switch to “COOL”,
and the fan switch to the “AUTO” position. The
reversing valve solenoid should energize. The
compressor and fan should not run.
3. Reduce the thermostat setting approximately 5
degrees below the room temperature.
4. Verify the heat pump is operating in the cooling mode.
5. Turn the thermostat system switch to the “OFF”
position. The unit should stop running and the
reversing valve should de energize.
6. Leave the unit off for approximately (5) minutes
to allow for system equalization.
7. Turn the thermostat to the lowest setting.
8. Set the thermostat switch to “HEAT”.
9. Increase the thermostat setting approximately 5
degrees above the room temperature.
10. Verify the heat pump is operating in the heating
mode.
11. Set the thermostat to maintain the desired
space temperature.
12. Check for vibrations, leaks, etc...
Earth Coupled Systems
 Loading...


