Do you have a question about the Bosch DVR-5000 and is the answer not in the manual?
Defines warnings and caution formats used in the manual.
Provides crucial guidelines for safe operation and handling of the unit.
Contains critical notices regarding accessories, power switches, and battery replacement.
Details compliance information for FCC and UL standards, including interference guidelines.
Copyright information for the manual provided by Bosch Security Systems.
Explains the 960H technology and its benefits for image quality.
Describes the use of H.264 and G.711 compression for storage and bandwidth reduction.
Outlines the capabilities of the DVR, including recording, dome control, and network features.
Provides instructions on how to carefully unpack the unit and check package contents.
Details requirements for mounting, ventilation, temperature, power supply, and environment.
Lists typical components that may be used in a system with the unit.
States that failure to follow instructions may void the unit's warranty.
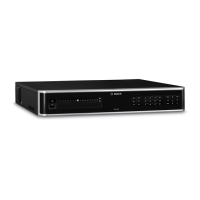
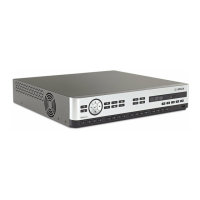
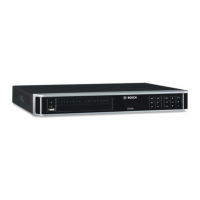
Details all hardware connections on the rear panel of the DIVAR 3000 and DIVAR 5000 units.
Step-by-step instructions for powering on the DIVAR 3000 and DIVAR 5000 units.
Explains the system login interface and default credentials for initial access.
Guides through the initial system setup process, covering language, general, encoder, schedule, record, and network settings.
Describes how to properly log out or shut down the system through the user interface.
Instructions for connecting cameras to the VIDEO IN connectors using coaxial cables.
Details how to connect audio inputs and outputs using RCA connectors.
Explains how to connect up to three monitors via VGA, HDMI, and CVBS outputs.
Information on connecting a Bosch Intuikey keyboard to the DIVAR 5000 unit.
Instructions for connecting the unit to a PC or network via the RJ-45 Ethernet port.
Details connecting controllable cameras using the RS485 port for PTZ control.
Explains the use of the RS232 port for connecting devices like consoles or PTZ matrices.
Describes the location and function of the USB 2.0 connectors for mouse or memory devices.
Information on the e-SATA connector for expanding hard disk capacity on DIVAR 5000.
Details alarm input and output connections using screw terminal blocks.
Explains the power supply requirements and specifications for DIVAR 3000 and DIVAR 5000 units.
Overview of the Setting menu, providing access to various configuration groups.
Configuration options for system time, date format, language, video standard, and device settings.
Settings for encoding streams, including resolution, frame rate, bit rate, and audio format.
Configuration for privacy masks, time display, and channel display overlays.
Settings for configuring snapshot mode, quality, and frequency.
Functionality to copy channel settings (encoder, schedule, alarm, detect) to other channels.
Planning and setting up recording schedules for efficient channel usage across a weekly calendar.
Configuration of the RS232 port for console or Bosch keyboard connections.
Settings for IP version, DHCP, IP address, subnet mask, gateway, and ports.
Access to network functions like IP filter, NTP, PPPoE, DDNS, UPnP, EMail, and FTP server.
Configuration of trusted or blocked IP addresses to control DVR access.
Settings for configuring the Network Time Protocol server for time synchronization.
Configuration for PPPoE connection, requiring user name and password from the ISP.
Setup for Dynamic Domain Name System to provide a consistent access address.
Configuration for Universal Plug and Play to enable automatic port mapping between LAN and WAN.
Setup for email notifications for events, including SMTP server and recipient details.
Configuration for uploading snapshots or other data to an FTP server.
Settings for Simple Network Management Protocol for network management system integration.
Configuration of desired behaviors for input, motion, or system failure alarms.
Setting up events for motion detection, video loss, and camera masking to trigger alarms.
Defining specific zones on the screen for motion detection activation.
Assigning time periods for alarms and detection events on a weekly basis.
Configuring PTZ camera movements when an alarm or detection event occurs.
Setup for controlling PTZ cameras, including protocol, address, and baud rate.
Options for setting screen appearance, including transparency, channel names, and resolution.
Configuring camera sequences for monitor displays, including interval and split views.
Restoring selected or all system settings to their factory default values.
Access to advanced configuration options like HDD management, system events, and account settings.
Viewing current HDD status and managing disks, including formatting and error handling.
Setting up system reactions to events like disk errors, network disconnection, or IP conflicts.
Configuring settings for the unit's alarm output ports based on schedule or manual input.
Defining recording modes (manual, schedule, stop) for each channel.
Managing user accounts, their privileges, and security settings.
Steps for adding a new user, defining username, password, group, and authority.
Procedures for modifying existing user accounts or deleting them from the system.
Instructions on how to change the password for user accounts.
Setting up automatic deletion of old files to manage storage space.
Adjusting TV output settings such as margins and brightness.
Configuring text overlays for ATM/POS data or other information on the video feed.
Managing configuration backups, including importing and exporting settings to memory devices.
Setting up tour sequences specifically for Monitor B display.
Overview of user controls and menu navigation via mouse, front panel, and remote control.
Detailed explanation of mouse functions for channel selection, menu navigation, and data input.
Explains the functions of the buttons on the front panel of the DIVAR 3000 and DIVAR 5000.
Instructions for operating the unit using the supplied IR remote control.
Accessing common functions like live view, playback, and settings via the quick menu.
Navigating and using the main menu for system configuration and operation.
Instructions for viewing live camera feeds and playing back recorded footage.
Explains the live viewing mode, display icons, and switching between channels.
Configuring and controlling Pan/Tilt/Zoom functions for compatible cameras.
Setting up camera sequences for viewing different cameras automatically.
Details about the primary monitor output for live and playback displays.
Information regarding the secondary monitor output, often used for alarms or spot monitoring.
Procedures for searching and playing back recorded video files, including using the calendar and time bar.
Steps for backing up recorded video and audio data to external storage devices.
Accessing system information such as HDD status, bit rate, logs, and version.
Displays detailed information about the status, capacity, and free space of installed HDDs.
Shows real-time video data stream information for each channel in Kb/s.
Viewing system log files to track events like system configuration, alarms, and user activity.
Displays installed system hardware and software features, including version numbers.
Manages currently connected users, allowing disconnection or blocking.
Provides network test and load information for monitoring network performance.
Explains how various events (alarms, motion, system alerts) affect the unit's operation.
Instructions for connecting to the DIVAR via TCP/IP network and loading the web client.
Lists the recommended PC and web browser requirements for using the web client.
Guides users on logging into the DIVAR system using a web browser and DVR IP address.
Overview of the Web Live window interface, including mode bars and workspaces.
Explains how to use the web client playback mode to view recorded video.
Details on accessing and using the setup menu within the web client interface.
Configuration of device alarm types and sound setups within the web client.
Displays current web client information, including version details.
Procedure for logging out of the web client interface.
Introduction to the DIVAR Archive Player for viewing archived video recordings on a PC.
Specifies the recommended PC requirements for running the Archive Player application.
Explains that the Archive Player does not require installation and how the application file is managed.
Instructions on how to start the Archive Player application to view video files.
Options for switching display modes, selecting zones for zoom, and changing resolution.
Process for verifying the authenticity of individual video frames using the watermark feature.
How to exit the Archive Player interface.
Guidance on properly attaching an ESD strap to prevent damage to sensitive components.
Instructions and precautions for replacing the internal backup battery.
Steps for installing Hard Disk Drives into the DIVAR 3000 unit.
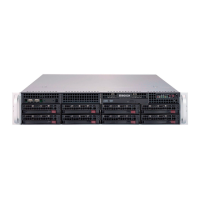
Steps for installing Hard Disk Drives into the DIVAR 5000 unit.
Instructions for installing a DVD drive into the DIVAR 3000 unit.
Instructions for installing a DVD drive into the DIVAR 5000 unit.
Detailed electrical, video, audio, control, and connector specifications for the DIVAR 3000.
Detailed electrical, video, audio, control, and connector specifications for the DIVAR 5000.
Lists relevant standards and directives for EMC, environment, low voltage, and safety compliance.
Information on proprietary Bosch software and other licensed components, including copyright notices.
Details Bosch software licensing terms and end-user license agreements.
Lists copyright notices for open-source licenses like GPL and SSL.
Provides warranty information and disclaimers for software and hardware components.
Lists tested DVD media compatibility for video export.
Recommended USB memory sticks for firmware updates and video export.
Lists tested portable HDDs compatible with the DIVAR for USB port connection.
| Operating System | Embedded Linux |
|---|---|
| Channels | 4 |
| Compression | H.264 |
| Motion Detection | Yes |
| Power Supply | 12V DC |
| Video Input | 4 channels |
| Audio Input | 4 channels |
| Audio Output | 1 channel |
| Hard Drive Capacity | Up to 2TB |
| Network Interface | 10/100 Mbps Ethernet |
| USB | 2 |
| Operating Temperature | 0°C |
| Recording Frame Rate | 25 fps (PAL), 30 fps (NTSC) |