English–111 609 929 J60 • (05.12) PS
Sawing
Clamp the work piece firmly according to its dimen
sions.
Set the required horizontal mitre angle and/or the ver
tical bevel angle.
Switch on the power tool.
Press the button 1 and move the tool arm slowly
downward with the handle 2.
Saw through the work piece with uniform advancing.
Switch off the power tool and wait until the saw blade
has come to a complete standstill.
Guide the tool arm slowly upward.
Sawing Equally Long Work Pieces
(see Figure
)
Loosen the winged nut 52 and position the length stop
38 to the required distance from the saw blade.
Retighten the winged nut.
Place the work piece against the length stop. Check
again with the aid of the cutting line marked by the la
ser if the length stop is correctly positioned.
Then saw the work piece and additional work pieces
to the same length according to the work steps in the
"Sawing" Section.
Special Work Pieces
When sawing curved or round work pieces, they must
be especially secured against slipping. At the cutting
line, no gap may exist between the work piece and the
fence or saw table.
In case necessary, a special fixture must be fabricated.
Changing the Table Insert
The red table insert 9 can become worn after long us
age of the power tool.
Replace a defective table insert.
Place the power tool in the working position.
Unscrew the screws 53 with the Phillips screwdriver
provided. (see Figure
)
Insert the new table insert 9 and screw in all screws 53
again.
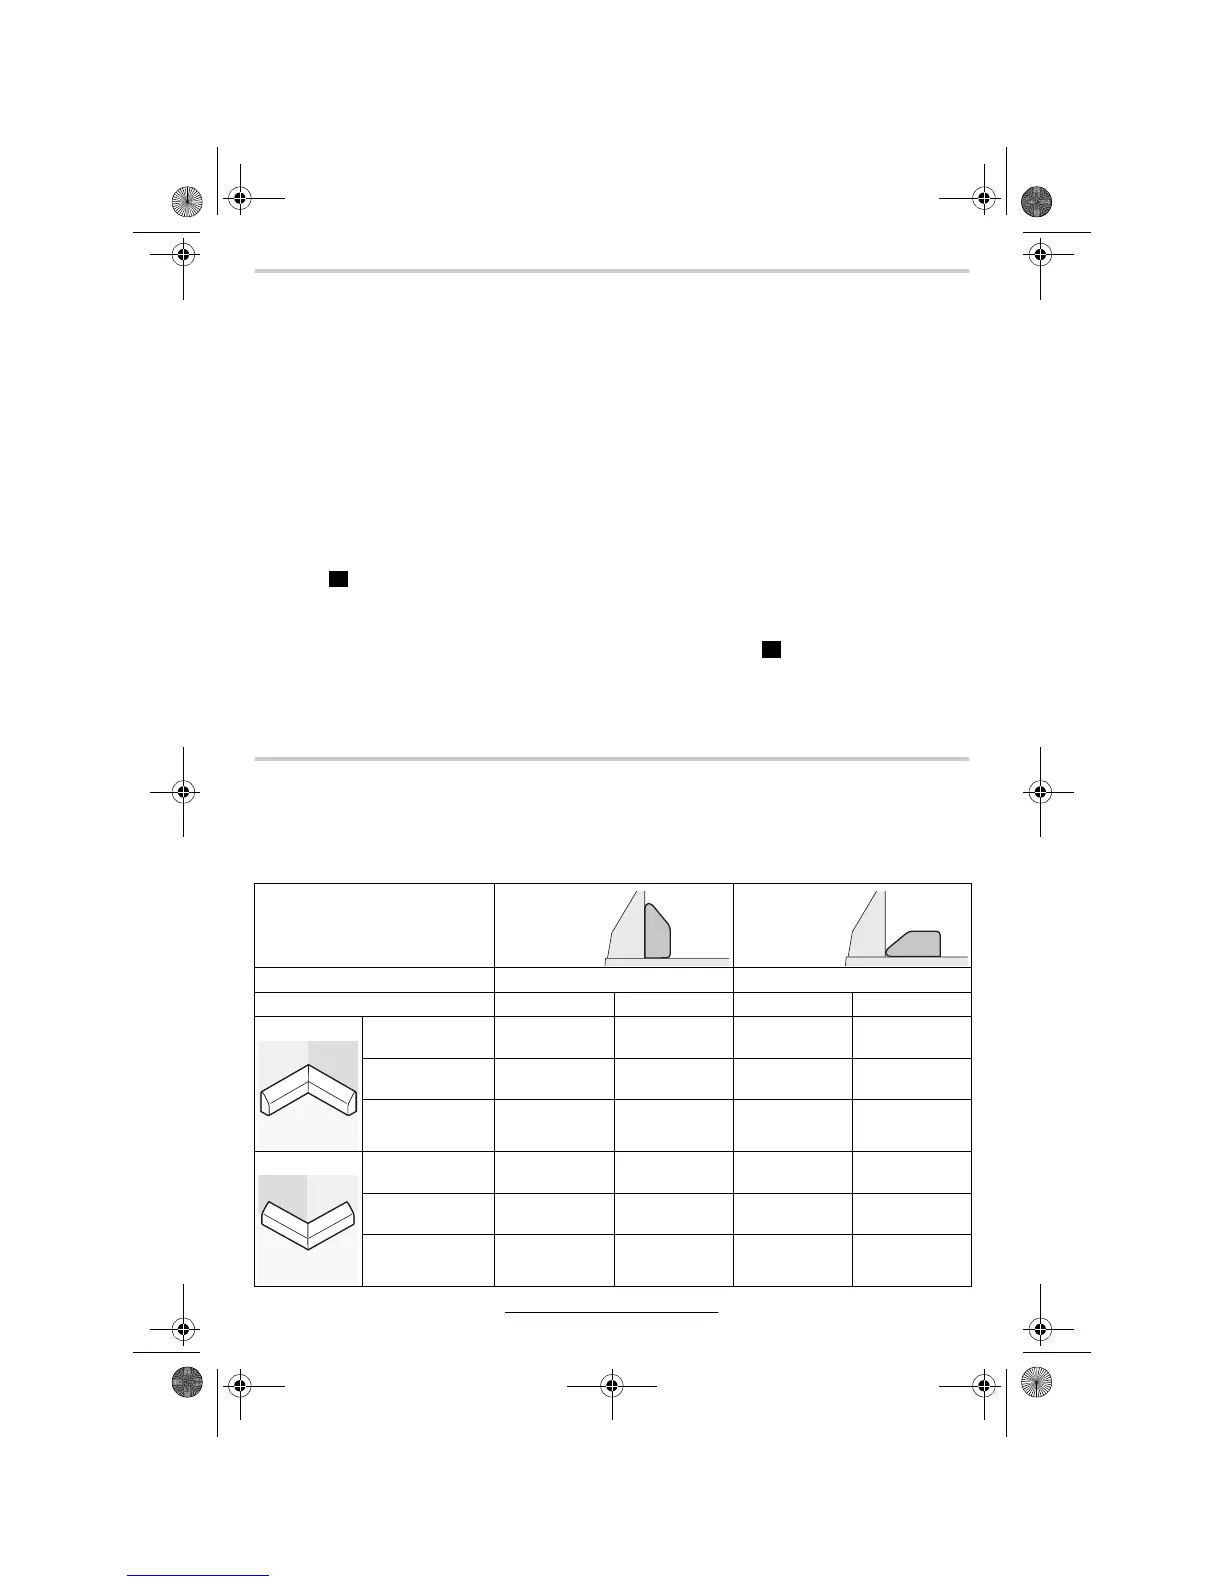
Working with Profile Mouldings (Floor or Ceiling Mouldings)
Profile mouldings can be worked with two different
methods:
– Placed against the fence,
– Lying flat on the saw table.
Always make trial cuts with the mitre angle settings
first on scrap wood.
Q
R
Setting Placed
Against the
Fence
Lying Flat
on the Saw
Table
Vertical Bevel Angle 0° 45°
Floor Moulding Left Side Right Side Left Side Right Side
Inner Corner Horizontal Mitre
Angle
45° Left 45° Right 0° 0°
Positioning of the
Work Piece
Lower edge on
the saw table
Lower edge on
the saw table
Upper edge on
the fence
Lower edge on
the fence
The finished work
piece is located …
…
to the left of
the cut
…
to the right of
the cut
…
to the left of
the cut
…
to the left of
the cut
Outer Corner Horizontal Mitre
Angle
45° Right 45° Left 0° 0°
Positioning of the
Work Piece
Lower edge on
the saw table
Lower edge on
the saw table
Lower edge on
the fence
Upper edge on
the fence
The finished work
piece is located …
…
to the right of
the cut
…
to the left of
the cut
…
to the right of
the cut
…
to the right of
the cut
PCM10_WEU.book Seite 11 Donnerstag, 1. Dezember 2005 9:16 09