English–81 609 929 J73 • (06.03) PS
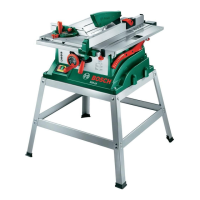
For machine versions with table stand:
–Table stand 53
(12 profiles, 4 caps)
– "Table stand" attachment set 52
(24 screws with nuts for assembly, 4 screws with
nuts for attachment to the power tool, 4 washers)
Check the power tool for possible damage.
Before further use of the power tool, check that all the
protective devices are fully functional. Any lightly dam$
aged parts must be carefully checked to ensure flaw$
less operation of the tool. All parts must be properly
mounted and all conditions fulfilled that ensure fault$
less operation.
Damaged protective devices and parts must be imme$
diately replaced by an authorised service centre.
Initial Operation
Remove all parts supplied carefully from the packag$
ing.
Remove all packing material from the power tool and
the accessories provided.
Take special care that the packing material under the
motor block is removed.
Tools Required in Addition to those
Delivered
– Phillips screwdriver
– Combination square
– Ring or open$ended spanner (13 mm)
for assembling the table stand
Sequence for Mounting
For ease of assembly, observe the sequence for
mounting the delivered machine elements.
1. Mounting from Below
– Extraction hose
– Bottom sheet metal
2. Mounting from Above
– Riving knife
– Protective hood
–Table extension
– Parallel fence and angle guide
–Insert plate
Mounting from Below
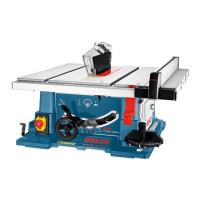
Place the power tool upside down so that it rests on
the saw table 11.
Mounting the Extraction Hose
(see Figure )
Connect the sawdust ejector on the saw blade hous$
ing to the sawdust ejector 30 on the machine housing
with the extraction hose 32.
Mounting the Bottom Plate
(see Figure )
Place the bottom plate 33 in the intended cut$out so
that the mounting holes match the holes in the bottom
plate.
Attach the bottom plate with the Philips head screws
provided.
Mounting from Above
Turn the power tool over so that it is in the correct po$
sition for working.
Mounting the Riving Knife
(see Figure )
Use the "riving knife" attachment set 34 (2 screws) for
mounting.
Position the riving knife 4 in front of the holder 36 so
that the drillings in both parts are in alignment.
Screw the riving knife to the holder with the screws.
The riving knife must be aligned with the saw blade 35
to prevent jamming of the work piece.
Mounting the Protective Hood
(see Figure )
Use the "protective hood" attachment set 37 for
mounting (screw, nut, washer).
Loosen the three side screws 38 so that the protective
hood can be spread somewhat at the rear.
Place the protective hood 6 over the riving knife 4.
Retighten the screws 38.
Insert the bolt 37 through the drilling on the protective
hood and the riving knife. The square on the bolt must
engage in the corresponding cut$out in the protective
hood.
Place on the washer and the nut.
Tighten the nut sufficiently so that the protective hood
remains secured in any position to which it is set.
a
b
c
d
PTS10_WEU.book Seite 8 Donnerstag, 23. März 2006 11:47 11
 Loading...
