20
22
23
24
25
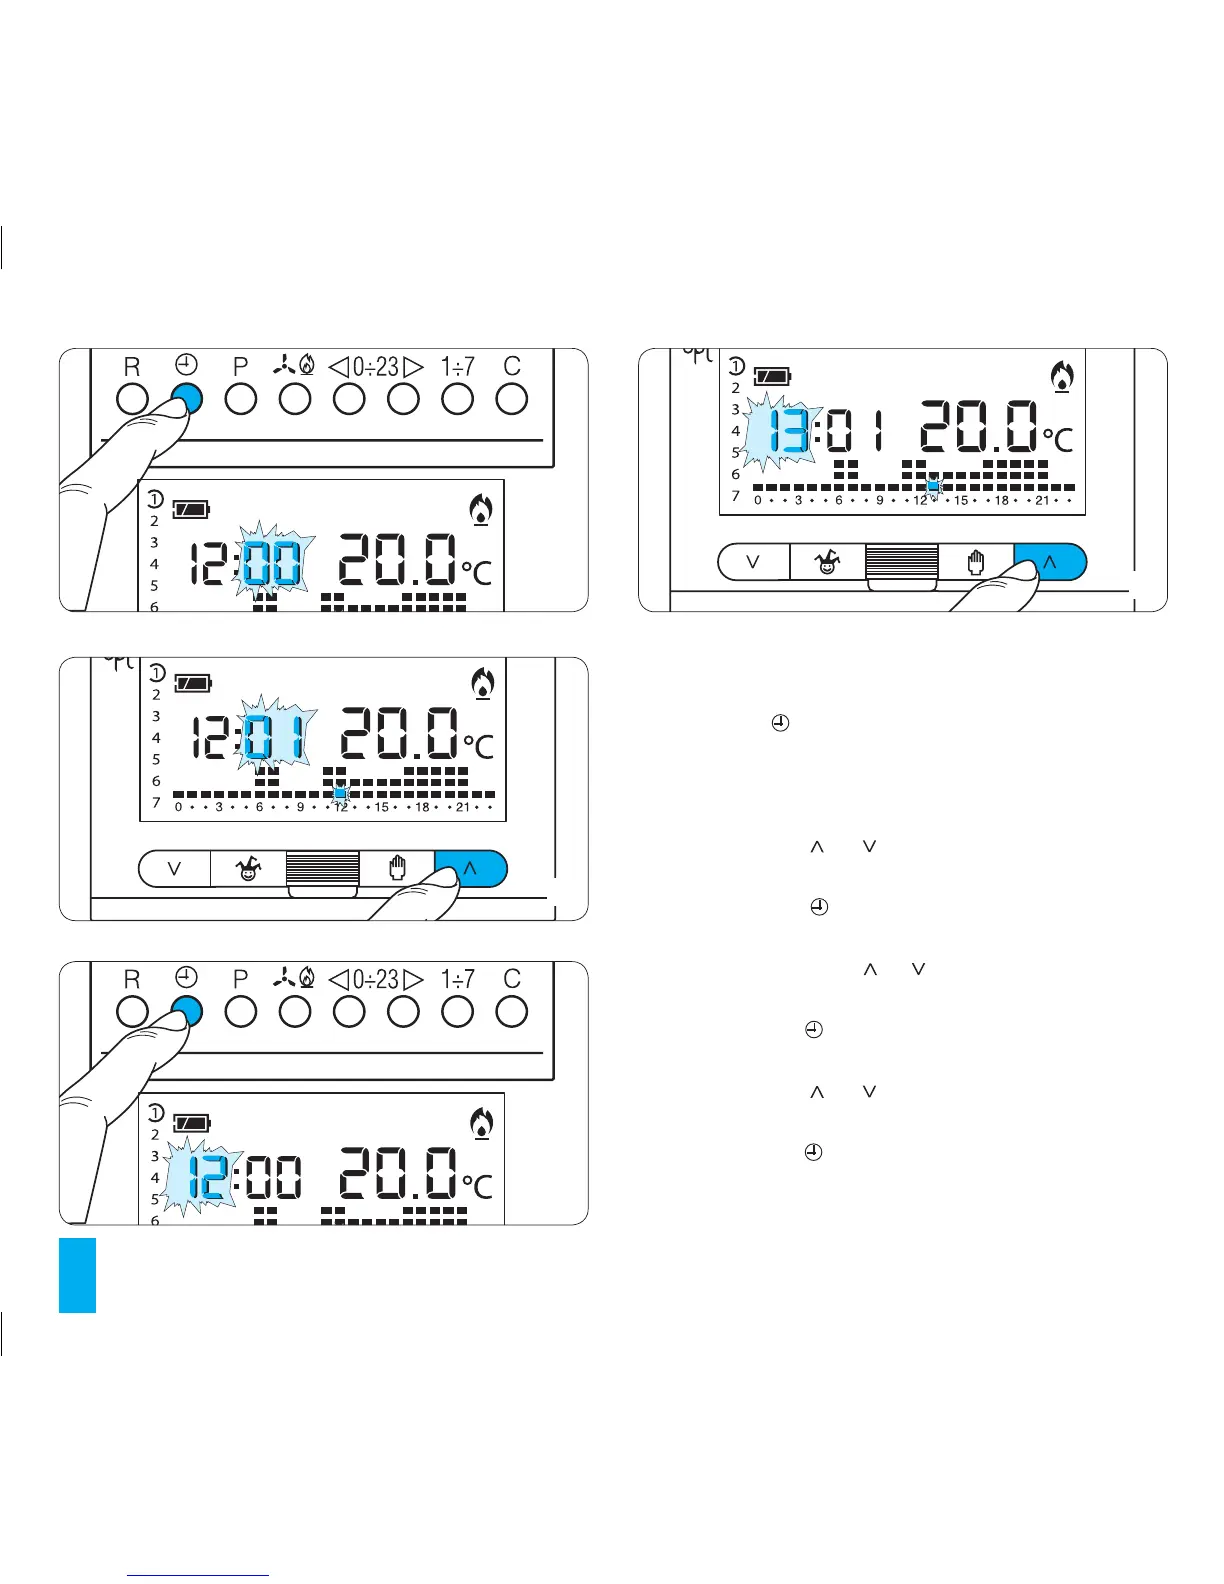
3 SETTING THE CLOCK
3.1-
Remove the main unit of the unit.
3.2- Press the button twice (fig. 22).
The first press of the button simply activates the back-
light.
The minutes digits flash.
3.3- Press button or until the correct value for the
minutes is reached (fig. 23).
3.4- Press button (fig. 24).
The hour digits flash.
3.5- Press either button or until the correct value for
the hour is reached (fig. 25).
3.6- Press button (fig. 26).
The indicator for the days of the week flashes.
3.7- Press button or until the correct value for the
minutes is reached (fig. 27).
3.8- Press button to end the procedure for setting the
time and day (fig. 28).
The colon between the hours and minutes flashes to confirm