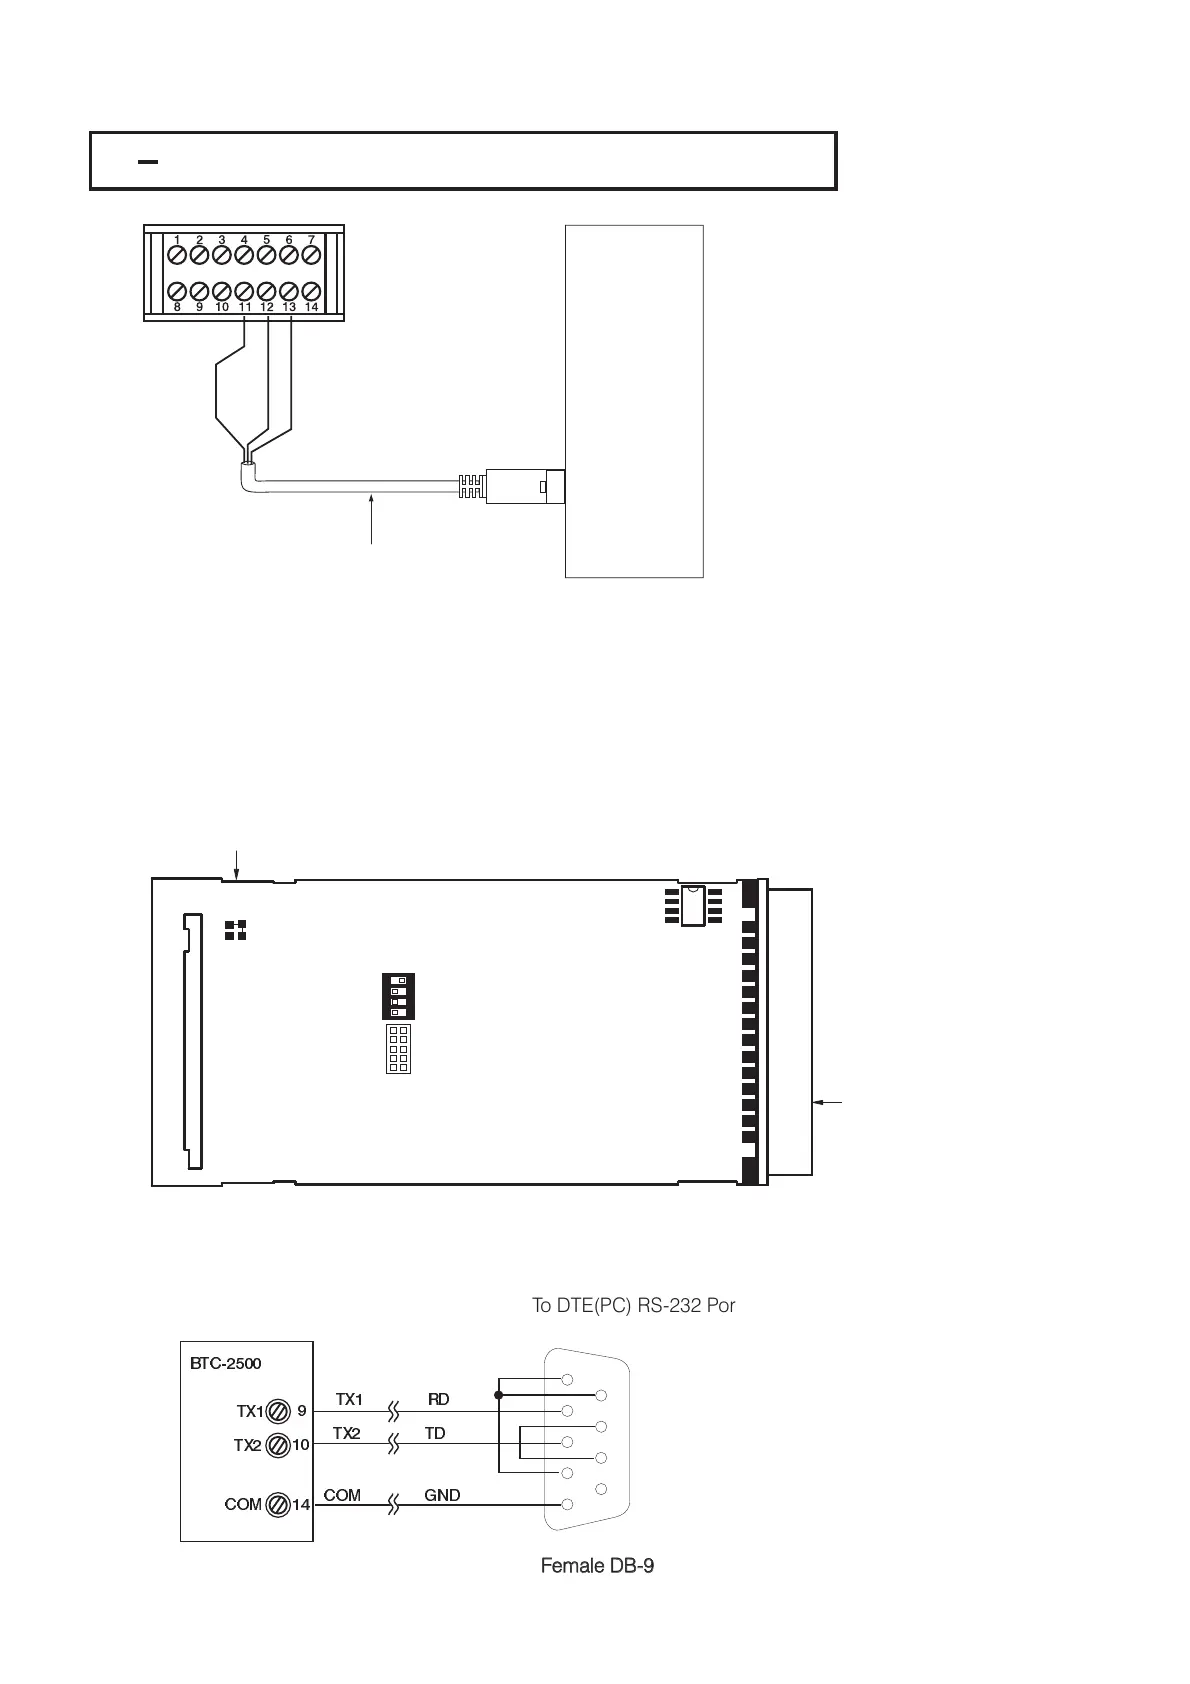
TX1 TX2
COM
PC
9-pin
RS-232 port
9-pin
RS-232
port
CC94-1
2 16 RS-2322 16 RS-232
Note:
If the BTC-2500 is configured for RS-232 communication, the input 2
and EI ( Event Input ) are disconnected internally. The unit can no longer
perform event input function (EIFN) and input 2 function.
If the BTC-2500 is configured for RS-232 communication, the input 2
and
EI ( Event Input ) are disconnected internally. The unit can no longer
perform
event input function (EIFN) and input 2 function.
Figure 2.19
RS-232 Wiring
Figure 2.19
RS-232
Wiring
UM25001C
37
When you insert a RS-232 module (CM94-2) to the connectors on CPU board
(C250), the jumper J51 and J52 be modified as following: J52 must be
shorted and J51 must be cut and left open. Location of jumper is shown in the
following diagram.
must
When you insert a RS-232 module (CM94-2) to the connectors on CPU board
(C250),
the jumper J51 and J52 be modified as following: J52 must be
shorted
and J51 must be cut and left open. Location of jumper is shown in the
following
diagram.
must
If you use a conventional 9-pin RS-232 cable instead of CC94-1, the cable must
be modified according to the following circuit diagram.
If you use a conventional 9-pin RS-232 cable instead of CC94-1, the cable must
be
modified according to the following circuit diagram.
1
2
3
4
5
6
7
8
9
BTC-2500
TX1
TX1 RD
9
10
14
TX2
TX2 TD
COM
COM GND
Female DB-9Female DB-9
To DTE(PC) RS-232 PortTo DTE(PC) RS-232 Port
1 DCD
2RD
3TD
4 DTR
5 GND
6 DSR
7 RTS
8 CTS
9RI
1 DCD
2
RD
3
TD
4
DTR
5
GND
6
DSR
7
RTS
8
CTS
9
RI
Figure 2.21
Configuration of RS-232
Cable
Figure 2.21
Configuration
of RS-232
Cable
Figure 2.20
Location of Jumper J51/J52
Figure 2.20
Location
of Jumper J51/J52
Jumper
1
ON DIP
234
SW51
CN55
CN54
U52
1
J52
J51
Display


 To Next Page