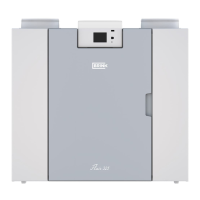
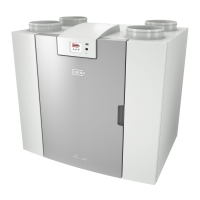
14 Elan 10 2.0 / Elan 16 2.0 / Elan 25 2.1 Revision D
&KDSWHU,QVWDOODWLRQ
5.11 Electric connections
The appliance comes with a 230 V mains plug.
On delivery, the 230 V mains cable is stored behind the bottom
SDQHO'RZQÀRZYHUVLRQVHHRUEHKLQGWKHXSSHUSDQHO
8SÀRZYHUVLRQ
5.11.1 Connecting the power plug
The appliance can be connected to an easily accessible,
earthed wall socket with the plug that is mounted to the ap-
pliance. The electric installation must comply with the require-
ments of your power company.
Various breakout tabs are provided for routing the power plug
out of the appliance.
Warning
The fan and control board carry a high voltage.
Always take the voltage from the appliance by
pulling the power plug when working on the ap-
pliance.
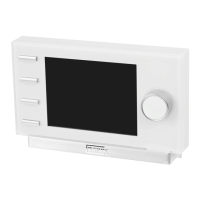
5.11.2 Ventilation switch
With an optional 4-way ventilation switch (connected to mo-
GXODUFRQQHFWRU ; WKHXVHUFDQVHW D QXPEHURIRSHUDWLQJ
modes.
For electric connection of the 4-way ventilation switch, see
§11.2.
The position of the multiple switch is indicated on the appliance
GLVSOD\EHKLQGWKHYHQWLODWLRQV\PERO
Note: The multiple switch functions differ when the appliance
is set to the outdoor air programme!
Position 4-way switch 2SHUDWLQJPRGHVWDQGDUGVWHSQRWR
,QFUHDVHGIDQVHWWLQJZLWKFRROLQJVZLWFKHGRQKLJK
6\VWHPIDQUXQVFRQWLQXRXVO\DWFRROLQJDLUÀRZUDWHVZLWFKFRROLQJRXWSXW
1
&RPIRUWVHWWLQJUHJXODU
- System fan controlled by system temperature sensor; at no demand
WKHV\VWHPFRQWLQXRXVO\UXQVDWPLQLPXPDLUÀRZUDWH
2
Ventilation setting off (stand-by
- System fan controlled by system temperature sensor; at no heat demand
the system fan is stopped
3
,QFUHDVHGIDQVHWWLQJKLJK
6\VWHPIDQFRQWLQXRXVO\UXQVDWPD[LPXPVHWDLUÀRZUDWH
Position 4-way switch 2SHUDWLQJPRGHDWRXWGRRUDLUSURJUDPPHVWHSQRWR
,QFUHDVHGIDQVHWWLQJZLWKFRROLQJVZLWFKHGRQKLJK
6\VWHPIDQUXQVFRQWLQXRXVO\DWFRROLQJDLUÀRZUDWHVZLWFKFRROLQJRXWSXW
1
&RPIRUWVHWWLQJUHJXODU
6\VWHPIDQUXQVFRQWLQXRXVO\DWPD[LPXPDLUÀRZUDWH
2
Ventilation setting off (stand-by
6\VWHPIDQUXQVFRQWLQXRXVO\DWPLQLPXPDLUÀRZUDWH
3
,QFUHDVHGIDQVHWWLQJKLJK
6\VWHPIDQUXQVFRQWLQXRXVO\DWFRROLQJDLUÀRZUDWH
Note:
Make sure that the mains cable is always free
from the exchanger when it is routed outside!
 Loading...