6.5 Quick Start Guide
Once all parameters have been set:
1. At the Master Controller press the “M” button until
“Heating” is displayed at the bottom of the screen
2. Press the On/Off button to call for heating
3. Increase the temperature set point to above room
temperature for Zone A only
4. Confirm Zone A is operating as intended
5. Repeat independently for the remaining zones
6. Turn on all zones to confirm system operation
7. Turn the unit off once Heating setup is confirmed
8. Press the “M” button until “Cooling” is displayed at the
bottom of the screen
9. Press the On/Off button to call for cooling
10. Decrease the temperature set point to below room
temperature for Zone A only
11. Confirm Zone A is operating as intended
12. Repeat independently for the remaining zones
13. Turn on all zones to confirm system operation
14. Turn the unit off once Cooling setup is confirmed
7.0 SYSTEM HAND OVER
1. Set the time and day
2. System operation
3. Product and warranty registration
4. Service notification
5. ZonePlus commissioning information
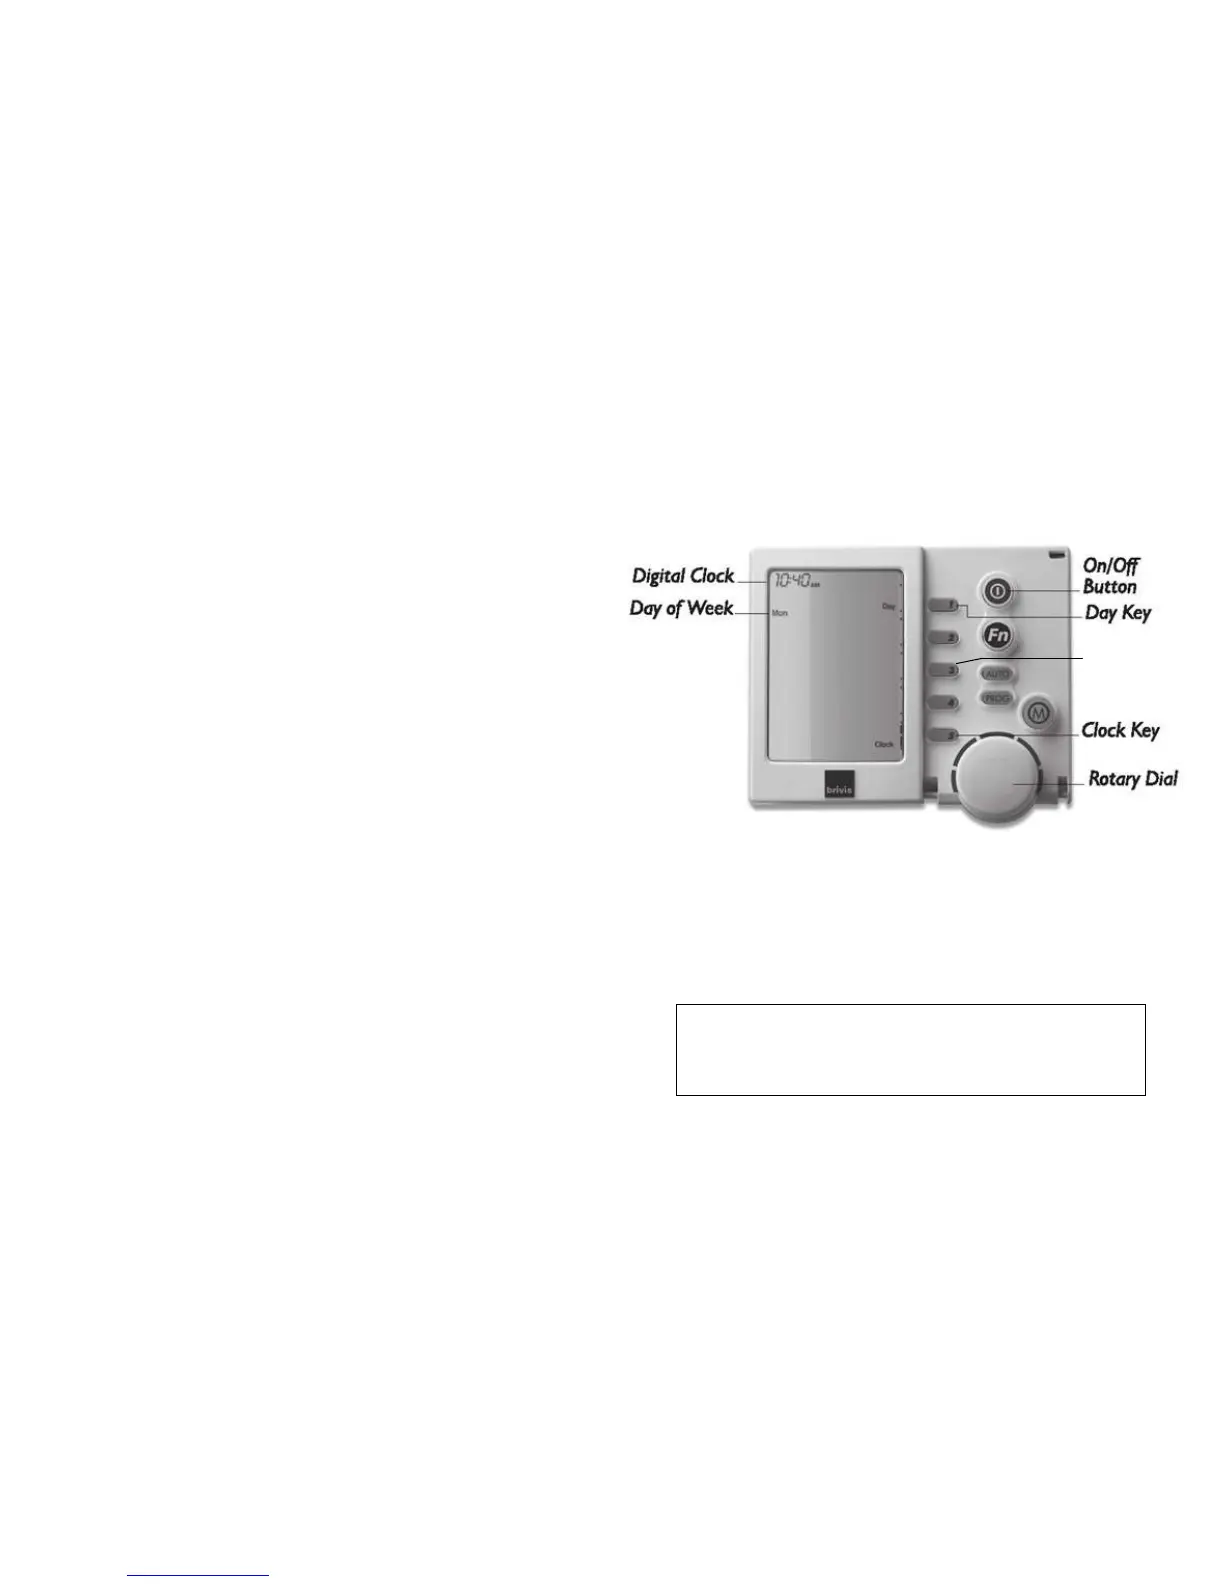
7.1 Setting the Time & Day
This is to be done at the Master Networker which displays the
word “Clock” opposite Key “5” or the Clock Key.
• Press the On/Off button to turn the System OFF.
• Press Key 5, Clock Key, and the screen will display the message
"Clock setting mode", and then the Digital Clock will flash
• Use the Rotary Dial to select the correct time.
• To set the day, press Key 1, the Day Key until the correct day of
the week appears on the left of the screen, e.g. "Mon".
• Press Key 5 the Clock Key again to save your new settings