ZonePlus Checklist
Correct system accessories and configuration for specific
heater dependent zone requirements (Table 2, p.6)
Correct wiring (5.2, p.7)
Correct Sensor ID set up (6.0, p.11)
Correct sequence of System Power Up (6.2, p.12)
Correct Heater Zoning Parameter set up (6.3, p.14)
Correct Networker Parameter set up (6.4, p.14)
No airflow
• Physically check zone motor to ensure mechanically sound
• Check wiring connection on the control board
Not enough airflow:
• Ensure the return air duct is not restricted or too small
• The supply air ductwork may be under sized or obstructed
• Ensure filter is not blocked
• If “ID105” and “ID111” (Refrigerated Cooling) are set to
“1” this will enable Fan Scaling.
• At this point you would have cycled though each zone
independently and set an appropriate flow rate
• If any changes after this point have been made to the
zoning configuration your Fan Scaling may have been reset.
You will need to reset your fan speeds for each zone, refer
to section 6.4.6 & 6.4.7, p.17
Airflow in wrong zone
• The incorrect sensor ID may have been assigned to the
wrong set of zoning parameters
• Check the polarity of the normally open (N/O) and normally
closed (N/C) damper motor wires at the heater control
board or 516 Zone Module
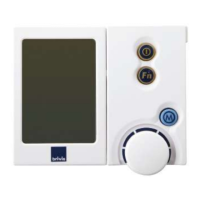
In MTSP conditions you cannot see the zone sensors on
the screen of the Master Controller; top right hand side
corner
• The zone sensor identification numbers may have been
reset to “1” if MTSP conditions were enabled at the end of
zoning parameter inputs
• Check the NT-1 jumper locations are in the correct position
• Each sensor must have a unique address. Press Key “3”
to access a sensor within the system. The sensor being
accessed will flash it’s LED once every second. Confirm
the sensor in question is in the correct zone – refer to
section 6.4.4, p.15
Blank screens when 2 or more NC-6s are installed:
Unit ID conflict between two Master NC-6 Controllers
Changing NC-6 unit ID
• With the NC-6 Slave user interface off the backing plate
hold down Keys “3” & “5” simultaneously
• Continue to hold Keys “3” & “5” and mount the interface to
the backing plate
• Do not release Key “3” & “5” for another five seconds.
• Eight large square blocks will appear at the top of the
screen during the reset
• Release Keys “3” & “5” and a message will scroll across
the screen “resetting this networker’s address!”
• After this message, “n00 ID00:0” will appear
• Rotate the dial to set the new NC-6 unit ID number (cannot
be “1”)
• Press the On/Off button to exit