7
1
After the cleaning cycle is finished, the LCD
shows;
2
Make sure the paper is loaded in the paper
tray.
Press the
Fax Start
key.
3
The machine starts printing the PRINT
QUALITY CHECK SHEET (only during
initial ink cartridge installation).
1
The LCD shows:
Check the quality of the four colour blocks
printed on the sheet.
(BLACK/CYAN/YELLOW/MAGENTA)
2
If all lines are clear and visible, press the
key on the dial pad to go to STEP B
Alignment Check.
—
OR
—
If you can see missing short lines, press the
key on the dial pad and go to step 3.
3
The LCD asks you if the print quality is OK
for each colour. Press the key or key
on the dial pad.
When you have finished selecting the
key (
YES
) or the key (
NO
) for each
colour, the LCD shows:
Press the key (
YES
), and then machine
starts cleaning the colours.
After cleaning is finished, press the
Fax Start
key. The machine starts printing
PRINT QUALITY CHECK SHEET again
and goes back to the first step of STEP A.
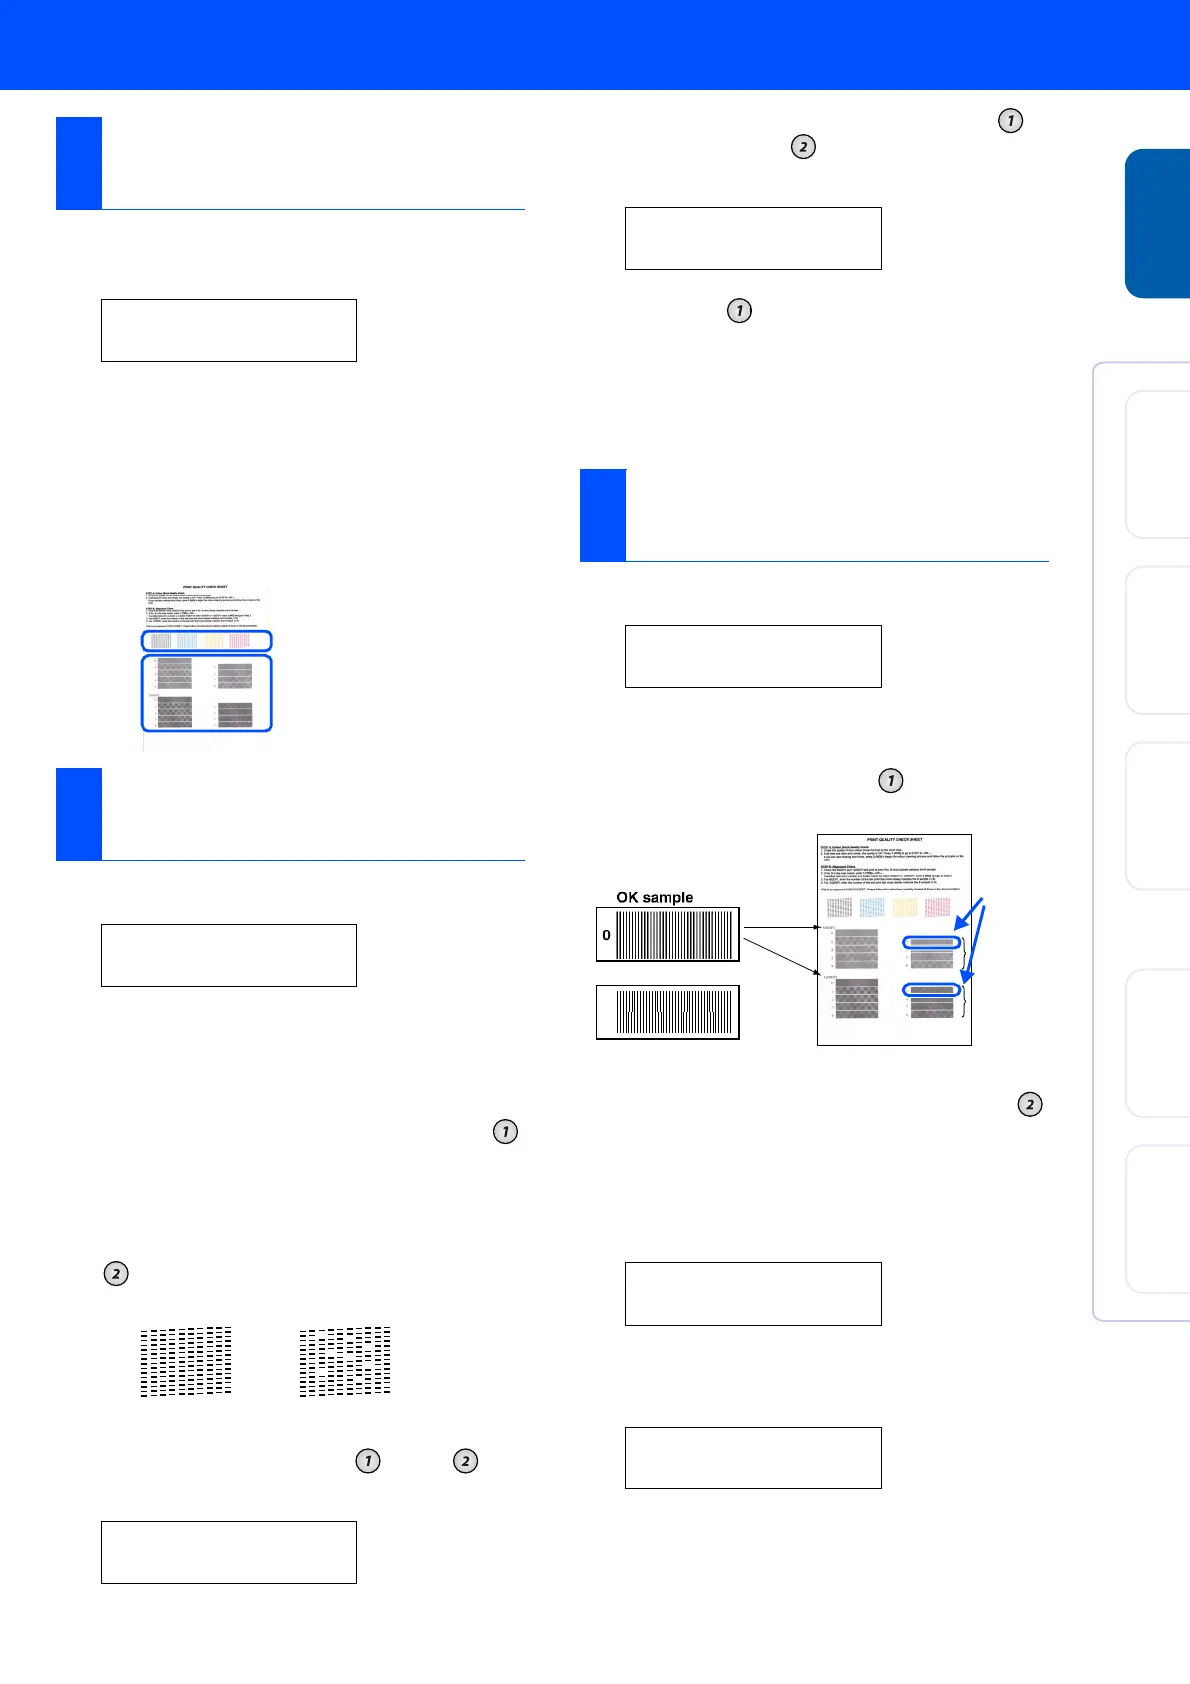
1
The LCD shows:
Check the 600 DPI and 1200 DPI test print
to see if No.5 most closely matches the OK
sample (No.0). Press the key if No.5
matches it.
1
If another test print number is a better match
for either 600 DPI or 1200 DPI, press the
key to select
NO
and go to step 2.
2
For 600 DPI, select the number from 1 to 8
that most closely matches the No.0 sample
and enter it using the dial pad.
3
For 1200 DPI, enter the number from 1 to 8
that most closely matches the No.0 sample.
The Quality check is now complete.
6
Colour Block Quality
and Alignment Check
SET PAPER AND
PRESS FAX START
Step A:Colour Block
Quality Check
IS STEP "A" OK?
1.YES 2.NO
BLACK OK?
1.YES 2.NO
Check in Step A
Check in Step B
OK
Poor
START CLEANING?
1.YES 2.NO
Step B:Alignment
Check
IS STEP "B" OK?
1.YES 2.NO
600DPI ADJUST
SELECT BEST #
1200DPI ADJUST
SELECT BEST #
600 DPI
1200 DPI
Do NOT select
No.5
Setting Up
the machine
Windows
®
USB
Windows
®
Parallel
Windows
NT
®
4.0
Mac
®
OS
8.5-9.2
Mac
®
OS X
10.1/10.2.1 or greater
 Loading...