Home > Paper Handling > Load Paper > Load Paper in Paper Tray #1 / Paper Tray #2 > Load Cut-Sheet
Paper or Photo Paper in the Paper Tray #1 / Paper Tray #2
Load Cut-Sheet Paper or Photo Paper in the Paper Tray #1 / Paper Tray
#2
• If the [Check Paper] setting is set to [On] and you pull the paper tray out of the machine, a message
appears on the LCD, allowing you to change the paper size and paper type.
• Load only one size and type of paper in the paper tray at a time.
• When you load a different paper size in the tray, you must change the Paper Size setting in the machine or
the paper size setting on your computer.
Doing this enables the machine to automatically feed paper from the appropriate tray if Auto Tray Select
has been set in the printer driver (Windows) or on the machine. (MFC-J4535DW)
• You can use only plain paper in Tray #2. (MFC-J4535DW)
These instructions describe how to load paper in Tray #1.
• (MFC-J4535DW) The steps for Tray #2 are very similar.
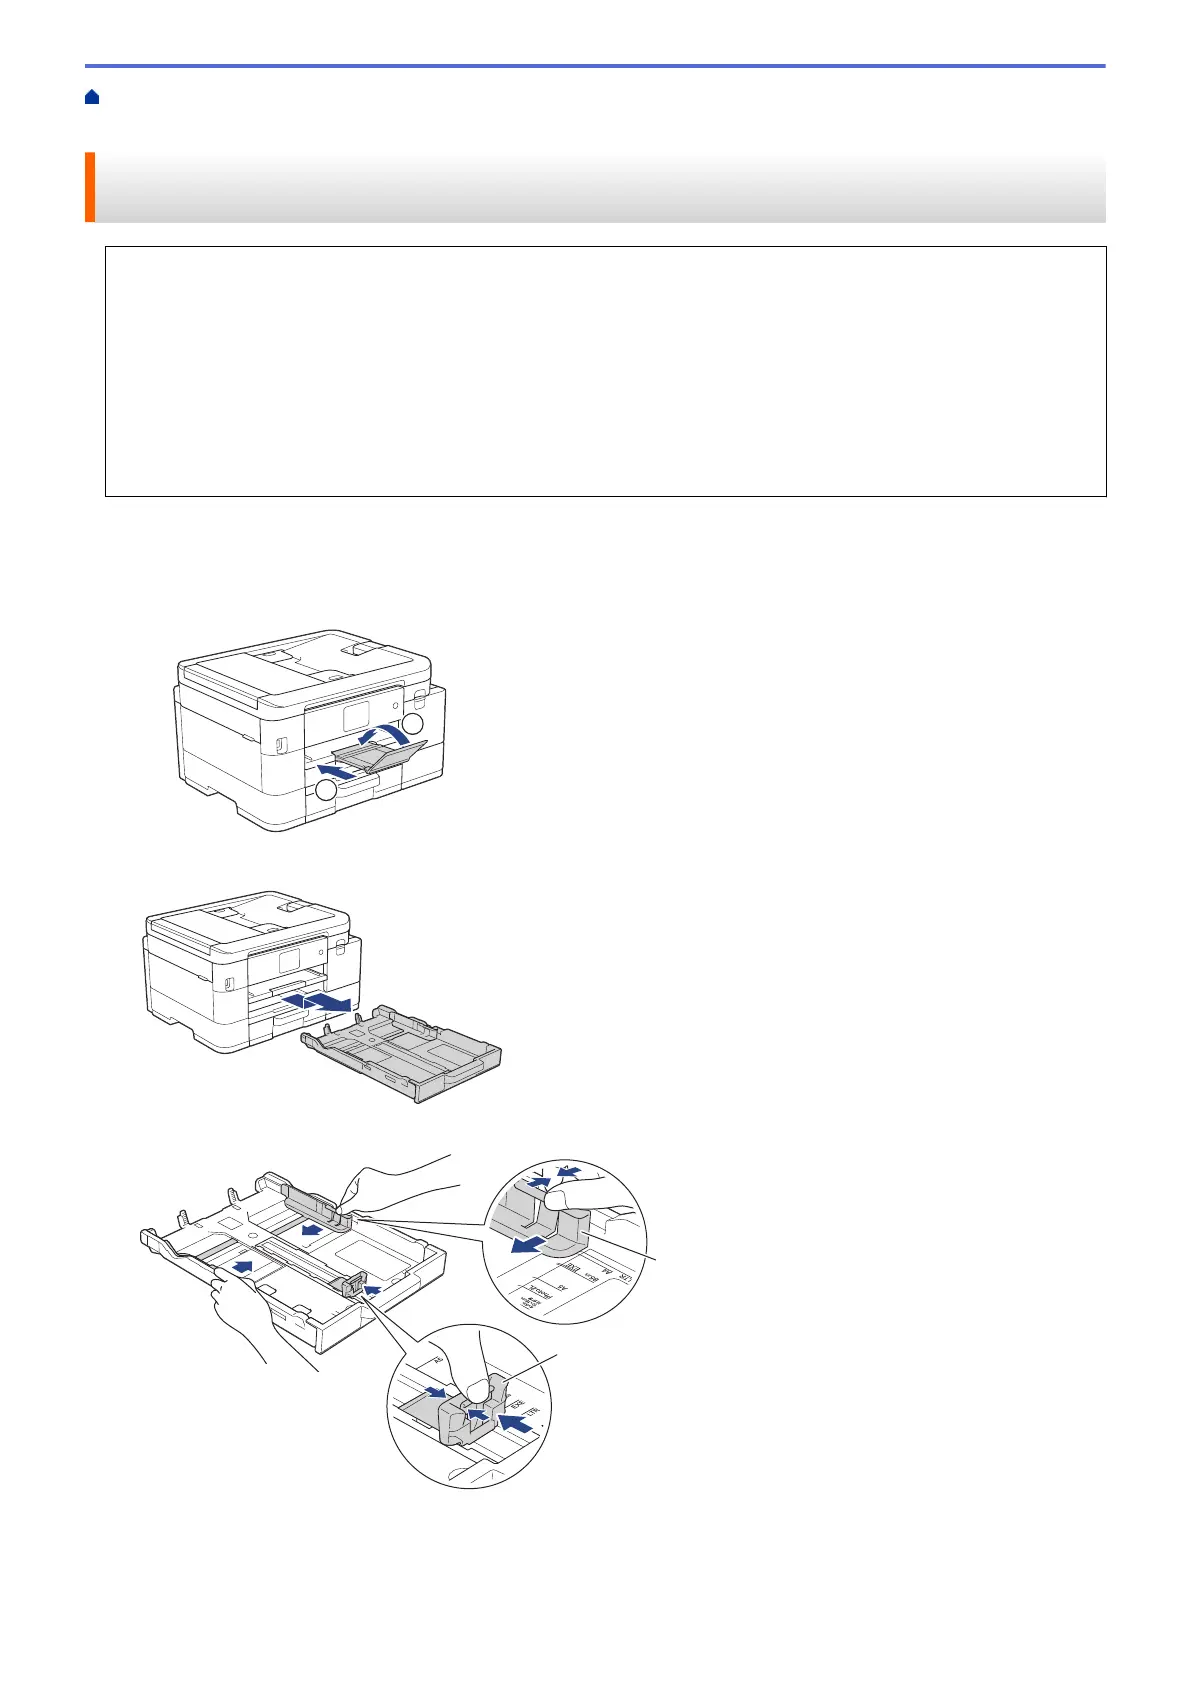
1. If the paper support flap (1) is open, close it, and then close the paper support (2).
2. Pull the paper tray completely out of the machine.
3. Gently press and slide the paper width guides (1) and then the paper length guide (2) to fit the paper size.
4. Fan the stack of paper well to avoid paper jams and misfeeds.
31
 Loading...