EasyManua.ls Logo

Brother T-8452C User Manual

Brother T-8452C
94 pages
To Next Page IconTo Next Page
Page #1 background imageLoading...
Page #1 background image
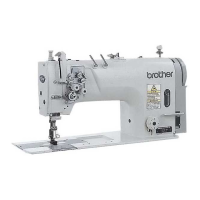
T-8421C, 8422C
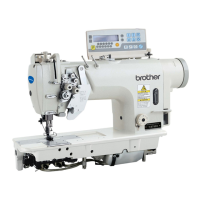
T-8452C, 8722C
T-8752C
Please read this manual before using the machine.
Please keep this manual within easy reach for quick reference.
TWIN NEEDLE DIRECT DRIVE LOCK STITCHER
INSTRUCTION MANUAL

Table of Contents

Questions and Answers:

Brother T-8452C Specifications

General IconGeneral
BrandBrother
ModelT-8452C
CategorySewing Machine
LanguageEnglish

Summary

SAFETY INSTRUCTIONS

Notes on Safety

General safety guidelines and precautions for operating the sewing machine safely.

Environmental Requirements

Specifies safe operating conditions regarding temperature and humidity.

Installation Safety

Safety precautions and requirements for installing the sewing machine.

Sewing Safety

Safety measures and warnings to follow during sewing operations.

Cleaning Safety

Safety precautions to take before and during the cleaning process.

Maintenance and Inspection Safety

Safety guidelines for performing maintenance and inspections.

Warning Labels

Identification and explanation of warning labels on the machine.

NAMES OF MAJOR PARTS

Machine Components Overview

Identification and brief description of the main parts of the sewing machine.

INSTALLATION

Machine Setup Location

Guidelines for choosing an appropriate location to set up the sewing machine.

Carrying the Machine

Instructions on how to safely carry the sewing machine.

Tilting Machine Head

Procedures for tilting the machine head back and returning it upright.

Table Processing Diagram

Diagram detailing the required table processing for installation.

Connecting Components

Steps for connecting various machine components like the control box.

Oil Pan and Rubber Cushions

Installation procedures for the oil pan and rubber cushions.

Machine Head and Operation Panel

Instructions for mounting the machine head and operation panel.

Knee Lifter Plate Adjustment

Steps for installing and adjusting the knee lifter plate.

Lubrication Procedures

Detailed instructions for lubricating the sewing machine via oil cover and tank.

Connecting Cords and Ground Wire

Guidelines for connecting electrical cords and ensuring proper grounding.

Test Operation

Procedures for testing machine operation using the treadle.

Adjusting Treadle Operation

Steps to adjust treadle sensitivity and stroke for optimal operation.

PREPARATION BEFORE SEWING

Installing the Needle

Step-by-step guide on how to correctly install a sewing machine needle.

Removing the Bobbin

Instructions for safely removing the bobbin from the machine.

Winding the Lower Thread

Procedure for winding thread onto the lower bobbin.

Installing the Bobbin

Guide on how to properly insert the wound bobbin into the rotary hook.

Threading the Upper Thread

Instructions for threading the upper thread through the machine.

Adjusting Stitch Length

How to adjust the stitch length dial for desired stitch size.

Using the Knee Lifter

Explanation of how to operate the knee lifter for raising the presser foot.

Using the Thread Wiper

Guide on operating the thread wiper for models with thread trimmers.

Corner Sewing Method

Techniques for sewing corners, including stopping needle bars.

Number of Stitches Guide

Reference chart for the number of stitches required for corner sewing.

USING THE G50 OPERATION PANEL (BASIC OPERATIONS)

Panel Names and Functions

Overview of the keys and displays on the G50 operation panel.

Sewing Start and End Backtack Stitches

How to set and perform start and end backtack stitches.

Sewing Continuous Backtack Stitches

Procedure for sewing continuous backtack stitches and automatic sewing.

Sewing Fixed Stitches

Instructions for setting and sewing a specific number of fixed stitches.

Sewing Pleat Presser Stitches

Guide on performing pleat presser stitch operations.

Using the Lower Thread Counter

How to set and use the lower thread counter for monitoring thread levels.

USING THE G50 OPERATION PANEL (ADVANCED OPERATIONS)

Panel Names and Functions (Advanced)

Introduction to advanced functions and keys on the G50 panel.

Adjusting Needle Up Stop Position

How to set the needle stop position to either up or down.

LOCK Key Function

Explanation of the LOCK key and its effect on panel operations.

Resetting Settings to Defaults

Procedure to reset all panel settings to their factory defaults.

USING THE G10 OPERATION PANEL (BASIC OPERATIONS)

Panel Names and Functions (Basic)

Overview of the keys and displays on the G10 operation panel.

Sewing Start and End Backtack Stitches (G10)

How to perform start and end backtack stitches using the G10 panel.

Sewing Continuous Backtack Stitches (G10)

Procedure for sewing continuous backtack stitches on the G10 panel.

USING THE G10 OPERATION PANEL (ADVANCED OPERATIONS)

Changing Needle Stop Position (G10)

Setting the needle stop position using the G10 operation panel.

Slow Start Function (G10)

Enabling and disabling the slow start feature for controlled sewing.

Correction Sewing Function (G10)

How to enable and disable correction sewing for precise adjustments.

Thread Trimming Lock (G10)

Activating and deactivating the thread trimming lock function.

Setting Maximum Sewing Speed (G10)

Adjusting the maximum sewing speed for different operations.

Adjusting Needle Up Stop Position (G10)

Fine-tuning the needle's stop position for better sewing control.

Lock Function (G10)

How to turn the lock function on and off to prevent accidental changes.

Resetting Settings to Defaults (G10)

Procedure to initialize all G10 panel settings to their original values.

SEWING

Performing Basic Sewing

Steps for preparing and starting a basic sewing operation.

Backtacking Operation

How to perform backtacking to secure stitches.

Sewing Condensed Stitches

Techniques for sewing stitches close together for condensed seams.

THREAD TENSION

Adjusting Thread Tension

Guide to adjusting upper and lower thread tensions for proper stitch formation.

Adjusting Presser Foot Pressure

How to set the presser foot pressure for different materials.

Adjusting Presser Foot Floating Amount

Fine-tuning the presser foot's floating amount for material handling.

Adjusting Trailing Length After Thread Trimming

Setting the thread trailing length after automatic thread trimming.

Adjusting Thread Take-Up Amount

How to adjust the thread take-up amount for optimal thread flow.

CLEANING

Daily Cleaning Procedures

Routine cleaning steps to maintain machine performance.

Lubricating via Oil Cover

Instructions for lubricating the machine through the oil cover.

Applying Grease (Semi-Dry Specs)

Procedure for applying grease when a "GrUP" notification appears.

ADJUSTING THE ROTARY HOOK LUBRICATION AMOUNT

Checking Lubrication Amount

Method to check the oil supply to the rotary hook.

Adjusting Lubrication Amount

Steps to adjust the oil flow to the rotary hook.

STANDARD ADJUSTMENT

Safety Switch Position

How to adjust the safety switch position for correct operation.

Thread Take-Up Spring Amount

Adjusting the thread take-up amount by modifying stopper heights.

Thread Take-Up Spring Tension

How to adjust the tension of the thread take-up springs.

Clearance: Rotary Hook and Needle Plate

Adjusting the gap between the rotary hook and the needle plate.

Clearance: Rotary Hook and Opener

Adjusting the gap between the rotary hook and the opener.

Presser Foot Height

How to adjust the height of the presser foot.

Needle and Rotary Hook Timing

Procedure for setting the timing between the needle and rotary hook.

Installing the Feed Dog

Steps for correctly installing the feed dog.

Feed Dog Position

Adjusting the forward-back and left-right position of the feed dog.

Feed Dog Height

How to adjust the height of the feed dog.

Feed Dog Angle

Adjusting the angle of the feed dog for proper feeding.

TROUBLESHOOTING

Sewing Problems

Common sewing issues and their possible causes and solutions.

Error Code Displays

Explains error codes displayed on the operation panel and their solutions.

7-SEGMENT DISPLAY

Character Representation

Chart showing how characters are displayed on the 7-segment display.

Related product manuals