BÜCHI Labortechnik AG
www.buchi.com
13
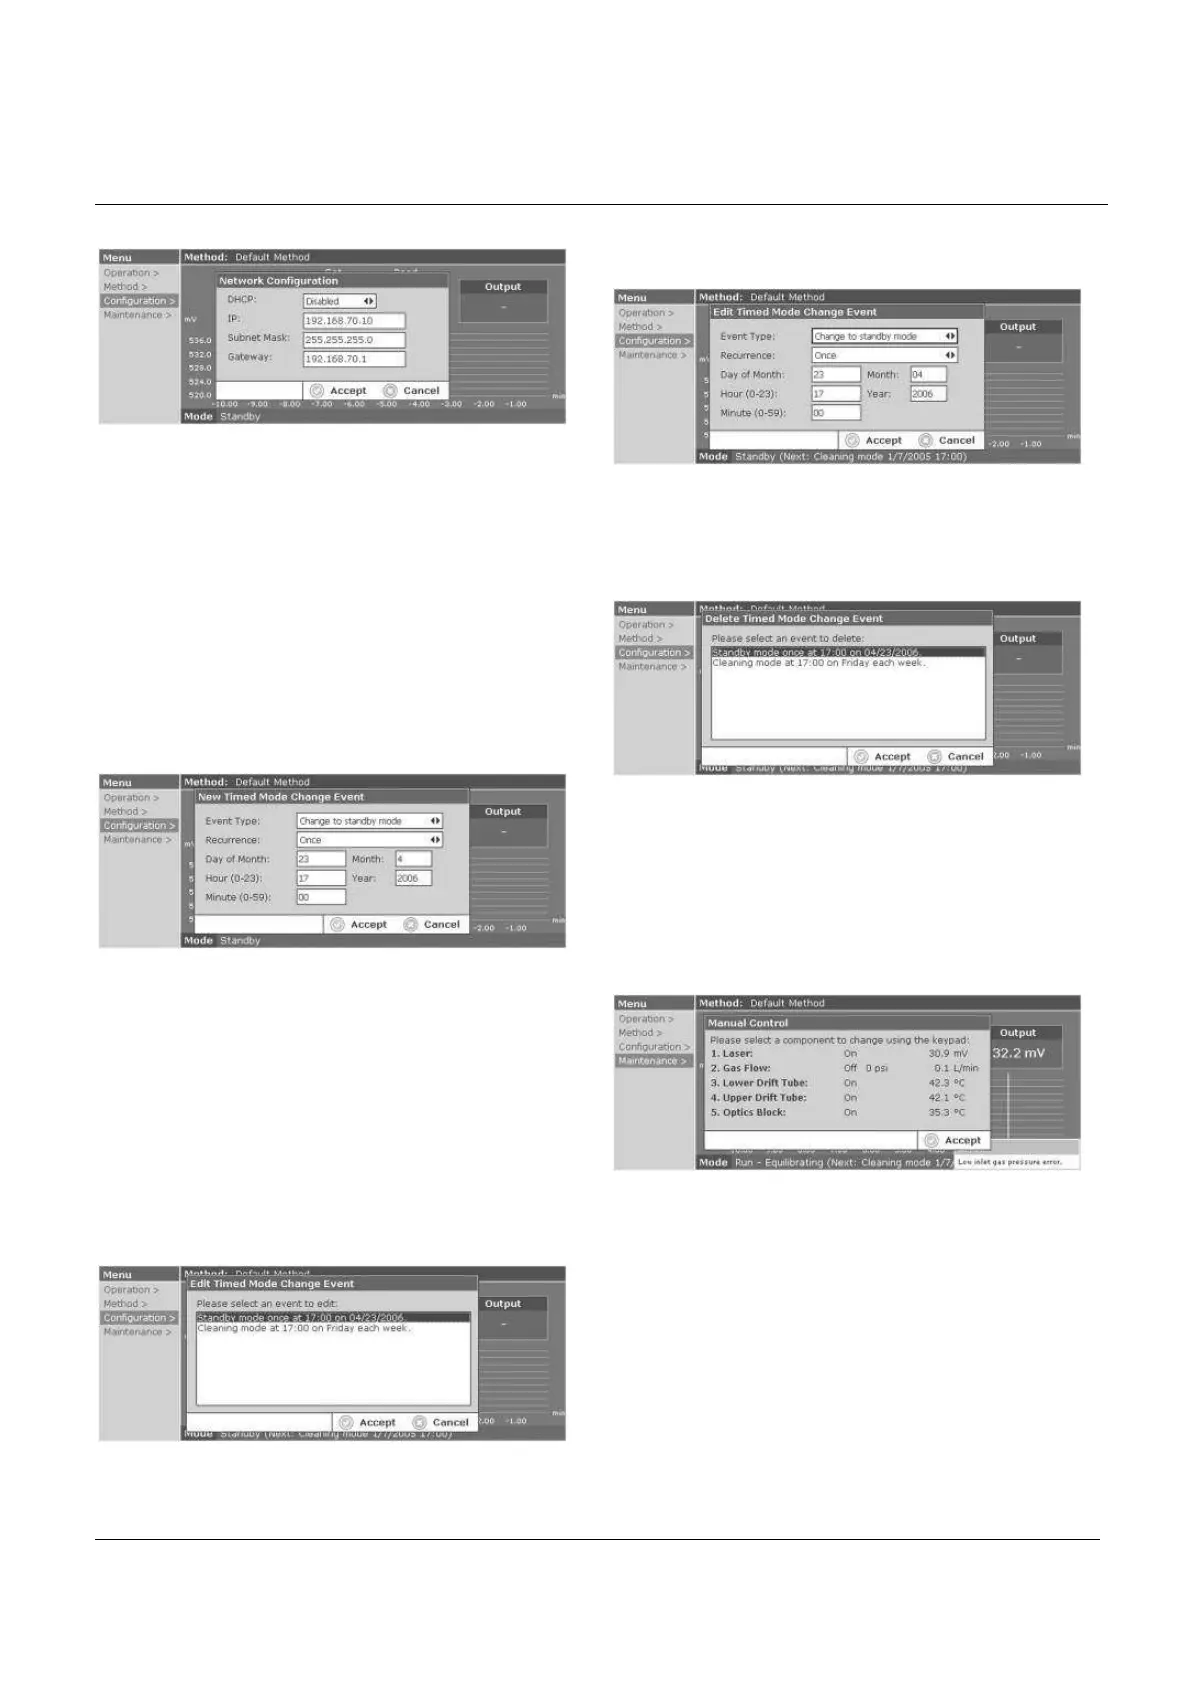
3.4.7 NETWORK
Se
lect Configuration/Network and press Enter to bring up the
Network Configuration window. Select DHCP Enabled or
Disabled. If Disabled is selected, enter the IP address,
Subnet Mask, and Gateway settings. If Enabled is selected,
the IP address, Subnet Mask, and Gateway will be grayed
out. Press Accept to save the new settings, or press Cancel
to cancel the new settings.
3.4.8 TIMED MODE CHANGES
Timed Mode Change Events can be used to put the detector
into another operation mode using a timer. This can be
convenient to schedule routine cleaning, heating, etc. events.
A reminder for the next Timed Mode Change will be displayed
on the main screen next to the Mode.
NEW TIMED MODE CHANGE
Select Configuration/Timed Mode Changes/New and press
Enter to bring up the New Timed Mode Change Event
window. Select an Event Type from the list using the left/right
arrows keys: Change to Standby mode, Change to Heating
mode, Change to Run mode, or Change to Cleaning mode.
Select the Recurrence using the left/right arrow keys: Once,
Weekly, or Monthly. For a Recurrence of Once, enter the
Day of Month, Month, Hour, Year, and Minute. Use the
up/down arrows to tab through the entry blanks. For Weekly
Recurrence, enter the Day of Week, Hour, and Minute. For
Monthly Recurrence, enter the Day of Month, Hour, and
Minute. Press Accept to save the new event settings, or
press Cancel to cancel the new event settings.
EDIT TIMED MODE CHANGE
To Edit a Timed Mode Change Event, select
Configuration/Timed Mode Changes/Edit and press Enter.
Use the up/down arrows to select an event from the table.
Press Accept to select the event to be edited, or press Cancel
to cancel the editing.
If Accept has been selected, the Edit Timed Mode Change
Event window will appear. Make the desired changes to the
Timed Mode Change Event. Press Accept to save the
changes, or press Cancel to cancel the changes.
DELETE TIMED MODE CHANGE
Select Maintenance/Timed Mode Changes/Delete and press
Enter to delete a timed mode change event. Use the
up/down arrows to highlight the event to be deleted from the
table. Once the event has been highlighted, press Accept to
delete the selected event; or press Cancel to cancel deleting
the event.
3.5 MAINTENANCE
3.5.1 MANUAL CONTROL
Select Maintenance/Manual Control and press Enter to reach
the Manual Control screen.
Laser: On/Off
Press 1 to toggle the Laser On or Off. The current signal
output value is also displayed in mV.