2003 Buell XB9S: Chassis 2-59
HOME
FRONT AND REAR ISOLATORS 2.20
FRONT ISOLATOR
Removal
CAUTION
Avoid cross-threading front isolator bolt or insert. Keep
weight of motorcycle off front isolator by alternately
loosening front isolator bolt and raising scissor jack to
support engine.
1. Place a scissor jack under jacking point for supporting
engine only. For location of jacking point see Figure 2-99.
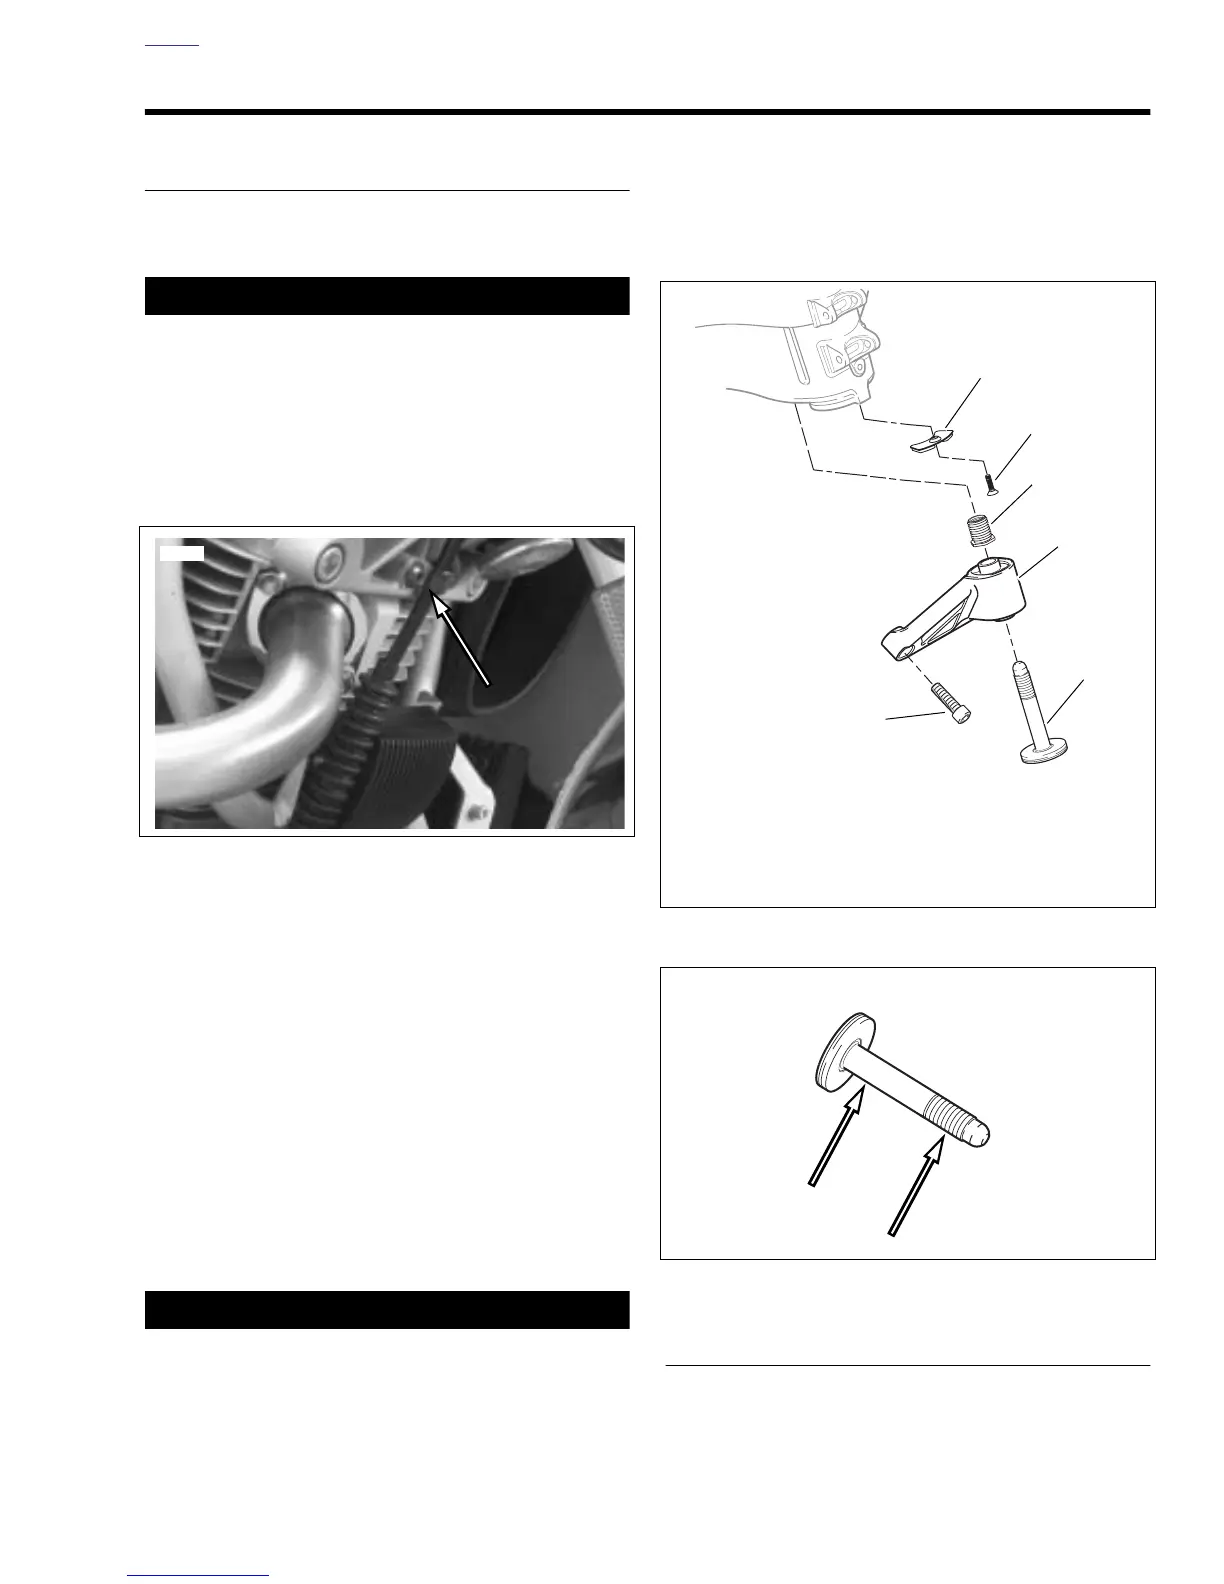
2. See Figure 2-82. Remove clutch cable p-clamp.
3. See Figure 2-83. Remove front isolator bolt (6).
4. Remove front isolator mount fasteners (5).
5. Remove front isolator bracket (4).
6. Remove upper snubber fastener (2) and remove upper
snubber (1).
Installation
1. See Figure 2-83. Install upper snubber (1) tightening
snubber fastener (2) to 12-36
in-lbs
(1-4 Nm).
2. See Figure 2-84. Lubricate front isolator bolt with ANTI-
SEIZE and loosely install.
3. See Figure 2-83. Use LOCTITE 272 on front isolator
bracket (4) and install. Tightening fastener (5) to 49-51 ft-
lbs (66-69 Nm).
CAUTION
Avoid cross-threading front isolator bolt or insert. Keep
weight of motorcycle off front isolator by alternately
tightening front isolator bolt and raising scissor jack to
support engine.
4. Tighten front isolator bolt (6) to 49-51 ft-lbs (66-69 Nm).
5. See Figure 2-82. Install clutch cable p-clamp. Tighten
fastener to 12-36
in-lbs (1-4 Nm).
NOTE
See Figure 2-83. If the threaded insert (3) is damaged and
needs to be replaced, install new insert with LOCTITE 272
and tighten to 49-51 Ft-Lbs (66.4-69.1 Nm).
REAR ISOLATOR
NOTE
It is necessary to remove engine to access rear isolator.
See 3.4 STRIPPING MOTORCYCLE FOR ENGINE SER-
VICE to access the rear isolator.
Figure 2-82. Clutch Cable P-clamp
8740
Figure 2-83. Front Isolator
Figure 2-84. Lubrication Points on Front Isolator Bolt
b1040x2x
1. Upper snubber
2. Upper snubber fastener
3. Insert
4. Front isolator bracket
5. Front isolator bracket fastener to engine
6. Front isolator bolt
1
2
3
4
6
5













 To Next Page