This mode allows the diagnostic files to be uploaded (copied) to the external USB flash-pen drive,
which must be plugged into one of the USB connectors located on the back panel of the device.
Important: Once the files have been uploaded to the USB flash-pen drive they can be send to the
distributor or the manufacturer for analysis.
To enter in the "Diagnostic files upload" mode from the "File management" menu (see item 5.4.7.), select the
" Diagnostic files upload " menu option using the <Down arrow> / <Up arrow> buttons and then confirm
with the < OK>.
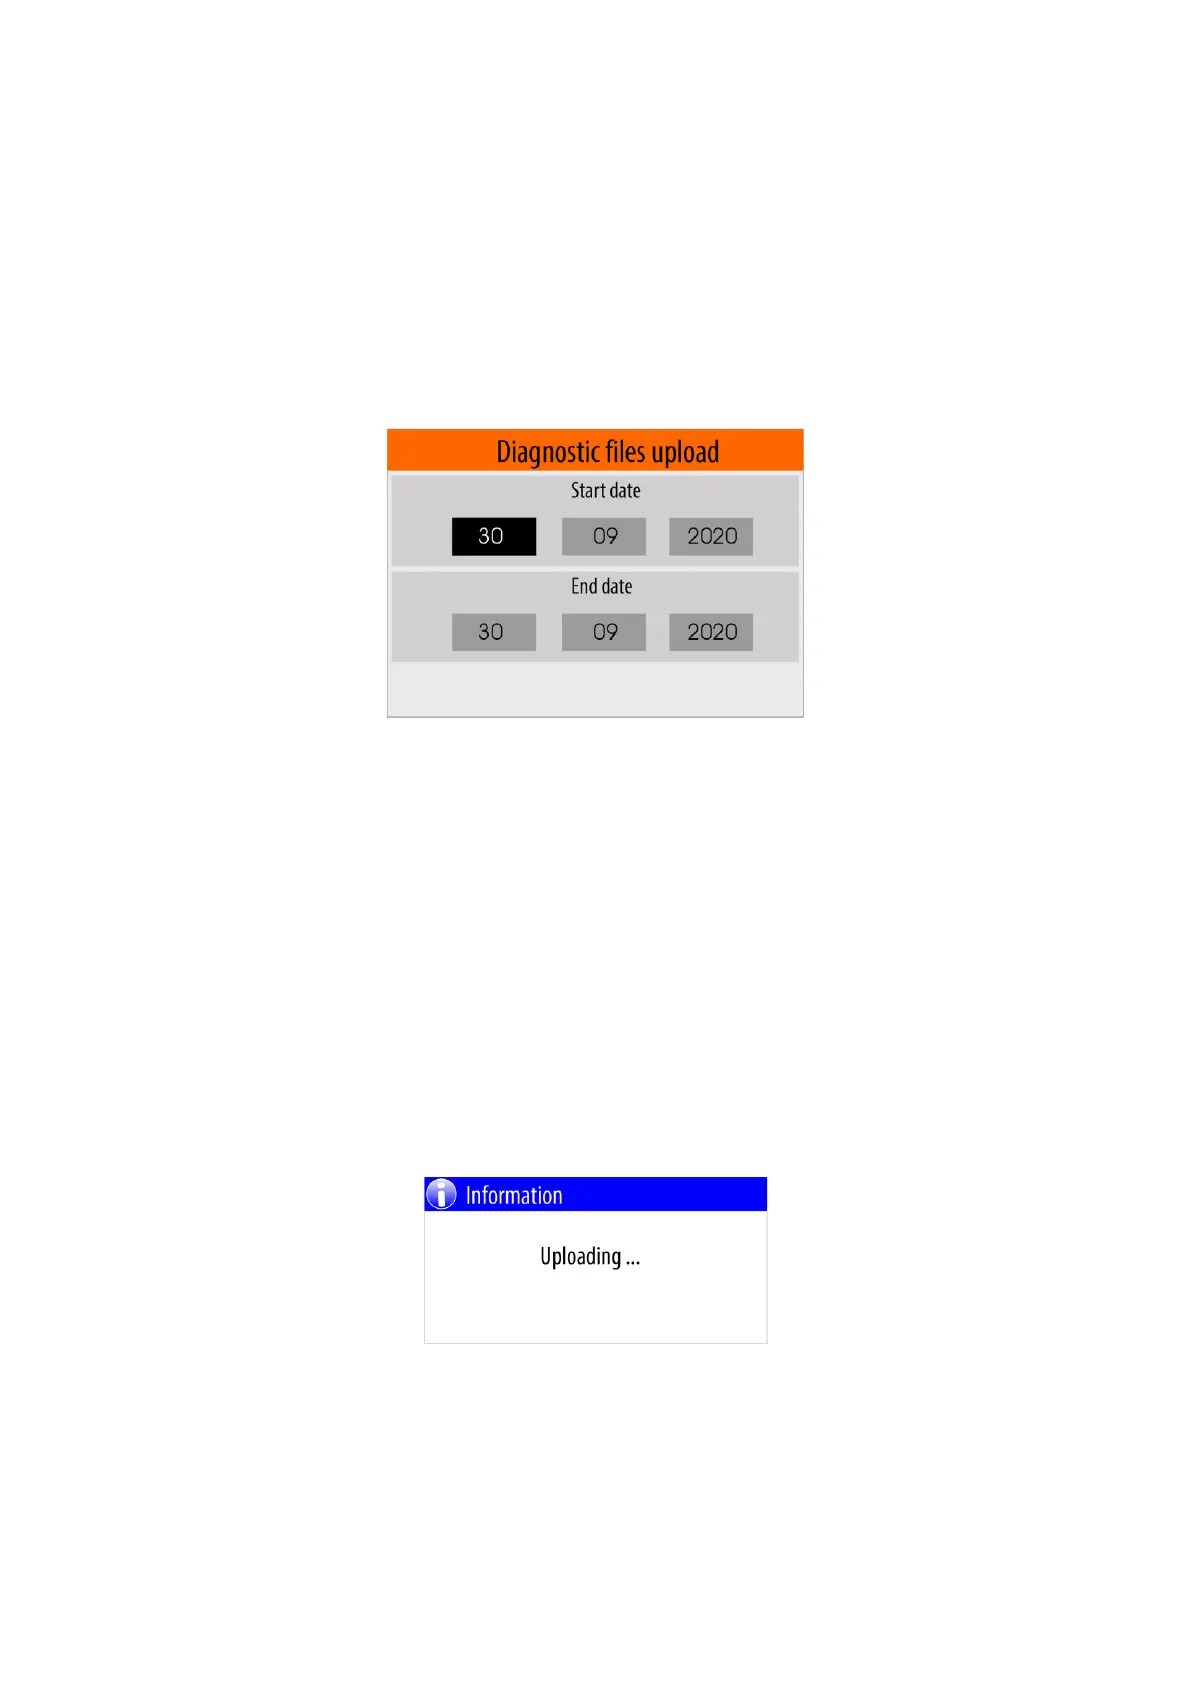
A panel will appear on the display in which the user have enter the period of time (start and end date, month
and year) for which he wants to upload the corresponding files.
In this panel use the <Left arrow> / <Right arrow> buttons to select the field for the start or end date, month
and year. Once you have selected the field you want to change, use the <Down Arrow> / <Up Arrow>
buttons to change the value.
After making all the changes, press the <OK> button to start the uploading (copying) files process.
The files will be copied to the USB flash pen drive in the DIAG folder.
Example:
K:\EBULL\U0200001\ DIAG
where :
К - Device label (USB flash pen drive )
EBULL - Ebulliometer folder
U0200001 - Ebulliometer serial number ( see item 5.4.9. )
DIAG - diagnostic files folder
During the copy (upload) process is in progress, the following message will be shown:
When the copying (uploading) is complete, a message will appear on the screen about the number of files
copied.
Example: