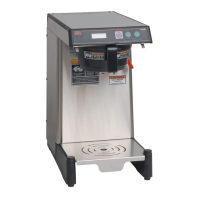
SmartWAVE
®
Training Manual
16
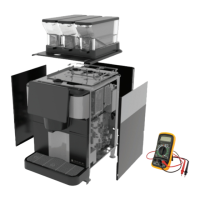
Preventive Maintenance
In order to maintain proper operation and long service life BUNN
®
recommends performing the preventative main-
tenanceevery6months.Individualcustomerswillvarywithsomecustomerschoosingnottoreceivepreventative
maintenance.
Tools Required:
Flat blade screwdriver•
Philips screwdriver•
Adjustable wrench•
Channel lock pliers•
Needle nose pliers•
Delimingspring(BUNNP/N:01188.0000)•
Delimingtool(BUNNP/N:38227.0000)•
Priortoservicingthebrewer:
Disconnect the electrical supply•
Shut off the water supply•
Remove the shroud•
Remove the top panel•
PM Steps
Step 1: Disassemble and clean the strainer assembly
UseChannellockplierstoremovethe¼”areto¾”hosethreadadapterttingfromthewaterinletassembly □
Use needle nose pliers to gently pull the strainer straight out □
Rinse the mesh screen to remove any debris build-up □
Reassembly is the opposite of disassembly □
Step 2: Remove and clean the temperature sensor
Gently pull the temperature sensor from the grommet in the top of the tank □
Wipe any mineral build-up from the probe □
Reinstallation is the opposite of removal □
Step 3:Removeandcleanthellprobe
Gentlypullthellprobeoutofthegrommet □
Wipe any mineral deposits off of the probe □
Reinstallation is the opposite of removal □
Step 4: Remove and clean the sprayhead
Using the pointed end of the deliming tool, remove any mineral build-up from the sprayhead outlet holes □
Step 5: Clean the sprayhead tube
With the sprayhead removed Insert the deliming spring into the tube □
Using a sawing motion run the deliming spring through the tube several times and then remove the spring com- □
pletely
Note:aftercleaningthetube,thebrewershouldrunonebrewcyclewiththesprayheadoffinordertoushoutthe
tube.
Step 6: Replace the seat cup in the hot water faucet
Unscrew the faucet bonnet from the assembly □
Remove the old faucet seat cup □
InstallthenewseatcupBUNNP/N:02766.0000 □
Reassembly is the opposite of disassembly □
Step 7: Visually examine the power cord for any damage
Step 8: Visually examine the water supply for any leaks