Do you have a question about the burroughs smartsource series and is the answer not in the manual?
Contact information and support resources for troubleshooting and assistance.
Inventory list of items included in the product packaging for initial setup.
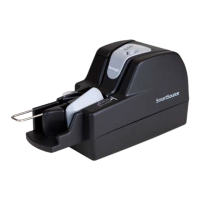
Identification of different models within the SmartSource product line.
Procedure for attaching the floor extender to specific unit models.
Instructions for installing the optional franker component.
Steps for inserting the ink cartridge into the unit.
Information on the expected lifespan and character output of the ink cartridge.
Step-by-step guide for connecting power and data cables to the unit.
Instructions for safely powering the unit on and off using the power switch.
Explanation of the unit's status lights and their meanings during operation.
Overview of the information displayed on the Expert unit's LCD screen.
Steps to prepare the unit and documents for processing.
Guide to adjusting the check limiter for proper document alignment.
Procedure for removing the unit's top covers for access.
Instructions for adjusting the endorser print position for optimal clarity.
Guidelines for preparing documents to ensure satisfactory unit performance.
Steps to properly align documents before inserting them into the feeder.
How to load documents into the feeder for Professional and Expert units.
How to load documents into the feeder for Value units.
Steps to initiate and manage document processing.
Functionality of the Start/Stop button for controlling document flow.
Guidance on removing processed documents from the output pocket.
Common reasons why documents may stop within the unit's track.
Methods for removing jammed or stopped documents from the unit.
Using the Start/Stop button to clear jams by moving items to a pocket.
Procedures for manually extracting stopped documents from the unit track.
A quick method for cleaning the unit using a cleaning card.
Comprehensive cleaning procedures for critical internal components.
List of recommended cleaning materials and their order numbers.
Step-by-step instructions for performing detailed cleaning of the unit.
Safety procedure for powering down the unit before cleaning.
Instructions for removing the unit's top covers for cleaning access.
Step to remove the front image camera's protective wall.
Steps to remove the franker roller and rear image camera wall.
Cleaning the rear camera wall and replacing the ink pad if needed.
Removing foreign objects from the document path.
Using compressed air to clean dust and debris from the paper path.
Cleaning the optical surfaces and fixed camera wall.
Cleaning ink residue from the endorser cartridge and its housing.
Troubleshooting steps for jams caused by foreign objects in the track.
Solutions for issues causing multiple documents to feed simultaneously.
Diagnosing and resolving power-related issues with the unit.
Troubleshooting connectivity problems between the unit and PC/network.
Identifying and resolving abnormal sounds during unit operation.
Troubleshooting issues related to status lights and control buttons.
Identifying and clearing paper jams or unexpected stops.
Diagnosing and resolving problems related to the document feeder.
Troubleshooting issues with the magnetic and optical readers.
Resolving problems related to image quality and document skew.
Troubleshooting issues with the endorsement printing function.
Diagnosing and resolving problems with document stacking in output pockets.
Troubleshooting issues with the Expert unit's display screen.
Information on obtaining replacement parts for damaged components.