89 of 166
The "Threshold" graphical evaluation element outputs the following results data:
Individual evaluation
or
The DIGIFORCE
®
9311 can also output the evaluation result from a single
threshold at the Fieldbus interface.
Crossing (intersection of measurement curve and threshold)
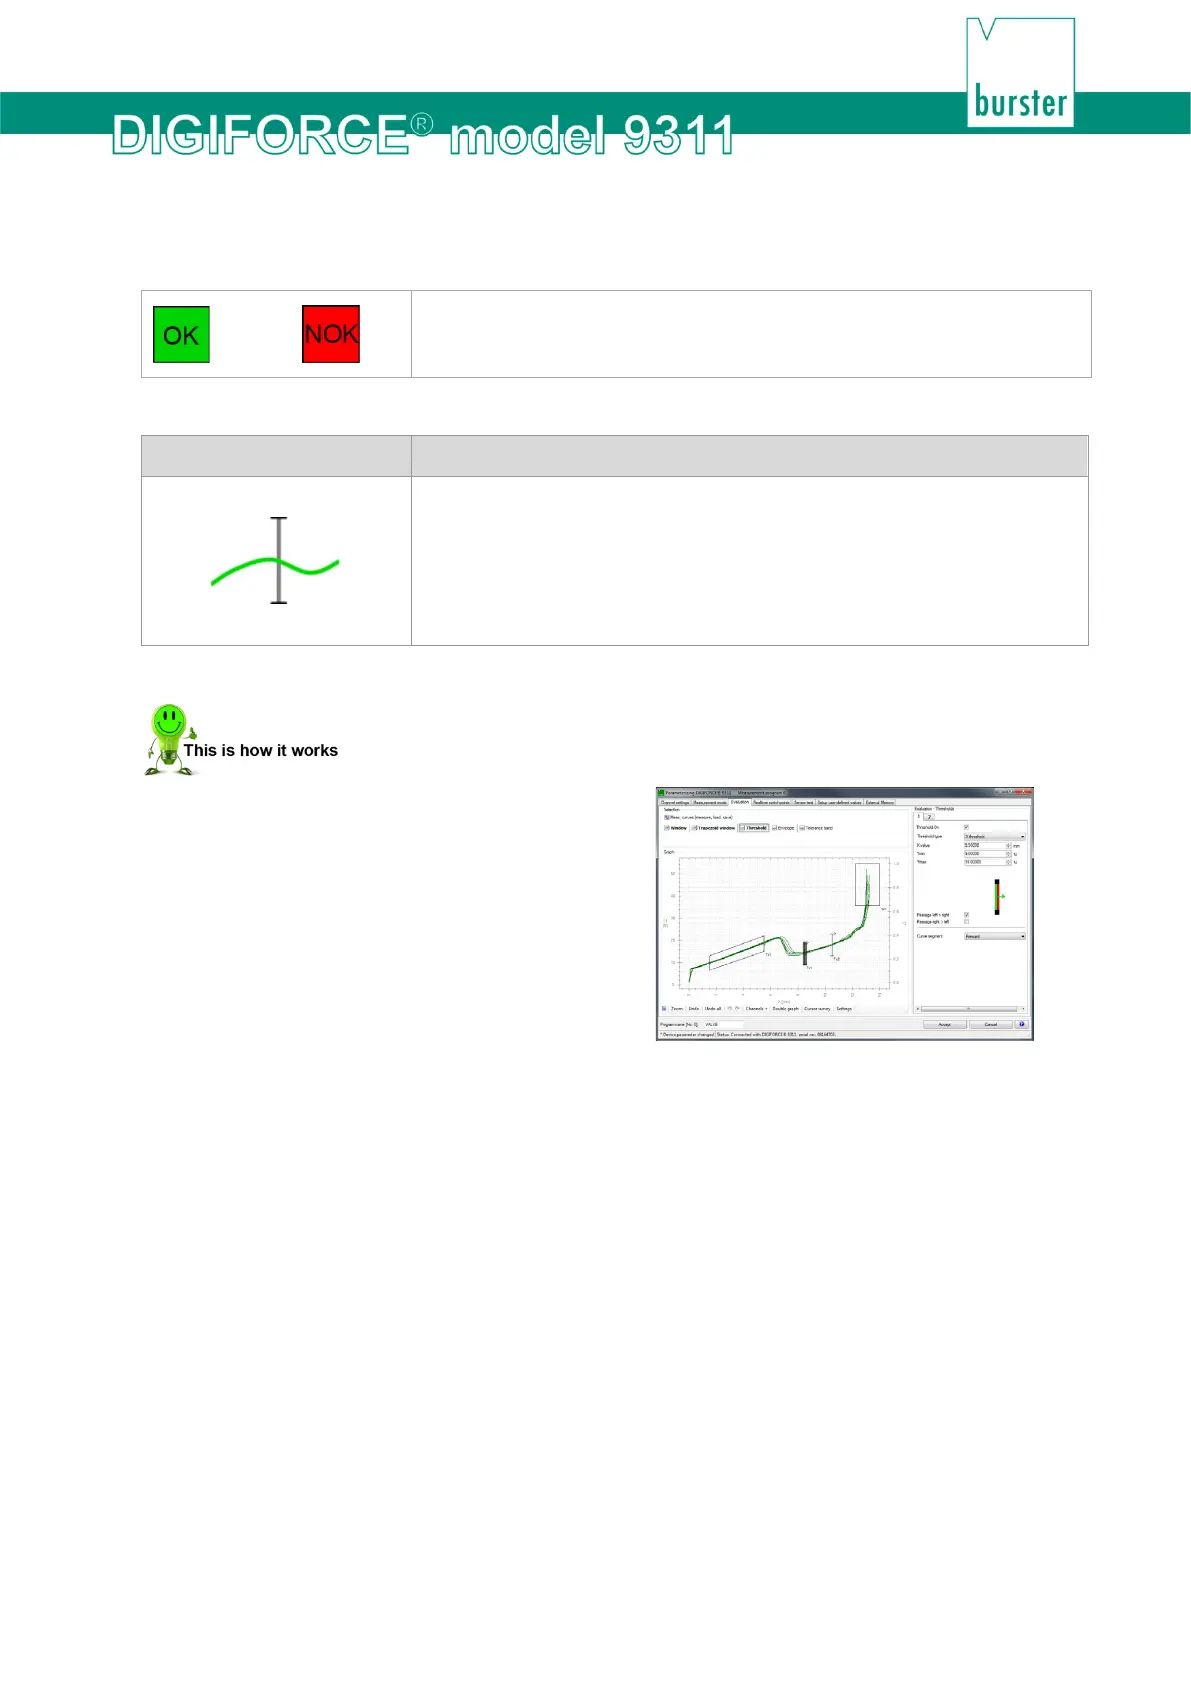
Symbol Threshold evaluation element
The DIGIFORCE
®
9311 linearly interpolates the crossing point from the
last measurement point before the threshold and the first measurement
point after the threshold.
If the DIGIFORCE
®
9311 cannot ascertain that the threshold has been
crossed, it indicates/outputs the value pair 909090/909090 and displays
"<<<>>>" on the screen.
Configuring a threshold
1 Click on [Threshold] and enable the
"Threshold On" checkbox.
If you have not measured any measurement
curves yet, click on "Meas curves (measure,
load, save)" and either use [Load] to load
existing measurement curves or [Start] to
begin recording measurement curves.
Perform one or more measurements. At the
end of the measurement click [Stop].
2 Select the "Threshold type" from the drop-down menu ("X threshold" or "Y threshold").
3 You have the option to use the mouse cursor or coordinates ("X value" or "Y value", "Ymin"
or "Xmin" and "Ymax" or "Xmax" respectively, depending on the threshold type).
4 Select the crossing direction you require by enabling the checkbox beside the
corresponding passage direction.
Note: The curve must pass through the "Threshold" evaluation element only once. You
can also define that the measurement curve shall not cross the threshold. If this
condition is breached, the DIGIFORCE
®
9311 gives the measurement an NOK
evaluation.
5 Select the "Curve segment" from the drop-down menu ("Forward", "Return" or "Complete
curve").
6 Select tab [2] to configure another threshold.
 Loading...