13
To set customized Play and/or Pause periods, move one or both
slider handles until you see the desired number of seconds. Play
period ranges from 10 to 120 seconds, and the Pause period ranges
from 5 to 60 seconds. Instead of controlling the Play period by
amount of time, you may also control it by number of balls thrown.
Simply select Balls as the Mode, then enter the number of balls.
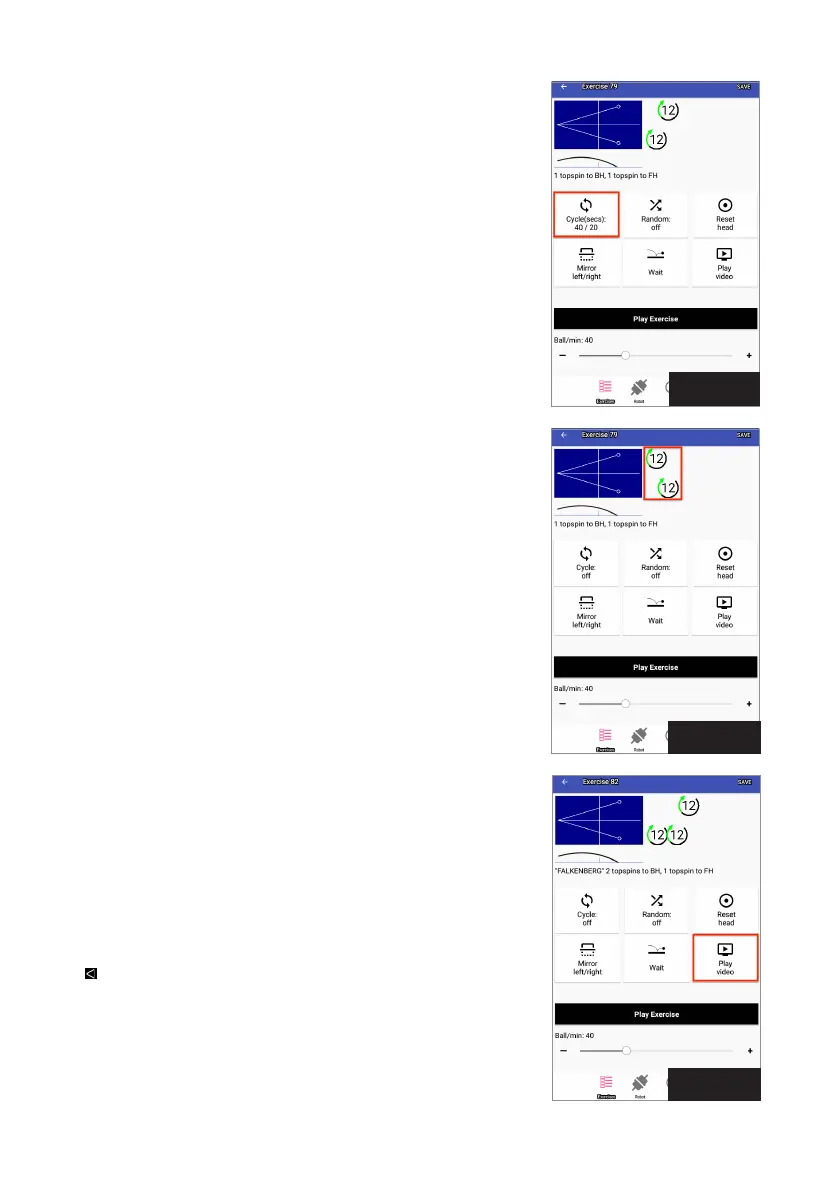
Tapping outside the popup window reveals that the Play and Pause
periods are shown on the Cycle button. For example, if Play is set
to 40 and Pause at 20, 40/20 is shown below Cycle (see Photo 19).
The Mirror button is a handy feature. It is used to match the
sequence of shots in an exercise with the playing hand of the user.
To illustrate, Exercise 79 is programmed for a right-handed player
so Ball 1 is thrown to the left corner (a right-hander’s backhand)
and Ball 2 to the right corner (a right-hander’s forehand). This is
reflected in the top view diagram of that exercise (see Photo 19).
However, if you’re left handed, the default order throws Ball 1 to your
FH and Ball 2 to your BH. To correct the placement of shots, tap
Mirror and the placement of shots in the top view diagram will be
flipped (see Photo 20), with Ball 1 directed to the right corner (a left-
hander’s BH) and Ball 2 to the left corner (a left-hander’s FH).
An alternative use of this button is to create a new sequence of
placements without having to create a new exercise. In the above
example, if a right-handed player wanted to start Exercise 79 with a
FH instead of a BH, tapping the Mirror button would be the quickest
way to create an exercise with the desired placements.
Tap Reset Head to start a Head Reset, which checks that each
motor of the head responds to commands and sets the Deflector
Plate to a known location. Use this as your first troubleshooting
step for an irregularity in the way balls are thrown out. For in-
stance, the side view diagram indicates a ball is to be delivered low
over the net, but instead, it is thrown high off the end of the table.
Press Play Video (see Photo 21) to start a video of the exercise being
demonstrated by a live player. This button shows only when a video
file is linked to the exercise.
The video opens in landscape orientation. It begins playing and
loops over and over so you can study the player’s movements and
strokes. After watching the video, exit by touching the Return icon
( ). This returns you back to the Play Exercise screen.
To add your own video to an exercise, tap directly below the side
view diagram. A popup window appears with a Select Video button.
Tap that button and navigate to where you stored the video file on
the tablet’s file directory or select it from the Gallery.
Photo 19
Photo 21
Photo 20