11
Best Practices: We recommend not saving any changes to the Default game exercise. This exercise is
handy for checking calibration. When exiting the Play Exercise screen, if you get a Save Exercise alert,
choose Close Without Save (see more info on Pg. 16Pg. 16).
Furthermore, if you edit the settings for a pre-programmed exercise, be certain you want to perma-
nently change its settings. To keep the pre-programmed exercise as programmed by the factory, select
Close Without Save. Alternatively, save it under a different name by tapping Save at the top right, then
Save As, and give it a new name. This keeps the original exercise unchanged.
When changing settings, large adjustments are most easily accomplished by moving the slider control
with your finger. For fine adjustments, touch the + or – symbol at either end of the slider. Doing so will
increase/decrease the settings by 1 unit for every touch.
Exercise ScreenS
After learning the controls in the Ball screen, return to the Exercise
List by tapping Exercises ( ). All saved exercises appear in this list.
By looking at the diagram for each exercise, you can quickly deter-
mine the number of balls, order of balls, and the placement, speed,
and spin of each ball (see Photo 13).
Scroll this screen by lightly touching it and moving your finger up or
down. Notice that this list includes exercises named Default game
and then 21 exercises named Exercise 79 to Exercise 99. These are
the pre-programmed exercises of your Amicus Prime. Created by
well-known Butterfly Coach Richard Prause, he recommends these
drills as a base upon which to develop more advanced skills.
As noted previously, we recommend to not overwrite these
pre-programmed exercises by using the Save command (use Save
As instead). However, modifying these exercises is permitted. If you
choose to do so, the original exercises can easily be restored by
selecting Restore factory exercises on the Info screen (page 2222).
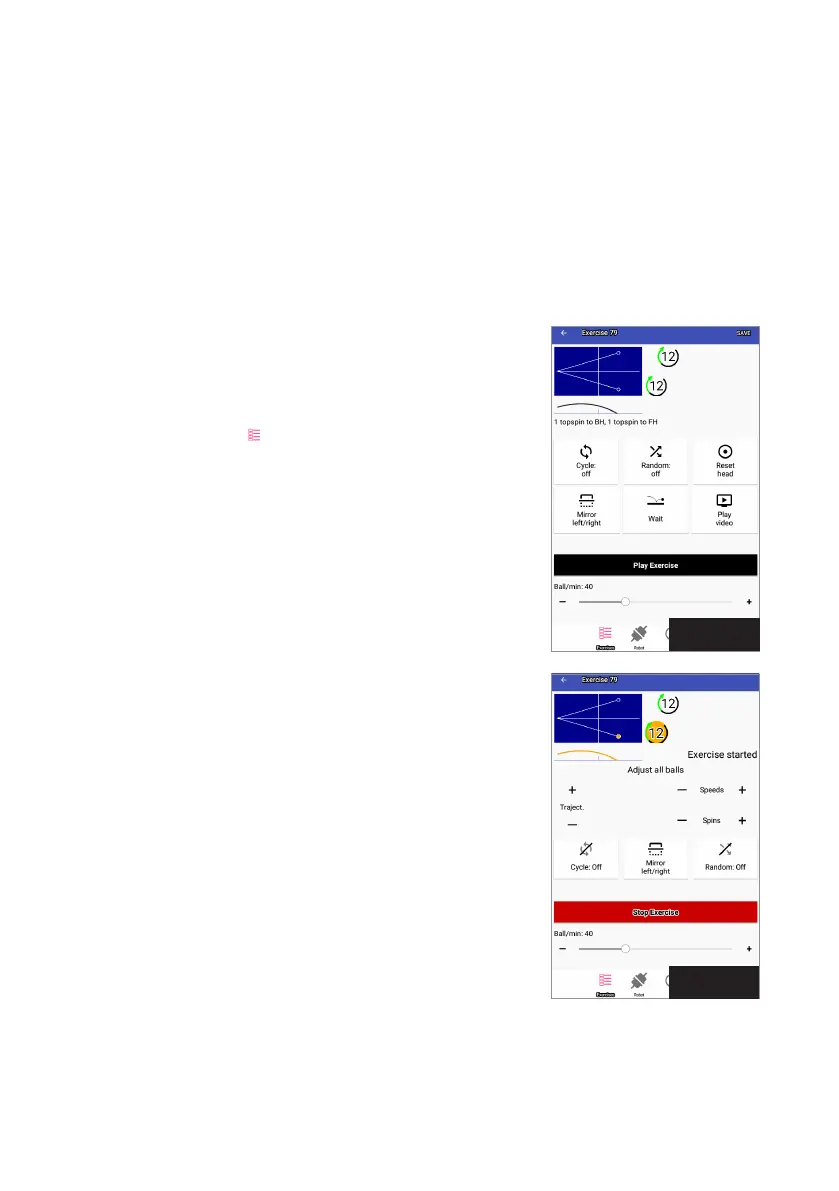
To learn about the settings in the Exercise screens, touch Exercise
79. The Play Exercise screen appears (see Photo 14). At the top of
this screen are a top view and side view diagram of the exercise.
From these 2 diagrams, you can quickly see that this exercise
throws the 1
st
ball to the left corner and the 2
nd
ball to the right
corner. Both balls have light topspin, a medium speed of 12, and a
mid-table landing spot (about halfway between the table net and
your endline). There is also a brief written description of the exer-
cise (which can be edited by touching it).
Touch the Play Exercise button to begin playing this exercise. The
screen flashes and shows a red Stop Exercise button (see Photo
15). After a short delay, the robot begins throwing balls in the order shown in the top view diagram. The
first ball is closest to the table and each successive ball further away. As each ball is thrown, the ball
icon and trajectory lines turn orange to indicate the Current Ball. After playing this exercise for a short
while, tap Stop Exercise.
Photo 14
Photo 15