9
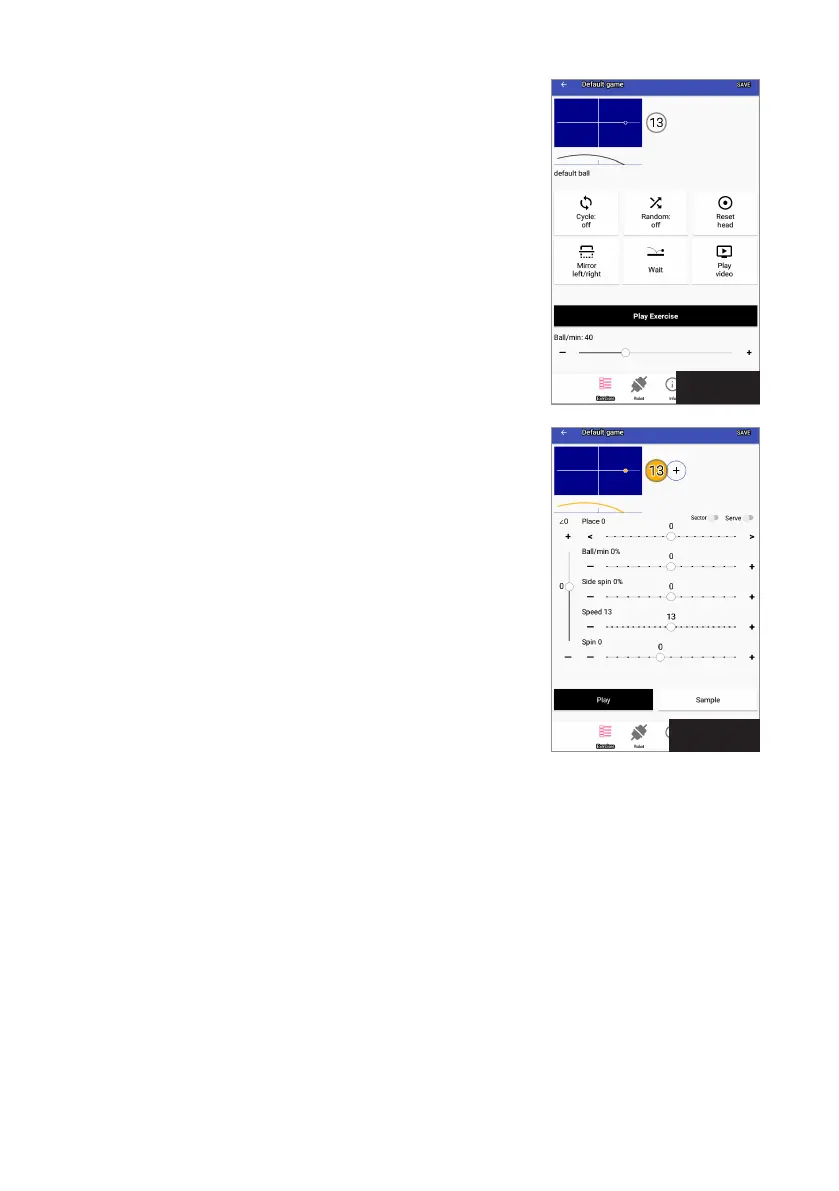
Place determines the left to right placement of the ball. Hold down
the slider handle and move it back and forth. Notice that the ball’s
position on the diagram at the top moves left and right across the
table diagram in response to this setting. “0” corresponds with a
centerline placement, -8 with an extreme angle off the left side of
the table, and 8 with an extreme angle off the right side.
Ball/min % (aka, Individual Frequency Control, or IFC) delays or
quickens the timing between balls. After setting Ball/min to your
liking, use this control when the timing between any two balls is too
little or too much. For example, an exercise with a slow, short back-
spin serve followed by several fast topspin shots. Or, an exercise
with several fast topspins followed by a slow, high popup. A “0” set-
ting means that the timing between balls is as set for Ball/min. Add
more time after a ball by using negative settings (this reduces the
Ball/min setting for that one Ball) or reduce the time after a ball by
using a positive setting (which increases Ball/min for that one ball).
Sidespin changes the orientation of the spin on the ball. The “0”
setting means no sidespin. Every step from “0” represents a 15°
change in orientation. Settings to the right of “0” are degrees of
right sidespin and to the left are degrees of left sidespin.
Speed determines how hard the ball is thrown. A setting of 1 means
the speed is very slow and 25 means it’s very fast, with 13 being
the default speed in the middle. Please note that the number in the
middle of the circle (that represents this ball) changes in response
to this setting. So a 13 in the circle means a speed of 13 and a 25
means a speed of 25. The effect of this setting is shown on both the
top view and side view diagrams of the table.
Spin determines if the ball has topspin, backspin, or no spin. “0”
indicates no spin (dead ball) and the circle is coloured gray. Positive
settings mean degrees of topspin with 1 being very light topspin,
and 7 being extremely heavy topspin. As topspin is increased, the
circle shows a longer and longer green arrow in a clockwise direction. Negative settings mean degrees
of backspin with -1 meaning light backspin and -5 meaning very heavy backspin. A longer and longer red
arrow around the circle in a counterclockwise direction indicates increasing amounts of backspin.
Trajectory is the vertical slider along the left side of the screen. This sets the throw angle of the ball.
A “0” setting indicates a ball thrown straight out with only a slight upward angle. When this slider is
moved upward, the robot will throw the ball increasingly higher. And when this slider is moved down-
ward, it means a lower throw angle. The lowest settings are used to make the ball bounce first on the
robot’s end of the table (a serve). Its effect is shown on both the side view and top view diagrams.
The Sector switch lets you set a range of Placements (see Place) for a ball. For example, instead of
specifying a ball thrown to Placement 4, you specify a range of ±4, which would tell the robot to throw a
ball randomly anywhere in the right court.
To activate Sector, please see Photo 11. The Sector Switch is turned on and there are now 2 slider but-
tons in the Place control instead of one. Move these two buttons to select the range for the placement.
Photo 9
Photo 10
 Loading...