Functional checks (Continued)
B
C
D
E
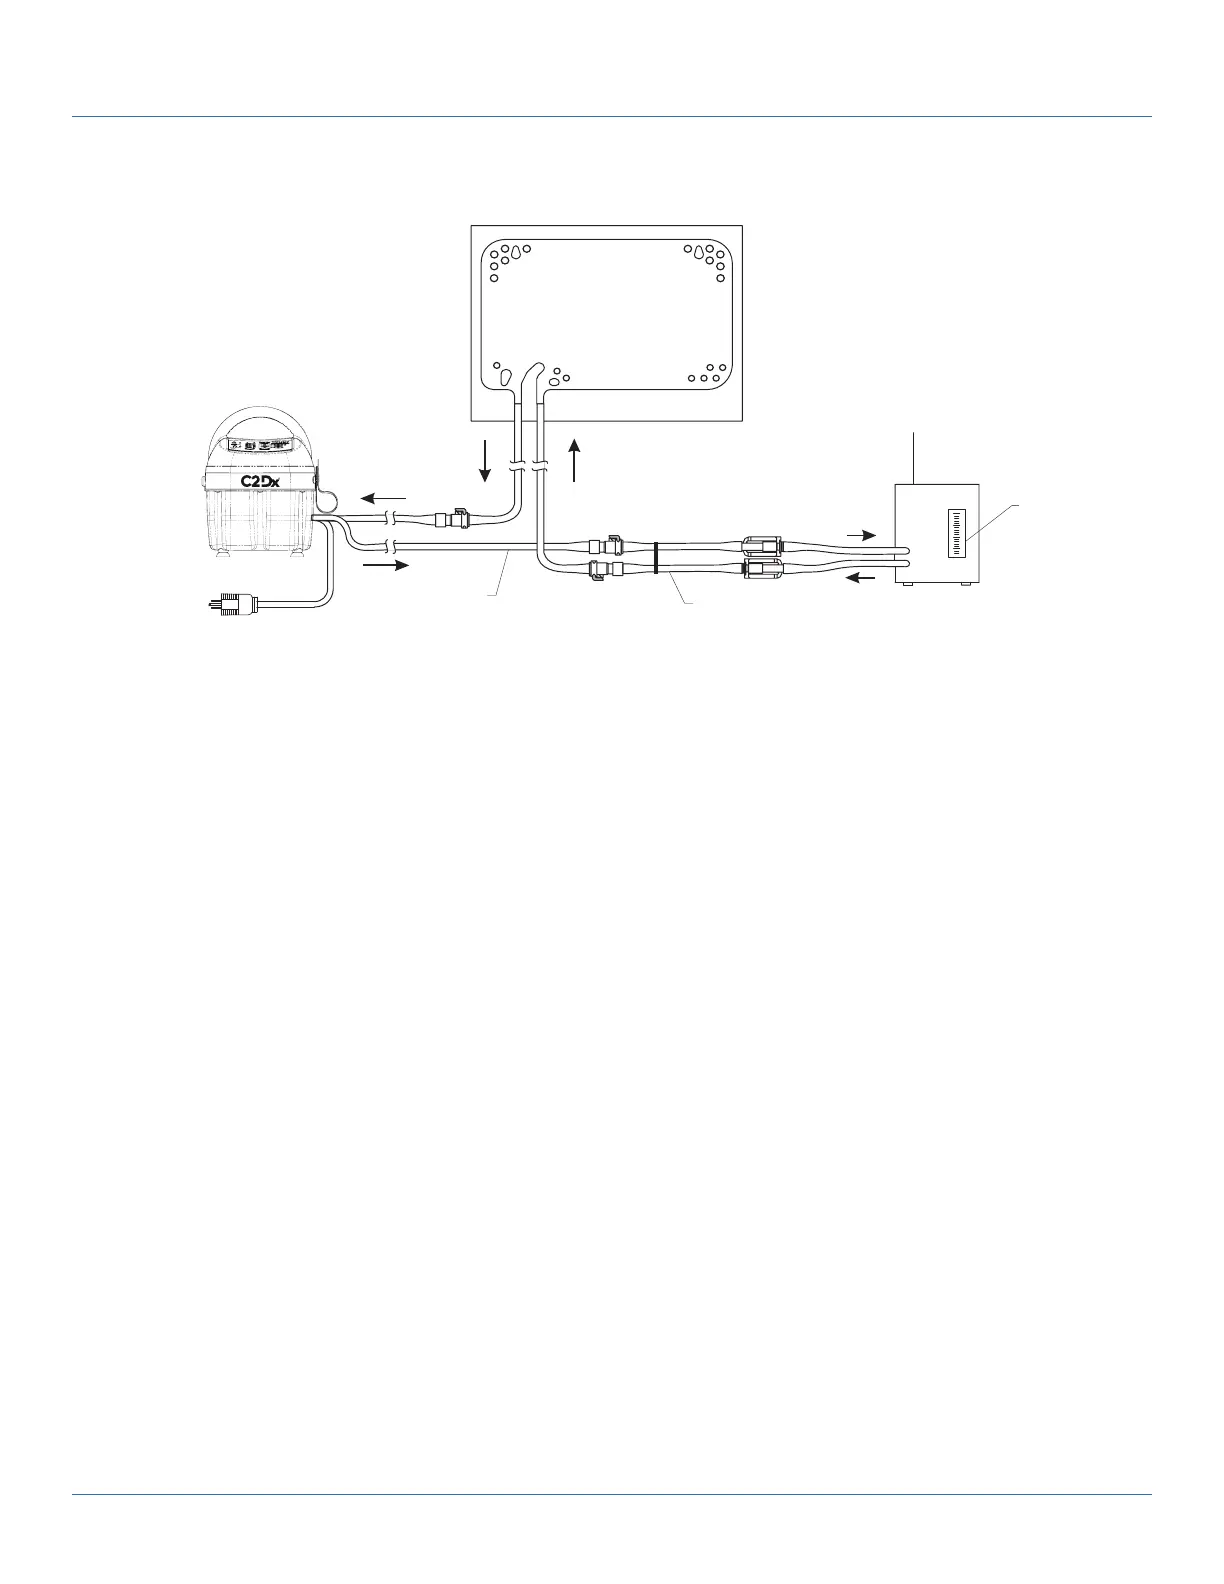
Figure 2: Functional check setup for Colder connector
1. Plug into a properly grounded outlet (A) (Figure 2 on page 17).
2. Fitting and tube closest to the front of the T/Pump
®
Temperature Therapy Pump (B).
3. Attach the Adapter hose assembly (C).
4. Mul-T-Pad
®
Temperature Therapy Pad, size 18” or 22”: lay the pad at and at the same level as the pump (D).
5. TPT9, 7 gph (26.5 lph) minimum. Read at top of the oat (E).
Internal pump inspection
1. Unplug the product.
2. Using a #2 Phillips screwdriver, remove and save the 9 screws that secure the tray to the reservoir.
P/N 90018082 (x4) P/N 90018075 (x5)
3. Perform a visual inspection of all internal parts.
4. Remove any accumulated dirt with a vacuum cleaner or air compressor.
5. Reverse steps to reinstall.
6. Verify proper operation before returning the product to service.
Flow and operating temperature test
Note: Stay present for the full duration of the test to observe all readings and to prevent damage to the
T/Pump
®
Temperature Therapy Pump.
Perform this test on a fully assembled unit.
1. Connect the T/Pump
®
Temperature Therapy Pump to the TPT9 and Mul-T-Pad
®
Temperature Therapy Pad (see
Functional check setup - Clik-Tite
®
connectors on page 16 or Functional check setup - Colder connection on page 17).
2. Straighten the pad and hose.
3. Open the hose clamps.
4. Open the ll cap on top of the pump.
101176 Rev 1
Preventive maintenance
17 c2dx.com