11. Reverse steps to reinstall.
12. Verify proper operation before returning the product to service.
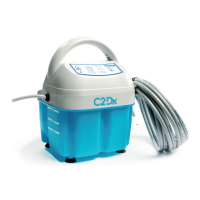
Heater kit assembly
Tools required:
• #2 Phillips screwdriver
Procedure:
1. Unplug the product.
2. Drain the water out of the reservoir.
3. Using a #2 Phillips screwdriver, remove and save the 9 screws that secure the tray to the reservoir. P/N 90018082 (x4)
P/N 90018075 (x5). Save the screws and the tray assembly.
4. Using a #2 Phillips screwdriver, remove the four screws from the back of the upper housing handle. Save the screws and
upper housing handle.
5. Remove the two wires from the Cartridge Heater. One goes to the PC Board, the other goes to a neutral wiring connector.
6. Remove the Temperature Sensor (Figure 5 on page 25, item 8) from the Brass Heater Manifold.
7. Cut the Gray Hose connected to the Brass Heater Manifold.
8. Remove the two brass ttings on the bottom of the Tray assembly which hold the brass manifold block to the tray.
9. Discard the two O-rings between the brass heater manifold and the tray assembly.
10. Remove and discard the heater kit assembly.
11. Reverse steps to reinstall.
12. Verify proper operation before returning the product to service.
Heater assembly
Tools required:
• #2 Phillips screwdriver
Procedure:
1. Perform the steps for the Upper Front and Rear Housing.
2. Remove the two wires from the Cartridge Heater. One goes to the PC Board, the other goes to a neutral wiring connector.
3. Remove the two brass ttings on the bottom of the Tray assembly that hold the brass manifold block to the tray.
4. Pay special attention when reassembling the following:
a. Gray hose can be placed in warm water (<50 ºC) to facilitate installation on manifold ttings.
b. All O-rings must be seated. The reservoir O-ring is shaped. The shape must be aligned with the reservoir.
c. All ttings on the manifold should have Teon tape applied to prevent leaks.
d. Make sure wires are routed away from the cooling fan blades.
e. For proper screw size and location for reservoir and housing, refer to parts illustration and replacement parts list.
f. Transfer the serial number to the new reservoir and cover the serial number label window
101176 Rev 1
Service
27 c2dx.com