A2+/A4+/A6+/A8+
Loading media
Edition 5/06 Operating Instructions 25
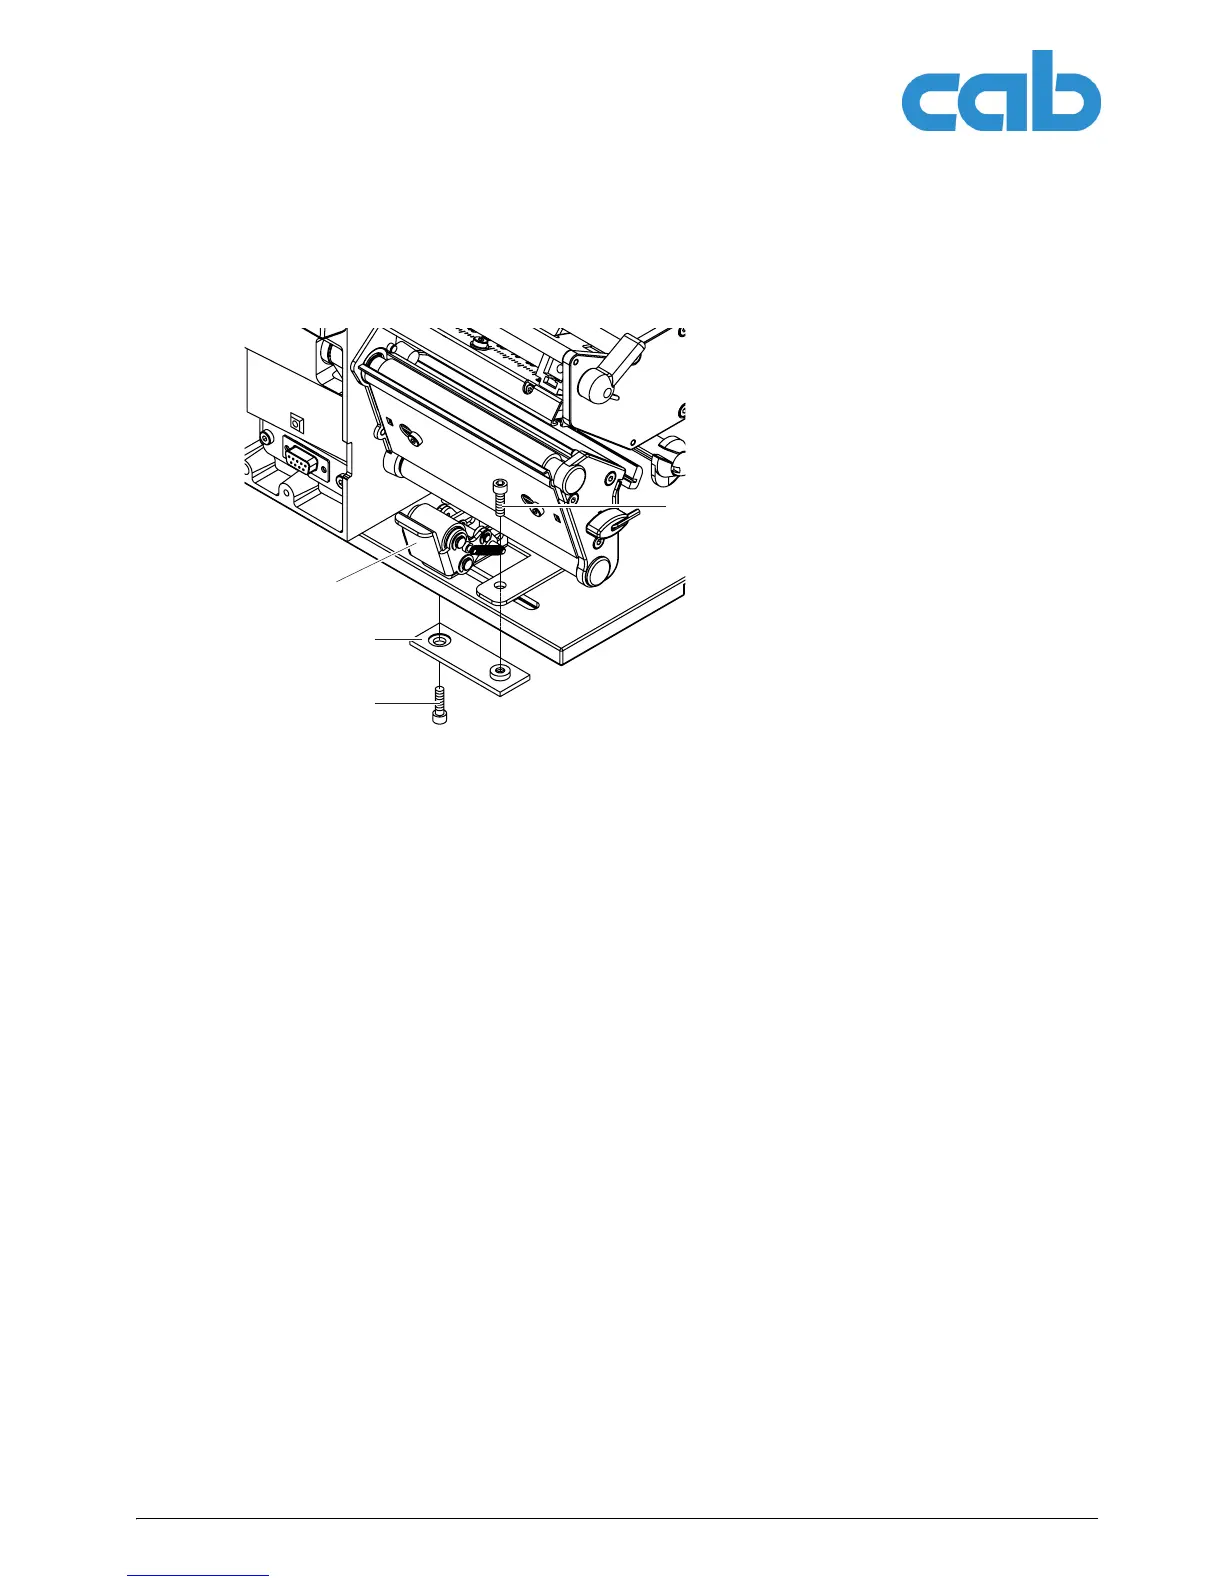
6.7 Removing and installing the locking system
Fig. 15: Removing the locking system
Removing the locking system
1. Position printer at edge of table so that the
oblong hole is accessible from below.
2. Screw out screws (1) (2) and remove them.
3. Remove the pinch roller (4) and bottom plate
(3).
Installing the locking system
1. Position printer at edge of table so that the
oblong hole is accessible from below.
2. Place the pinch roller (4) into oblong hole
and lightly tighten screw (1) of bottom plate
(3) from above.
3. Lightly tighten screw (2) of bottom plate (3)
from below.
4. Align the pinch roller (4) with center of label
and tighten screws.
1
2
3
4