A2+/A4+/A6+/A8+
Cleaning and basic maintenance
Edition 5/06 Operating Instructions 31
8.8 Replacing the print roller and rewind assist roller
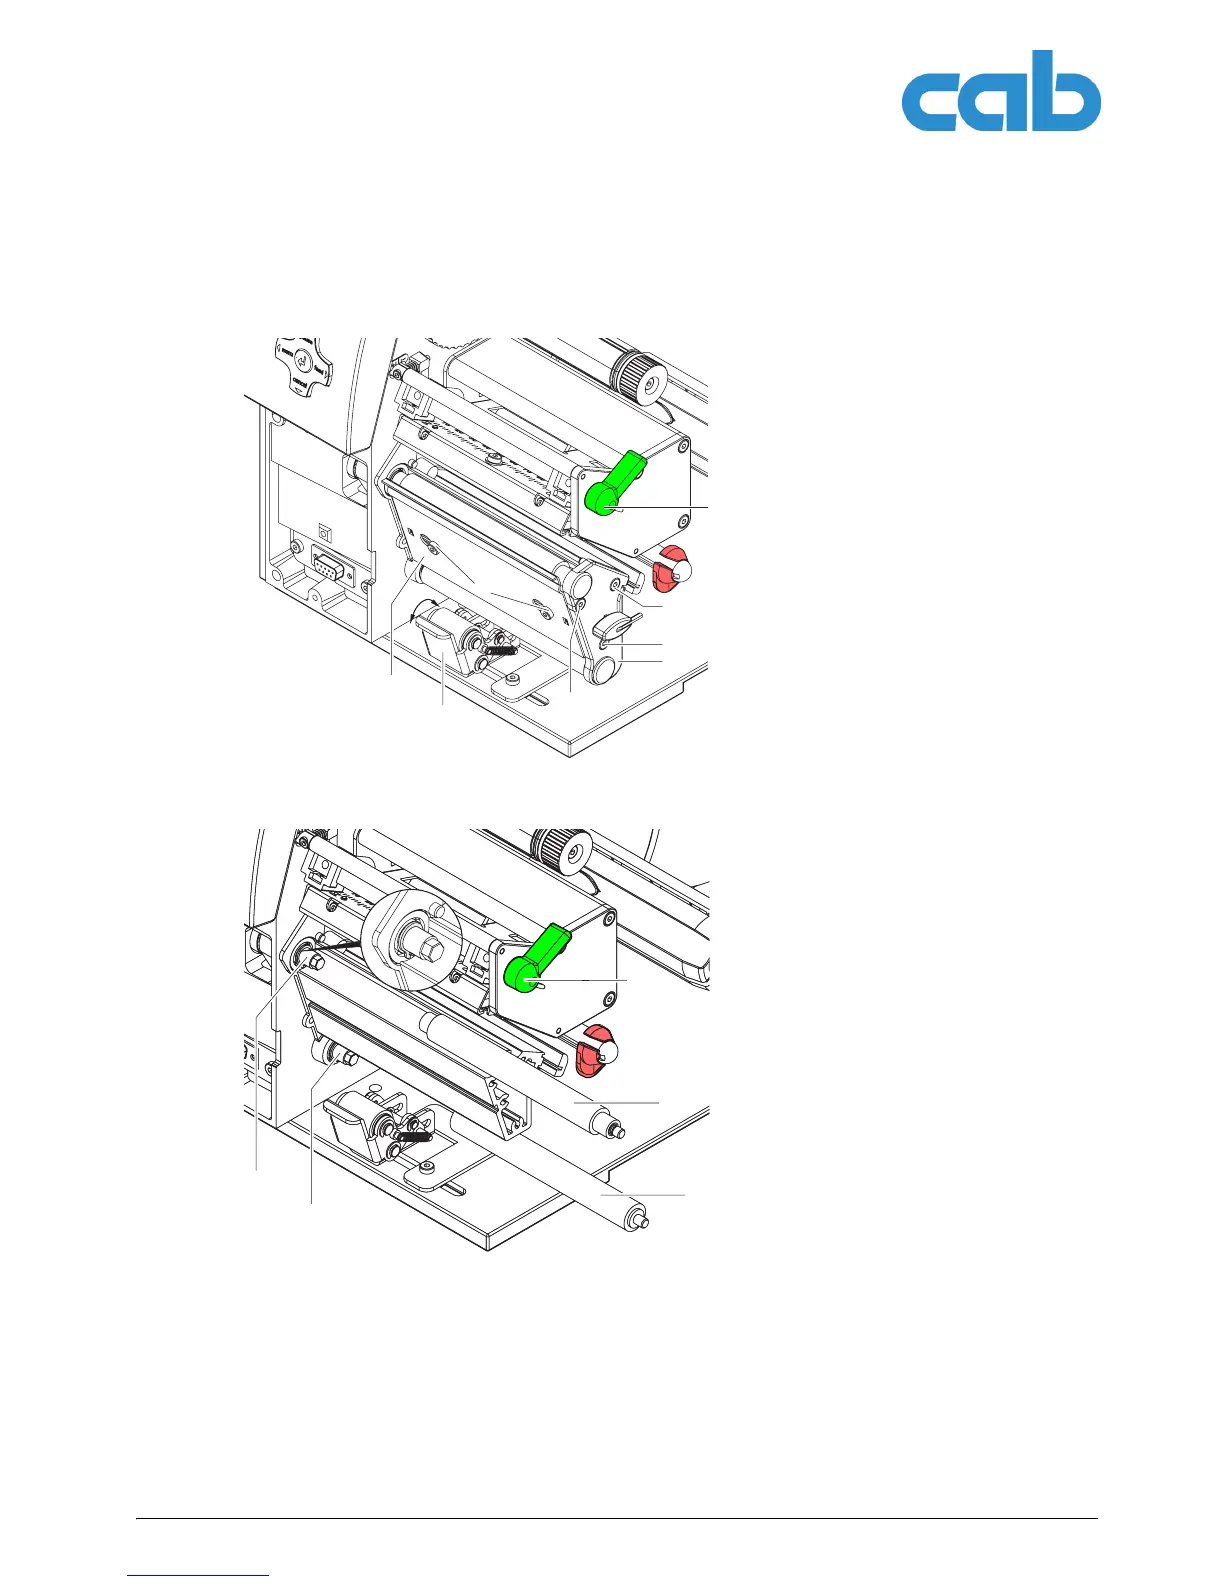
Fig. 19: Removing the side plate
Removing the side plate
1. Turn lever (1) counterclockwise to lift the
printhead.
2. Lift the pinch roller (5) off the rewind assist
roller.
3. Remove labels and transfer ribbon from
the printer.
4. Loosen screws (4) on plate (6) with hexag-
onal wrench by several turns and remove
plate (6).
5. Unscrew screws (3abc) of the side plate
(2) with hexagonal wrench.
6. Remove side plate (2).
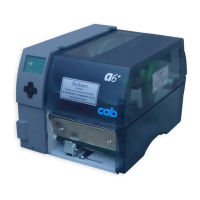
Fig. 20: Removing and installing rollers
Removing and installing rollers
1. Pull print roller (7) and rewind assist roller
(8) from the shafts (9, 10) on the housing.
2. Clean shafts (9, 10) of the rollers (see
expanded view at shaft (10)).
3. Slide print roller (7) and rewind assist roller
(8) onto their respective shafts and turn
slightly until the hexagon of the shaft
engages in the hexagon socket of the print
roller.
4. Set side plate (Item 2, Fig. 19) in place and
screw it down with the screws (Items 3abc,
Fig. 19) by tightening the screws in order,
i.e. a, b then c.
5. Set plate (Item 6, Fig. 19) in place and
tighten screws (Item 4, Fig. 19) with hex-
agonal wrench.
3a
3b
2
3c
4
5
6
7
8
9
10
1