11
5. Setting Up and Putting into
Operation
5.1. Setting Up
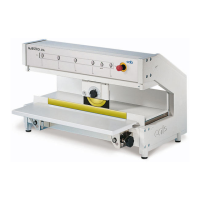
Once the MAESTRO 4M PCB Separator has
beenplacedonarmsurface,itcanbeputinto
operation with a minimum of effort.
Whenusingthemachineforthersttime,itwill
be found that both blades are covered with a
protectivelmofoil.Thiscanberemovedby
wiping it off with a soft cloth.
5.2. Earthing Connection
To provide an earthing connection a 10mm dia.
press stud (9) is mounted on the machine frame.
A connection to earth is necessary due to the
build-up of electrostatic charges which can occur
when PCB’s are separated.
5.3. Connect Foot Switch
Connect the foot switch cable (2) to the socket
(8) adjacent to the mains input module.
5. Installation et mise en route
5.1. Installation
Une fois le MAESTRO 4M sorti de son embal-
lage, l’installer sur une surface plane.
La mise en route se fait selon les indications qui
suivent et peu de manipulations sont néces-
saires. Lors de la première mise en route, il est
recommandé de retirer la graisse qui se trouve
surlescouteauxàl’aided’unchiffondoux.
5.2. Mise à la terre
Pour relier la machine à la terre, utiliser le bou-
ton pression (9) de 10mm de diamètre, à l’arrière
de la machine.
La mise à la terre est nécessaire car des déchar-
ges électrostatiques peuvent avoir lieu lors de la
séparation des cartes.
5.3. Raccordement de la pédale
Brancherlecâbledelapédale(2)àlaprise(8)
prévue à cet effet, à côté du module de branche-
ment.