19
Proprietary Information: Not for use or disclosure except by written agreement with Calix.
© Calix. All Rights Reserved.
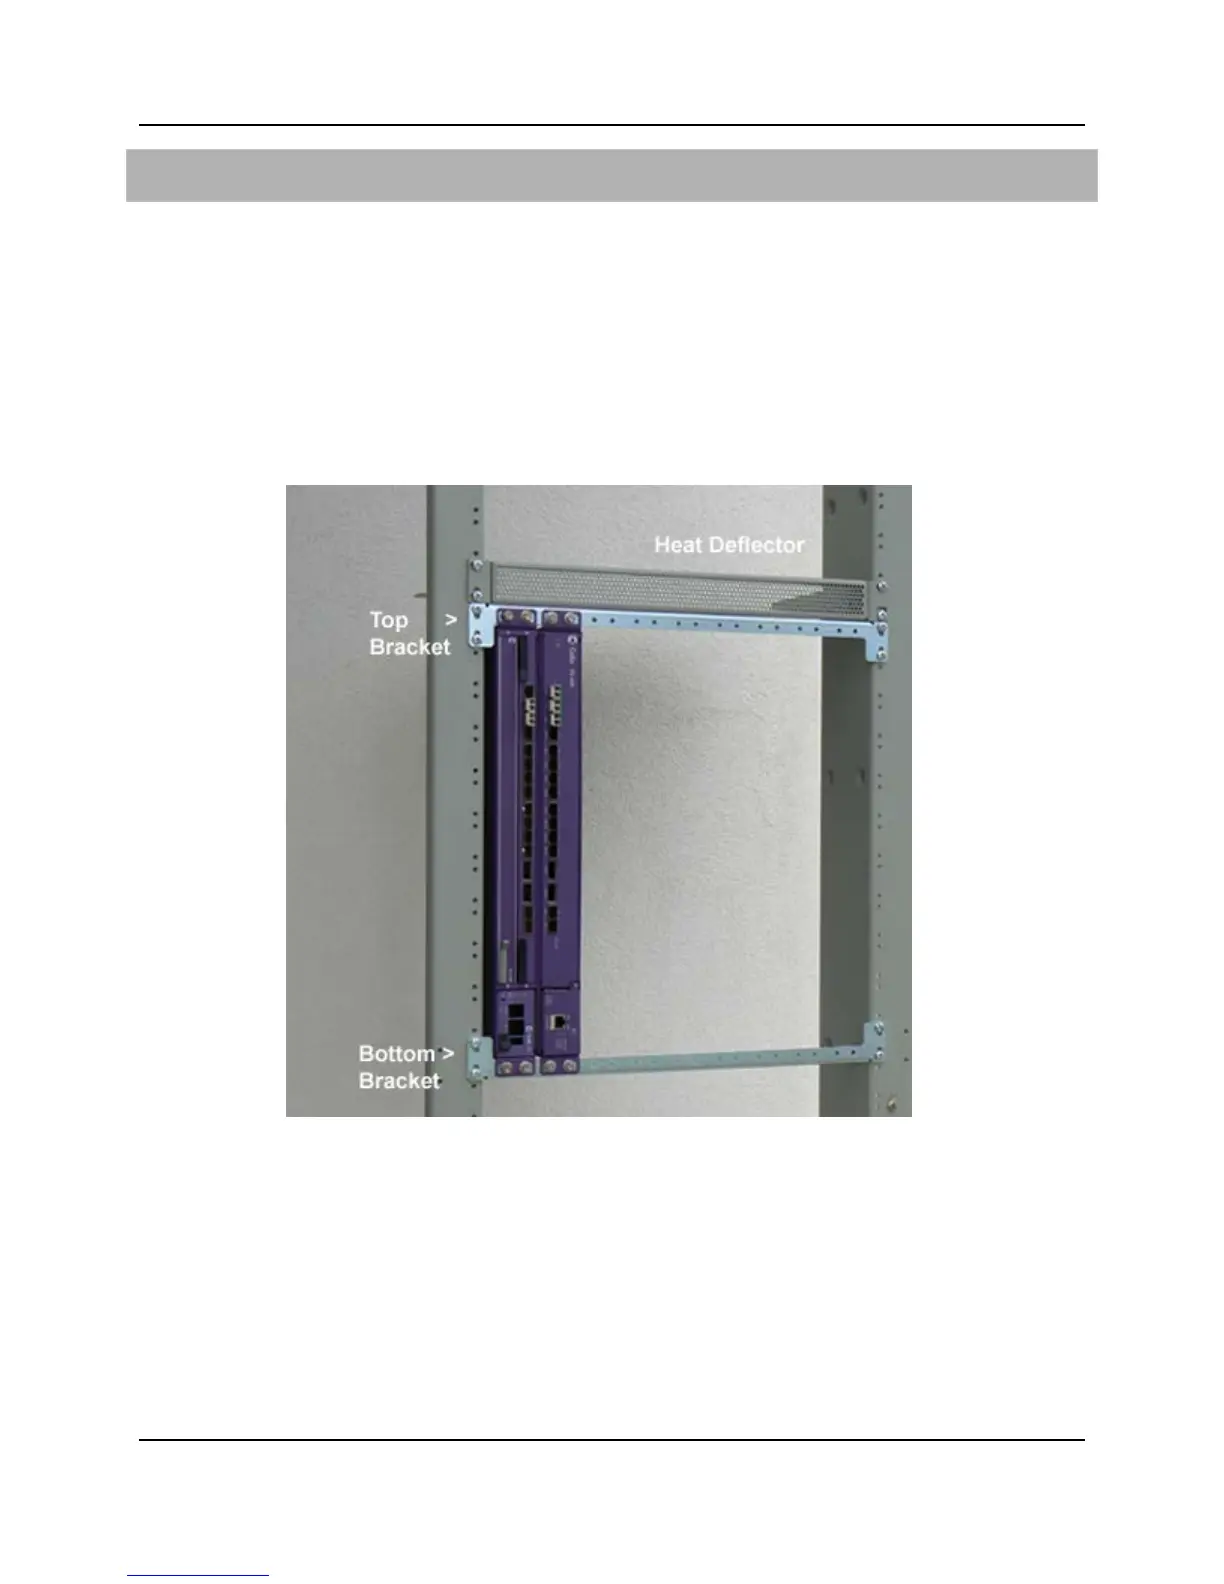
To install an E7-2 vertical mounting frame
1. Identify the exact mounting location on the equipment rack for the E7-2 mounting
frame. The frame requires approximately 22 inches (55.88 cm) of vertical rack space.
2. Install the mounting frame's top bracket as follows:
a. Orient the bracket with its equipment-mounting flange on the top.
b. Position the bracket against the rack at the identified location, aligning the bracket's
mounting holes with counterpart holes on the rack.
c. Attach the top bracket to the rack using (4) supplied mounting screws (2 per side).
3. Install the mounting frame's bottom bracket as follows:
a. Orient the bracket with its equipment-mounting flange on the bottom.
b. Position the bottom bracket against the rack 19 inches (48.26 cm) below the top
bracket, aligning the bracket's mounting holes with counterpart holes on the rack.
c. Attach the bottom bracket to the rack using (4) supplied mounting screws (2 per
side).