Operation
5.1 Measurements
The measurements are made by pressing the Start/Stop (toggle) button.
By default, the measurement starts immediately, but a warm-up time may elapse first. Measurement start can be
programmed to a timer set up by the user via Settings.
Note: If an OTA module is fitted and is enabled in the Mode page, the measurement will not start until the OTA
card has locked to the selected frequency. If the OTA card is not being used it should be disabled in the Mode
page.
While a measurement is in progress, pressing the Stop key stops the measurement immediately. The
measurement will still be saved for the completed duration before Stop was pressed.
A measurement with a defined measuring time stops automatically after the set time has elapsed.
The default characteristics are:
• Sample time:
33ms
• Duration:
10min
• Reference:
Auto
selection between internal oscillator and external reference
These characteristics can be modified and saved in the Settings screen as previously described.
By default, the user will be prompted to select where to save the measurement.
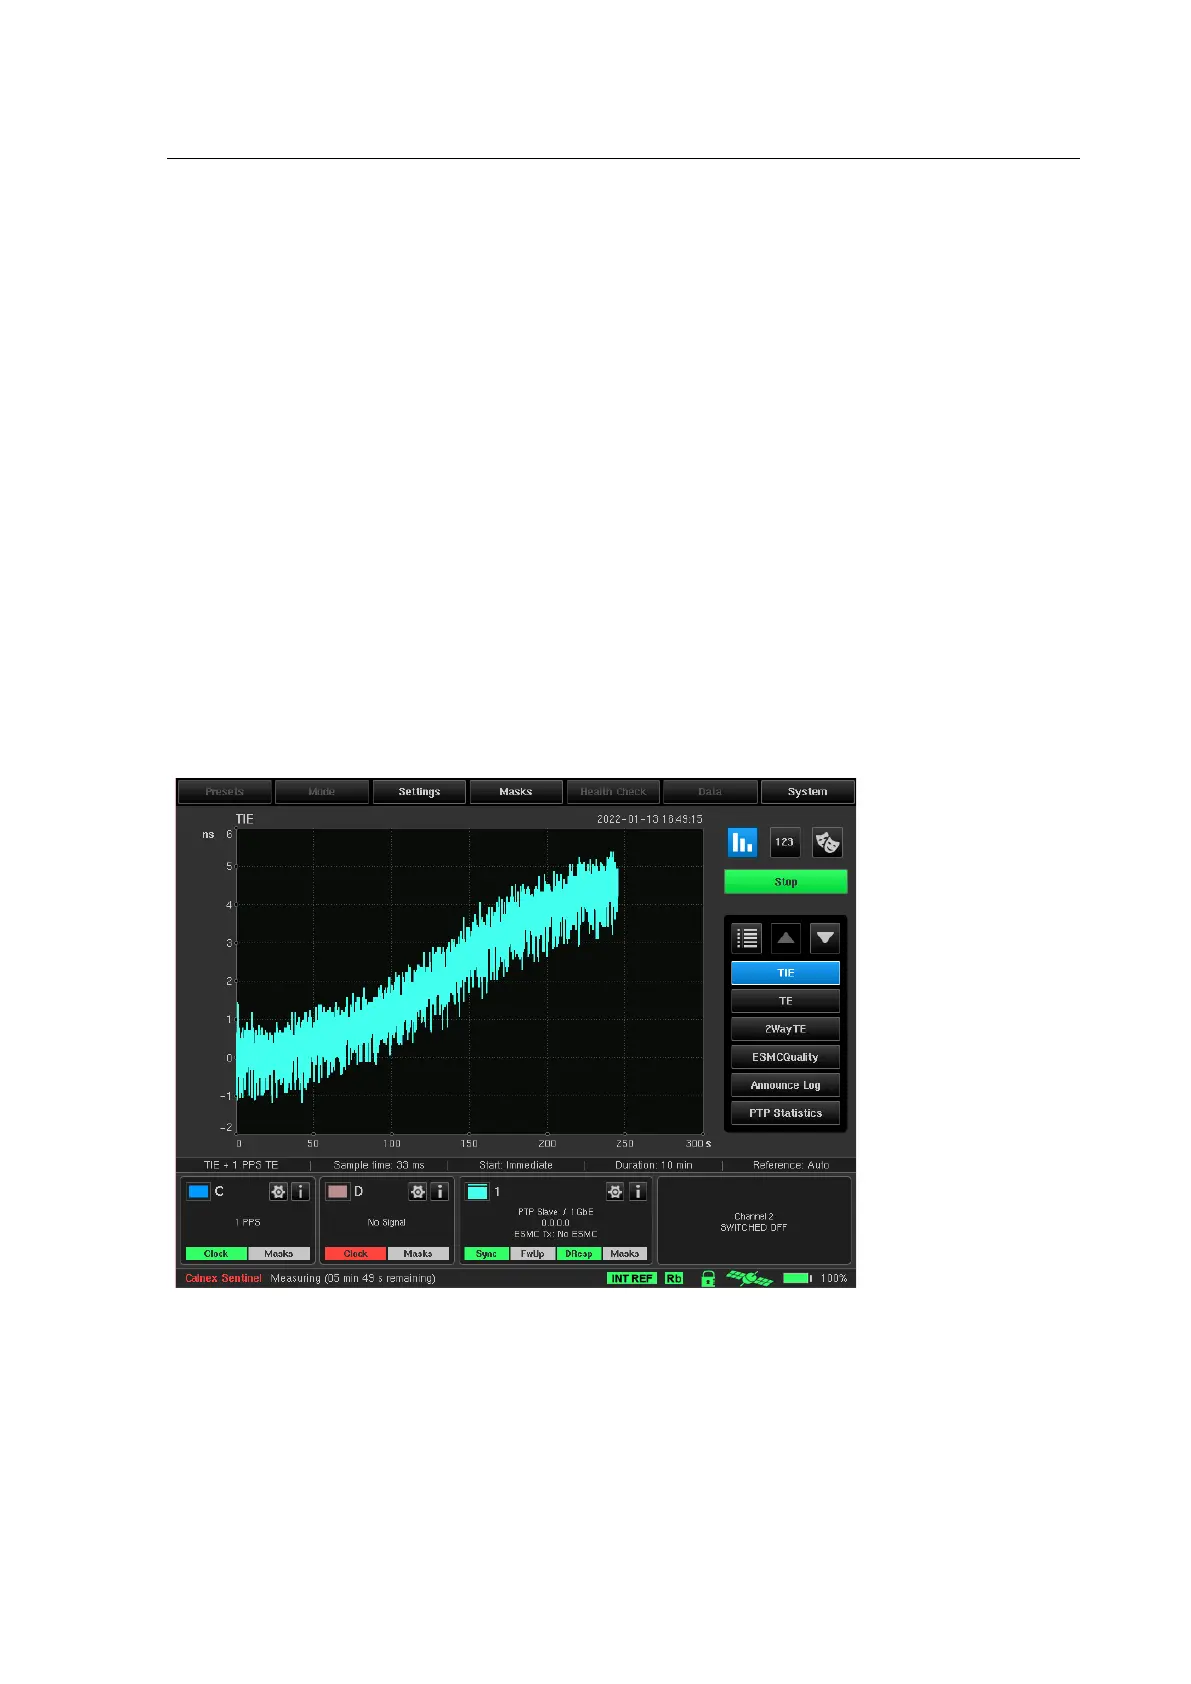
Throughout the duration of the measurement, the TIE and/or Raw PDV are displayed, with plot scale adjustment
as the time elapses. The calculated functions (MTIE and TDEV together with PDV Distributions, Selected PDV
metrics: FPP, MAFE, and 2Way TE) and PTP Statistics can also be displayed during measurement acquisition.
The remaining measurement time is displayed on the status line at the bottom of the screen.