15
DMX
DEUTSCHFRANCAIS
ESPAÑOL
ENGLISH
ITALIANO POLSKI
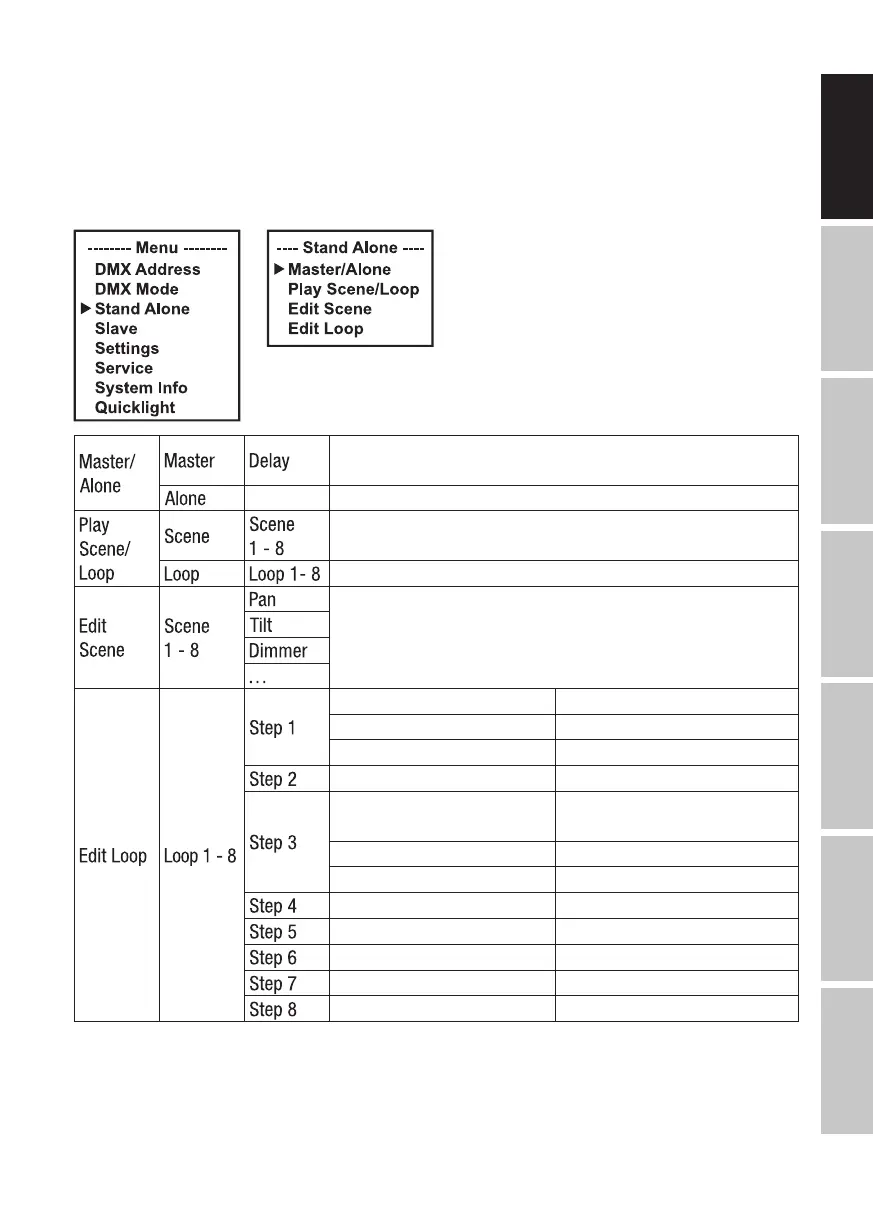
Activate one of the eight available scenes (Scene 1 - 8) or one of the eight available loops (Loop 1
- 8). The settings are made individually for each scene and each loop and are retained even after
the device is restarted.
Starting from the main screen, press MENU to enter the main menu. Use the ⏶ or ⏷ buttons to
select the Stand Alone menu item and confirm with ENTER. Now select the desired sub-menu
item, confirm and then make the settings as required (see table).
Forward control signal via DMX OUT and set delay for slave
units: Off, 0.1 s– 2.0 s
Do not forward control signal
Select and activate the desired scene
Selection and activation of the desired loop
Set each scene individually. Scenes are activated by selecting
them. Refer to DMX mode 43 CH Extended for all functions
and the corresponding values.
Scene 1–Scene 8 / Blackout Scene selection / Blackout
t-step 0 s–20 min Setting of the step time
t-Fade 0 s–20 min Setting of the fade time
t-Fade 0 s–20 min Setting of the fade time
Scene 1–Scene 8 / Blackout
/ Skip Step
Select scene 1–8 / Blackout /
Skip step
t-step 0 s –20 min Setting of the step time
t-Fade 0 s–20 min Setting of the fade time
t-Fade 0 s–20 min Setting of the fade time
t-Fade 0 s–20 min Setting of the fade time
t-Fade 0 s–20 min Setting of the fade time
t-Fade 0 s–20 min Setting of the fade time
t-Fade 0 s–20 min Setting of the fade time
SLAVE MODE
Standard slave mode: Starting from the main screen, press MENU to enter the main menu. Use
the ⏶ or ⏷ buttons to select the Slave menu item, confirm with ENTER, then select slave group