Group 6 Specialty Options
Specialty Options are factory set and, in most cases, do not require additional programming.
ITEM
1 Tax Rate
Enter a tax value to 2 decimal places. For example: for 5% tax, enter 5.00
In tax method A, the tax amount adjusts the time and distance rates accordingly when
going “Hired”. For tax method B, the tax amount is added to the sum of the fare and
extras (if applicable) at the end of the trip.
DISABLE tax calculations: enter a value of 0.00 RANGE: 0.00 - 100.00
2
1
Auto Rate Change At $ Amount
Enter a value in dollars and cents. When this value is reached in the fare display the
current rate will be incremented by 1 and the new rate will apply.
DISABLE auto rate change at $ amount: enter 0.00 RANGE: 0.00 - 655.35.
3
1
Auto Rate Change At Distance Amount
Enter a distance value as a whole number greater than 0. While “Hired” and this distance
value is reached, the current rate will be incremented by 1 and the new rate will apply.
DISABLE auto rate change at distance amount: enter 0 RANGE: 0 - 65535.
4 Critical Speed
Enter a speed value. If this speed is reached while in “Hired” state, the meter will stop
accumulating charges.
RANGE: 0 - 00255.
5 Reset Statistics
If programmed with zeros, the reset function will operate normally. If a value greater than
0 is programmed, then that value must be entered in order to reset the statistics.
RANGE: 00001 - 65535.
6 TIP INCREMENT
Enter the Tip increment value required. Each press of the programmed Tip Increment
switch will add this value to the total tip.
RANGE: 0.05 - 1.00.
To change the Specialty Options factory settings:
1) Slide SW5 to the left to enter programming mode.
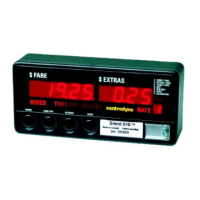
2) Press SW1 to select Group 6. The group number displays in the Rate window, (above SW5).
3) Press SW2 to step through and select the Item (1 – 6).
4) Press SW4 to (to confirm Item selection). The last digit in the Fare window will flash.
5) Press SW3 to change the character value.
6) Press SW2 to move one character position to the left.
7) Repeat Steps 5 and 6 (SW3, SW2) until the correct value is displayed.
8) Press SW4 to save.
Repeat Steps 2 through 8 as required, until all Specialty Options are programmed.
Notes 1. Requires Auto Rate Change option.
2. For use with Printer option.
3. Requires Real Time Clock option.
5