19
Red (+) wire
from Solar
Harness Kit
Black (-) wire
from Solar
Harness Kit
Red (+) Black (-)
White jumper from
Solar Harness Kit
33AH Batteries
J15 Plug
STEP 7 continued...
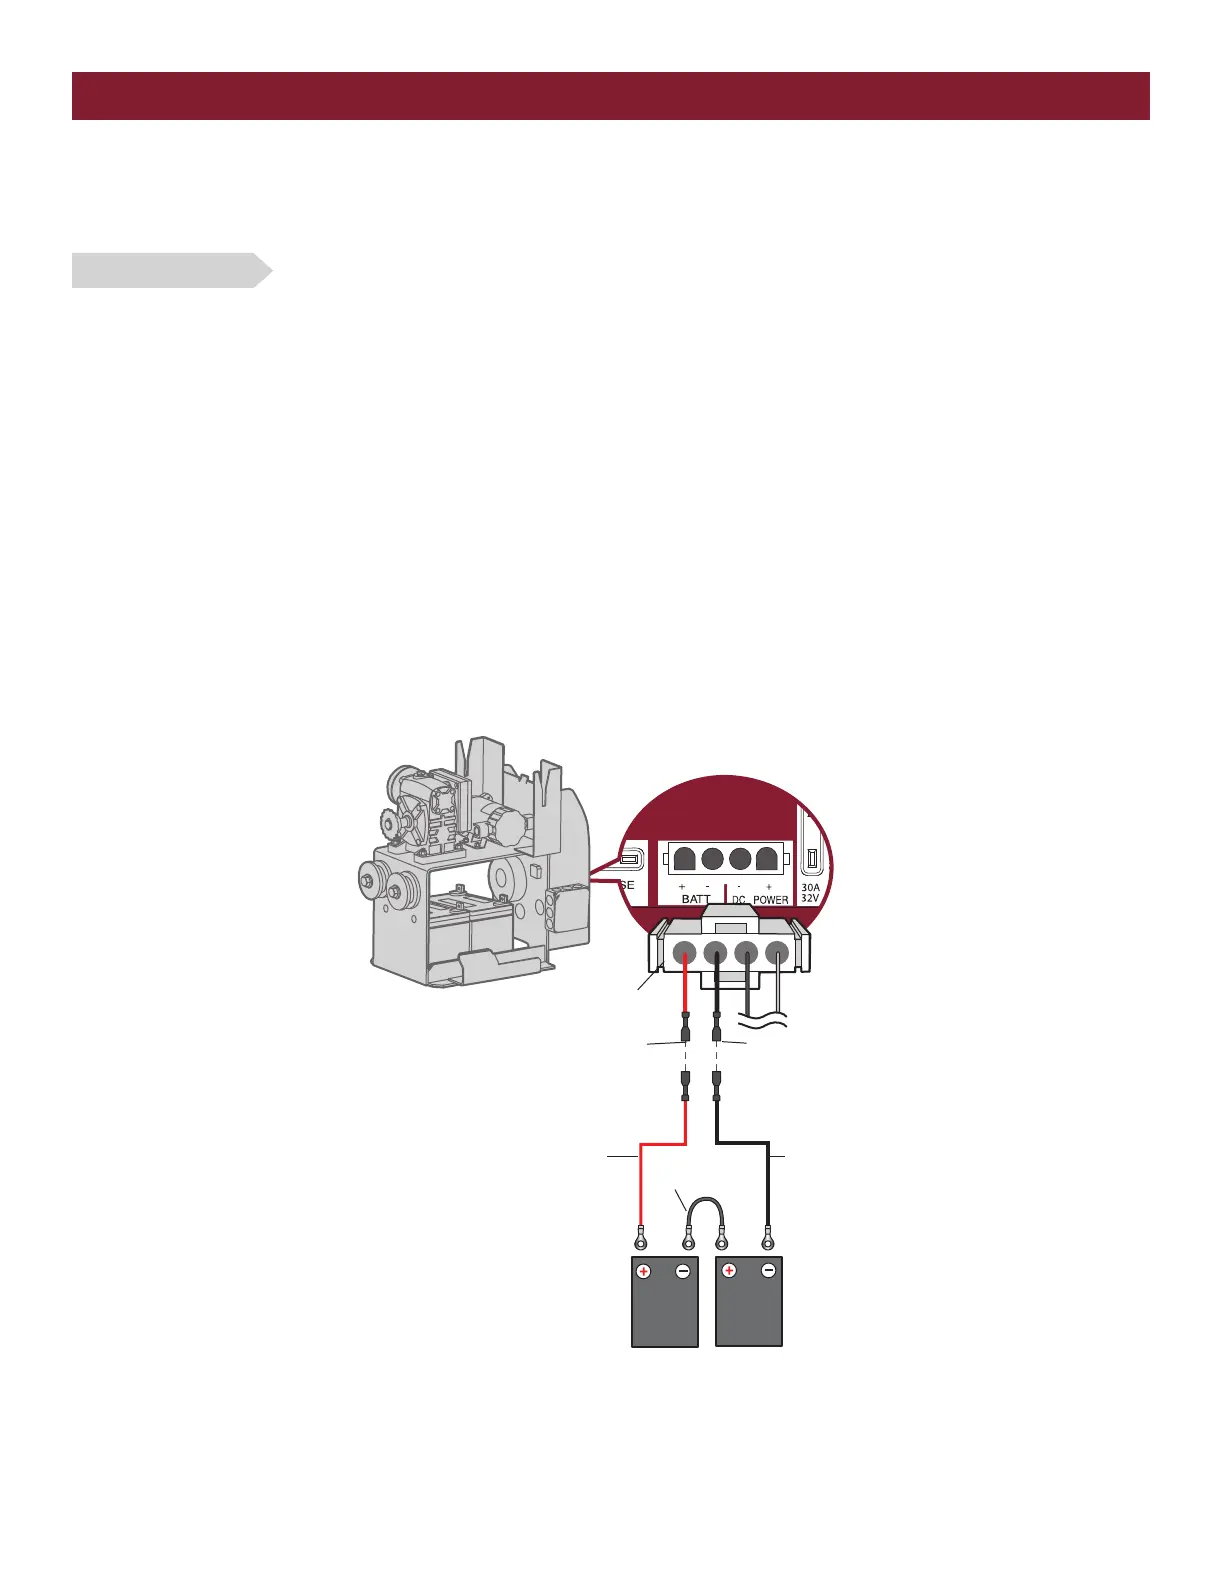
CONNECT BATTERIES
33AH BATTERIES
The batteries are charged in the circuit by the integrated transformer. The batteries are for battery backup or solar installation. The 33AH application
requires the Solar Harness Kit (Model K94-37236). NOTE: If 33AH batteries (2) are used, the battery tray underneath the heater will need to be
removed to allow more space in the enclosure (if applicable).
1. Locate the J15 plug on the control board and disconnect it.
2. Connect the white jumper from the Solar Harness Kit between the positive (+) terminal of one battery and the negative (-) terminal of the other
battery.
3. Connect one end of the red (+) wire from the Solar Harness Kit to the red wire from the J15 plug as shown. Connect the other end of the red (+)
wire to the positive (+) terminal on the battery as shown.
4. Connect one end of the black (-) wire from the Solar Harness Kit to the black wire from the J15 plug as shown. Connect the other end of the black
(-) wire to the negative (-) terminal on the battery as shown.
5. Turn ON AC power to the operator.
6. Turn ON the AC power switch on the operator.
7. Reconnect the J15 plug to the control board. NOTE: You may see a small spark when plugging the J15 plug into the board.
INSTALLATION