CAC Gasoline Engine Maintenance And Servicing Manual
45
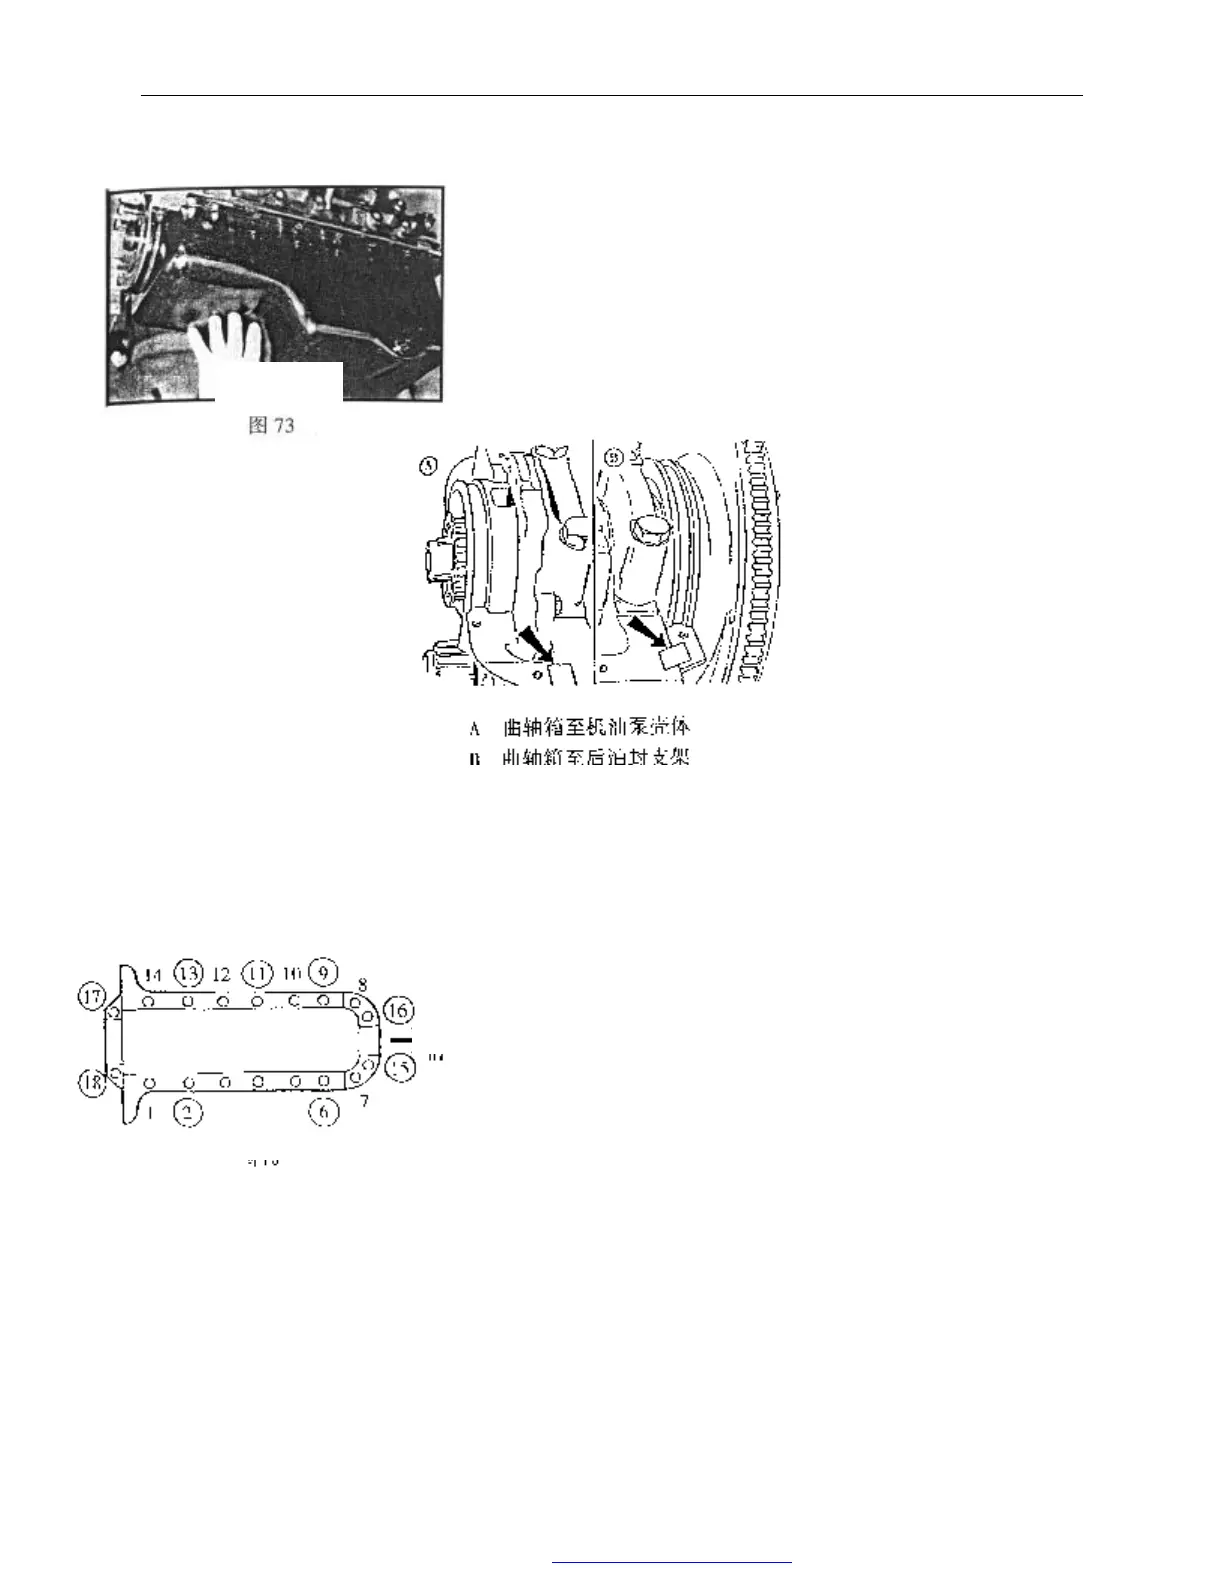
2) The removal and installation of oil pan:
removal:
——Loosen drain plug and drain oil
——Loosen eighteen M6×20 bolts
——Take out the sealing gasket of oil pan
——Check if the left and right reinforced plates are still clipped on the
back face of oil pan flange face
Installation:
——Apply locite 598 sealant
and G Y409 anaerobic sealant
on the joint place between
flange surface of oil pan of
cylinder body and oil pump case,
and carrier of real oil seal.
——Put the new rubber seal
gasket on the cylinder body and
have the two sides of sealing
gasket enter into the grooves of
carrier of real oil seal and oil
pump.
——Install the oil pan with the
two sides of sealing gasket in
the grooves of oil pan.
——Screw the bolt by hand (the bolt with washer indicated
in the left upper figure is precedent.)
——Tighten bolts to 5.0—8.0Nm according to the sequence of the left
figure.
——Replace the sealing gasket of drain plug. Screw in the drain plug
by hand and tighten to 21—25Nm.
Fig. 73
pump shell
B.
oil seal carrier
Fig.75
forward
PDF 文件使用 "pdfFactory Pro" 试用版本创建 www.fineprint.com.cn