CAC Gasoline Engine Maintenance And Servicing Manual
46
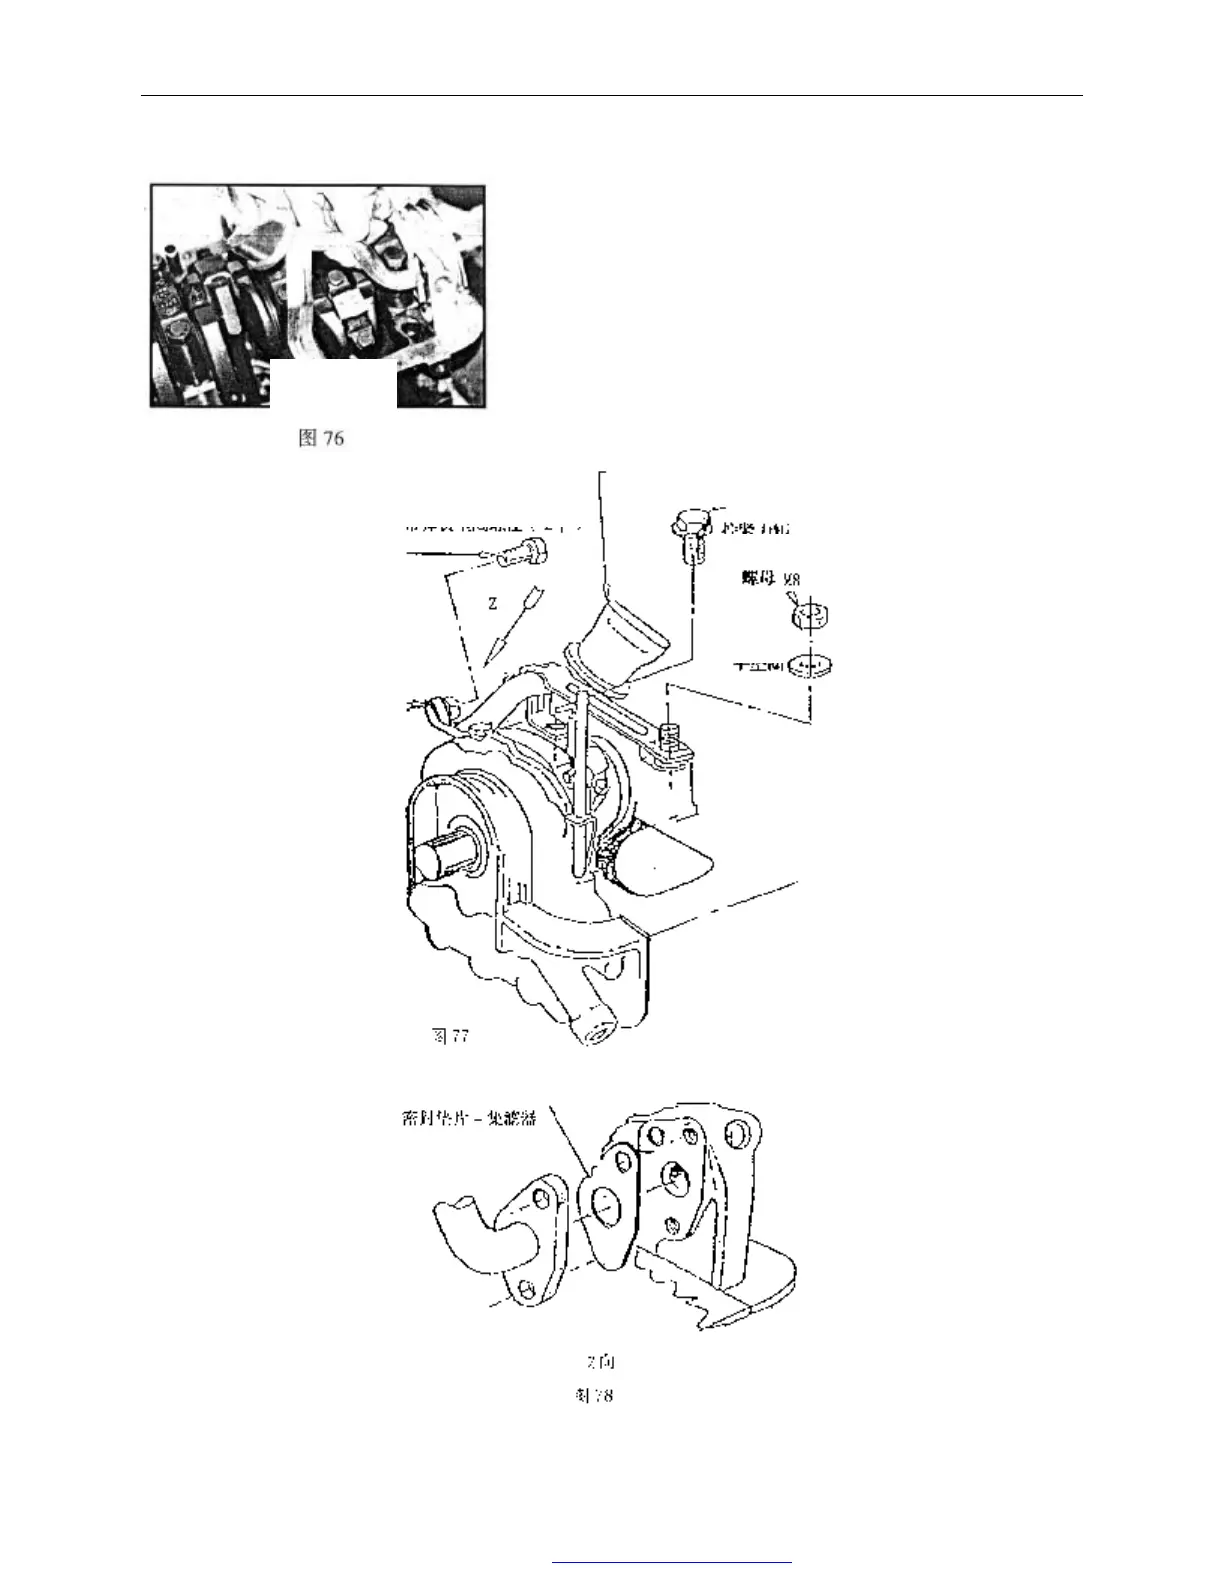
The removal and installation of oil collector assembly
removal:
——Loosen locknut of oil collector assembly and take out the nut
and flat washer
——Loosen carrier bolts and take out the bolts。
——Loosen flange face bolt of oil collector (two ) and take out the
two bolts with spring washers
Installation:
——Install a new
sealing gasket of
oil collector on
the flange face of
oil pump and then
install oil
collector assembly.
Screw two bolts
with gasket by
hand.
——Screw the oil
collector carrier
into the cylinder
body with M8
bolt. At the same
time, hitch the
carrier into the
stud which is in
the left of the
second bearing
cap. Install the
flat washer and
screw in the nut
by hand.
——Tighten the
flange face bolt of
oil collector to
8.0—12.0Nm.
——Tighten carrier bolt to 17—23Nm
——Tighten the locknut to 17—23Nm
Fig. 76
with spring plate screws(2)
oil collector
screw M6×20
screw M8
flat washer
PDF 文件使用 "pdfFactory Pro" 试用版本创建 www.fineprint.com.cn