www.cisco.com
7
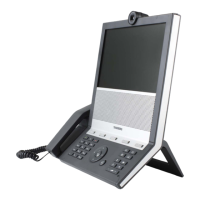
Cisco IP Video Phone E20 Administrator guide
D143 30.12 Administrator guide Cisco IP Video Phone E20, TE4.1 November 2011.
All contents are Copyright © 2010–2011, Cisco Systems, Inc. All rights reserved.
Setting up the E20 from a remote PC
Log onto the system using Telnet or a SSH client. When using SSH log in with
username “admin”.
First you should choose a name for your unit. Use a name that is unique to avoid
conicts. The recommendation would be to incorporate your name or initials, eg.
AliceWonderland.
xConguration SystemUnit Name: “AliceWonderland
”
Note that in most most cases DHCP will be used for assignment:
xConguration Network 1 Protocol: “IPv4”
xConguration Network 1 Assignment: “DHCP”
If not, you may want to set your IP network settings manually:
xConguration Network 1 IPv4 Address: “<Your-IP-Address>”
xConguration Network 1 IPv4 Gateway: “<Network-Gateway-IP-
Address>”
xConguration Network 1 IPv4 Subnetmask: “<SubNet-mask>”
xConguration Network 1 DNS Domain Name: “<local domain names>”
xConguration Network 1 DNS Server 1 Address: “<DNS Server IP Address>”
For remote administration the following settings are recommended. This should
also make the system visible in TMS.
xConguration Provisioning Mode: Tms
xConguration Provisioning ExternalManager Address: “<hostname
of your tms server>”
xConguration Provisioning ExternalManager Protocol: Http
xConguration Provisioning ExternalManager Path: “tms/public/
external/management/systemmanagementservice.asmx”
To be able to dial, you need to congure the SIP settings.
xConguration NetworkServices SIP Mode: On
xConguration SIP Prole 1 DefaultTransport: Auto
xConguration SIP Prole 1 Type: Auto
xConguration SIP Prole 1 Proxy 1 Discovery: Manual
xConguration SIP Prole 1 Proxy 1 Address: “<ip of your SIP
server>”
xConguration SIP Prole 1 URI: “<your SIP URI>”
If your SIP Server/PBX uses user authorization you need to supply a user-id and
password
xConguration SIP Prole 1 Authentication 1 LoginName: <your
user-name>
xConguration SIP Prole 1 Authentication 1 Password: <password>
You may want to use a corporate TMS phonebook. If you have this and no entries
are displayed after conguring, you must make sure that your unit is registered in
TMS and a phonebook is assigned to your system.
xConguration Phonebook Server 1 ID: “default”
xConguration Phonebook Server 1 Type: “TMS”
xConguration Phonebook Server 1 URL: “<URL to your phonebook
service>”
Should the system fail to respond to incoming calls, make sure that:
• The system is connected to line voltage
• The LAN cable is properly connected—see Connecting the E20 for details.
Auto provisioning
There are situations where service providers prefer that users need not enter any
information at all. Instead, they want the E20 to retrieve all the information necessary
by itself—through pro-active behavior using HTTP or HTTPS.
When provisioning mode is set to Auto (default), we try the following:
1. HTTP provisioning towards http://tandbergprovisioning/getcong
2. If PROVISIONINGSERVER and PROVISIONINGDOMAIN is set in /etc/dhcpinfo,
use VCS provisioning
3. If TMSSERVER is set in /etc/dhcpinfo, use TMS provisioning
4. For TE4.0 and newer: If TFTPSERVERADDRESS (option 150) is set in /etc/
dhcpinfo, use Cisco UCM provisioning.
5. If TFTPSERVER (option 66) is set in /etc/dhcpinfo, try tftp
6. HTTP provisioning towards http://globalprovisioning.tandberg.com/getcong
(see examples right).
If all of the above steps fail, the GUI will show the startup wizard.