Do you have a question about the Cisco Meraki MS410 Series and is the answer not in the manual?
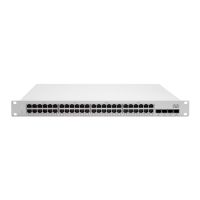
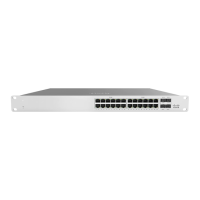
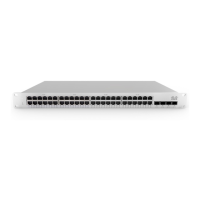
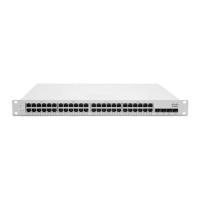
Details the available MS410 switch models and their key specifications.
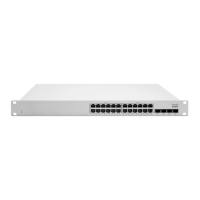
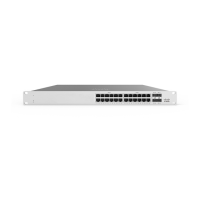
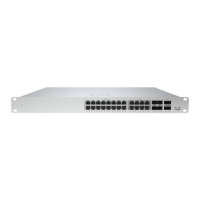
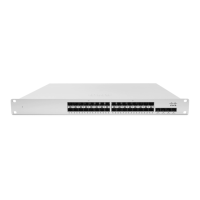
Describes the front panel layout and indicators on MS410 series switches.
Explains the meaning of different LED statuses for switch operation and troubleshooting.
Provides instructions on how to perform a factory reset using the dedicated button.
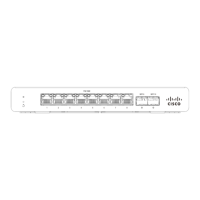
Details the components and indicators located on the back panel of the MS410 switches.
Lists the items included in the MS410 switch package, such as the mounting kit.
Outlines crucial safety precautions and warnings for installing and operating the MS410 switches.
Steps to prepare and configure your Meraki dashboard network before installing switches.
Recommends updating switch firmware before mounting for optimal performance.
Specifies necessary upstream firewall settings for Meraki switch connectivity.
Explains how to configure static IP addresses for switches using DHCP server reservations.
Details the process of manually assigning static IP addresses via the switch's web server.
Steps for installing mounting cage nuts and attaching the switch to the rack.
Steps to add switches to a Dashboard network for stacking preparation.
Instructions for connecting switches using stacking cables in a ring topology.
Steps for powering on switches, downloading firmware, and verifying status.
Guidance on how to provision and configure switch stacks within the Meraki Dashboard.
Common methods for resolving basic connectivity issues, including resets and cable checks.
Details the warranty coverage period for the MS410 model and its accessories.
Specifies the warranty period for accessories associated with Meraki switches.
Instructions on how to contact Meraki support for installation help or technical issues.
Notes on intended use, environmental conditions, and maintenance for Meraki equipment.
Guidelines for storing and transporting Meraki equipment to maintain its condition.
Information on proper disposal of technical devices and where to find additional documentation.
The Cisco Meraki MS410 Series Installation Guide provides comprehensive instructions for setting up and configuring your MS410 series switch, covering everything from initial installation to advanced network configurations. This guide is an essential resource for anyone looking to deploy and manage Meraki MS410 switches, ensuring a smooth and efficient setup process.
The MS410 series switches are designed as Layer-3 aggregation switches, offering robust performance and advanced features for modern network environments. They are equipped with multiple SFP and SFP+ ports, providing flexible connectivity options for various network devices. The switches also include a dedicated management interface, simplifying network administration and monitoring. A key feature of the MS410 series is its hot-swappable power supplies and fans, which enhance reliability and allow for maintenance without interrupting network operations. This design ensures continuous uptime, which is critical for business-critical applications and services.
The installation process begins with a pre-install preparation phase, where you are guided through configuring your Dashboard Network. This involves logging into the Meraki dashboard, creating a new account if necessary, and adding your MS410 switches to your network. You'll need your Meraki order number or the serial number of each switch, along with your Enterprise license key. The guide also instructs you to place each switch on a map or floor plan within the dashboard, aiding in physical deployment planning. Before mounting the switch, it's recommended to check and set the firmware. This involves connecting the switch to power and a wired internet connection, allowing it to download and install the latest firmware. The power LED will indicate the firmware upgrade status, blinking white during the process and turning solid white once complete. This proactive step ensures that your switch operates with the most up-to-date software, optimizing performance and security from the outset.
For network connectivity, the MS410 switches require routable IP addresses, which can be assigned dynamically via DHCP or statically. If using DHCP, it's recommended to configure the DHCP server to assign static IP addresses for each Meraki switch's MAC address, especially for features like 802.1X authentication. Static IP assignment can also be done through the switch's local web server. By connecting a client machine to the switch and accessing its built-in web server, you can configure the static IP address, net mask, gateway IP address, and DNS servers. The guide also mentions the option of using DHCP reservations on the upstream DHCP server to assign static IP addresses, providing flexibility in network management.
The physical installation instructions are detailed and user-friendly, starting with installing mounting cage nuts in the rack. The guide emphasizes the importance of using the correct hardware and following procedures to prevent hazardous situations. After installing the cage nuts, you attach the switch face plate to them. The next step involves inserting the power supply unit into the back of the switch and then connecting power to it. The MS410 series comes with a rack mounting kit, including various mounting screws and cage nuts, ensuring compatibility with different rack types. The guide also highlights the importance of ensuring adequate airflow around the device, especially when installing it in a rack, to prevent overheating and maintain optimal performance.
The guide also covers bringing your stack online, which is crucial for managing multiple switches as a single logical unit. This process involves adding the switches to a Dashboard network, connecting each switch with individual uplinks to bring them online, and ensuring they can check in with the Meraki Dashboard. Before physically stacking, it's important to download the latest firmware build for all switches using the Firmware Upgrade Manager. Once the firmware is updated, you power off all switches and disconnect links, then connect them via stacking cables in a ring topology. The guide provides clear instructions on how to connect the stacking cables to create a full ring. After physical stacking, you connect one uplink for the entire switch stack and power on all switches, allowing them to download firmware updates from Dashboard. Finally, you configure the switch stack in Dashboard, either by provisioning a detected stack or manually adding a stack.
Troubleshooting basic connectivity issues is also addressed. The guide suggests simple steps such as resetting the switch, performing a factory reset by holding the reset button for 5 seconds, and trying different cables or testing existing ones on another device. For more complex issues, the guide directs users to the Meraki documentation website and advises contacting Cisco Meraki support by logging into the dashboard and opening a case.
Maintenance features are implicitly covered through the design of the MS410 series. The hot-swappable power supplies and fans allow for easy replacement without downtime, which is a significant maintenance advantage. The ability to remotely monitor and manage the switches through the Meraki dashboard simplifies ongoing maintenance and ensures that network administrators can quickly identify and resolve issues. The guide also provides information on warranty coverage, with the MS410 series offering a lifetime warranty, while accessories like SFP modules and stacking cables have a 1-year warranty. This ensures that users are covered for hardware failures and can receive replacements if necessary. The guide also emphasizes the importance of retaining original packaging for hardware replacements, as it contains essential serial and order information.
The MS410 series switches are intended for industrial and commercial activities, designed for operation without the constant presence of maintenance personnel, and are subject to installation and maintenance by specialists with appropriate qualifications. The guide also includes important safety warnings, advising users to power off the unit before beginning installation, be aware of electrical hazards, and read mounting instructions carefully. It also specifies that the product relies on the building's installation for short-circuit protection and that only provided power cables should be used to ensure regulatory compliance. The guide also provides guidelines for equipment storage and transportation, ensuring the device remains in optimal condition.
Overall, the Cisco Meraki MS410 Series Installation Guide is a comprehensive and user-friendly document that empowers users to effectively install, configure, and maintain their MS410 series switches, ensuring reliable and high-performance network operations.
| Model | MS410 Series |
|---|---|
| Category | Switch |
| Forwarding Rate | 95 Mpps (MS410-16), 190 Mpps (MS410-32) |
| Power over Ethernet (PoE) | No |
| Layer | Layer 3 |
| Operating Temperature | 32°F to 104°F (0°C to 40°C) |
| Product Series | MS |
| Uplink Ports | SFP+ |
| Switching Capacity | Varies by model |
| Management | Cloud-managed |
| Weight | Varies by model |